Live Home 3D Workspace
The Main Window
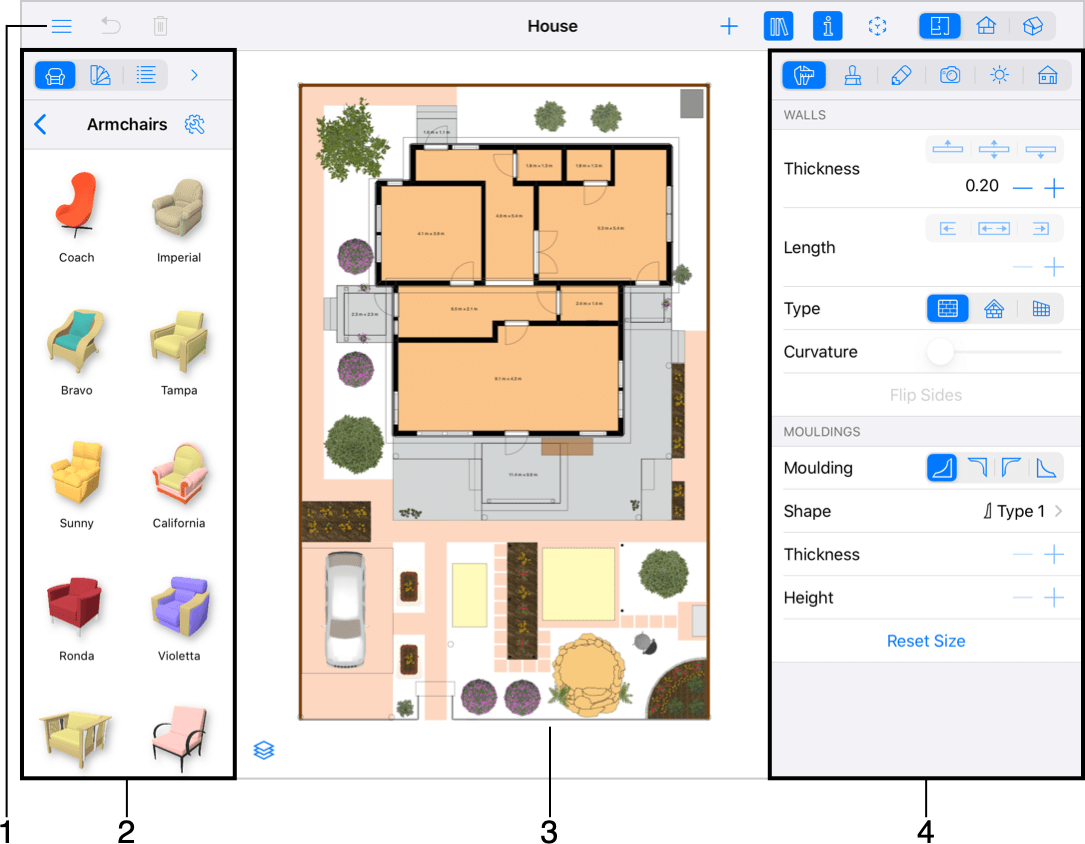
1 – The toolbar with 2D Plan, 3D view or 2D Elevation view tools. The available set of tools depends on which view is activated.
2 – The Library panel can display the 3D object or material library or the Project Tree.
3 – The editing area can display a floor plan, elevation or 3D view.
4 – The Inspector.
Controlling Views and Panels
There are buttons in the toolbar that let you activate 2D or 3D views, or open the menu or panels.

1 – Open the menu. It contains commands to open the Gallery and Settings. It also lets you open or save projects and access the documentation and tutorials.
2 – Bring up the panel with tools to add parts of the building (e.g. walls), or tools that add auxiliary objects such as guide lines or dimensions. The set of tools depends on the currently activated view, and on the edition of the software. The Pro edition has more tools. For more details, read the 2D Floor Plan view or 2D Elevation view section.
3 – Open or close the Library panel that includes the object and material libraries and the Project Tree.
4 – Open or close the Inspector.
5 - Open the Model Setup panel to view your model in AR.
6 – Open the 2D Floor Plan view.
7 – Open the 2D Elevation view. (Pro edition only)
8 – Open the 3D view.
Note that on a narrow screen, the switch between 2D and 3D views may be displayed as a single button. A tap on this button opens another view. In the Pro edition, the 2D view will open either the floor plan or 2D Elevation view depending on which of them was open the most recently. Long-press on the button to have all three options available.