Working with Materials
Adding Materials to the Library
To add a new material, click on the gear icon in the Material Library and choose New Material… in the pop-up menu. The following dialog will open.
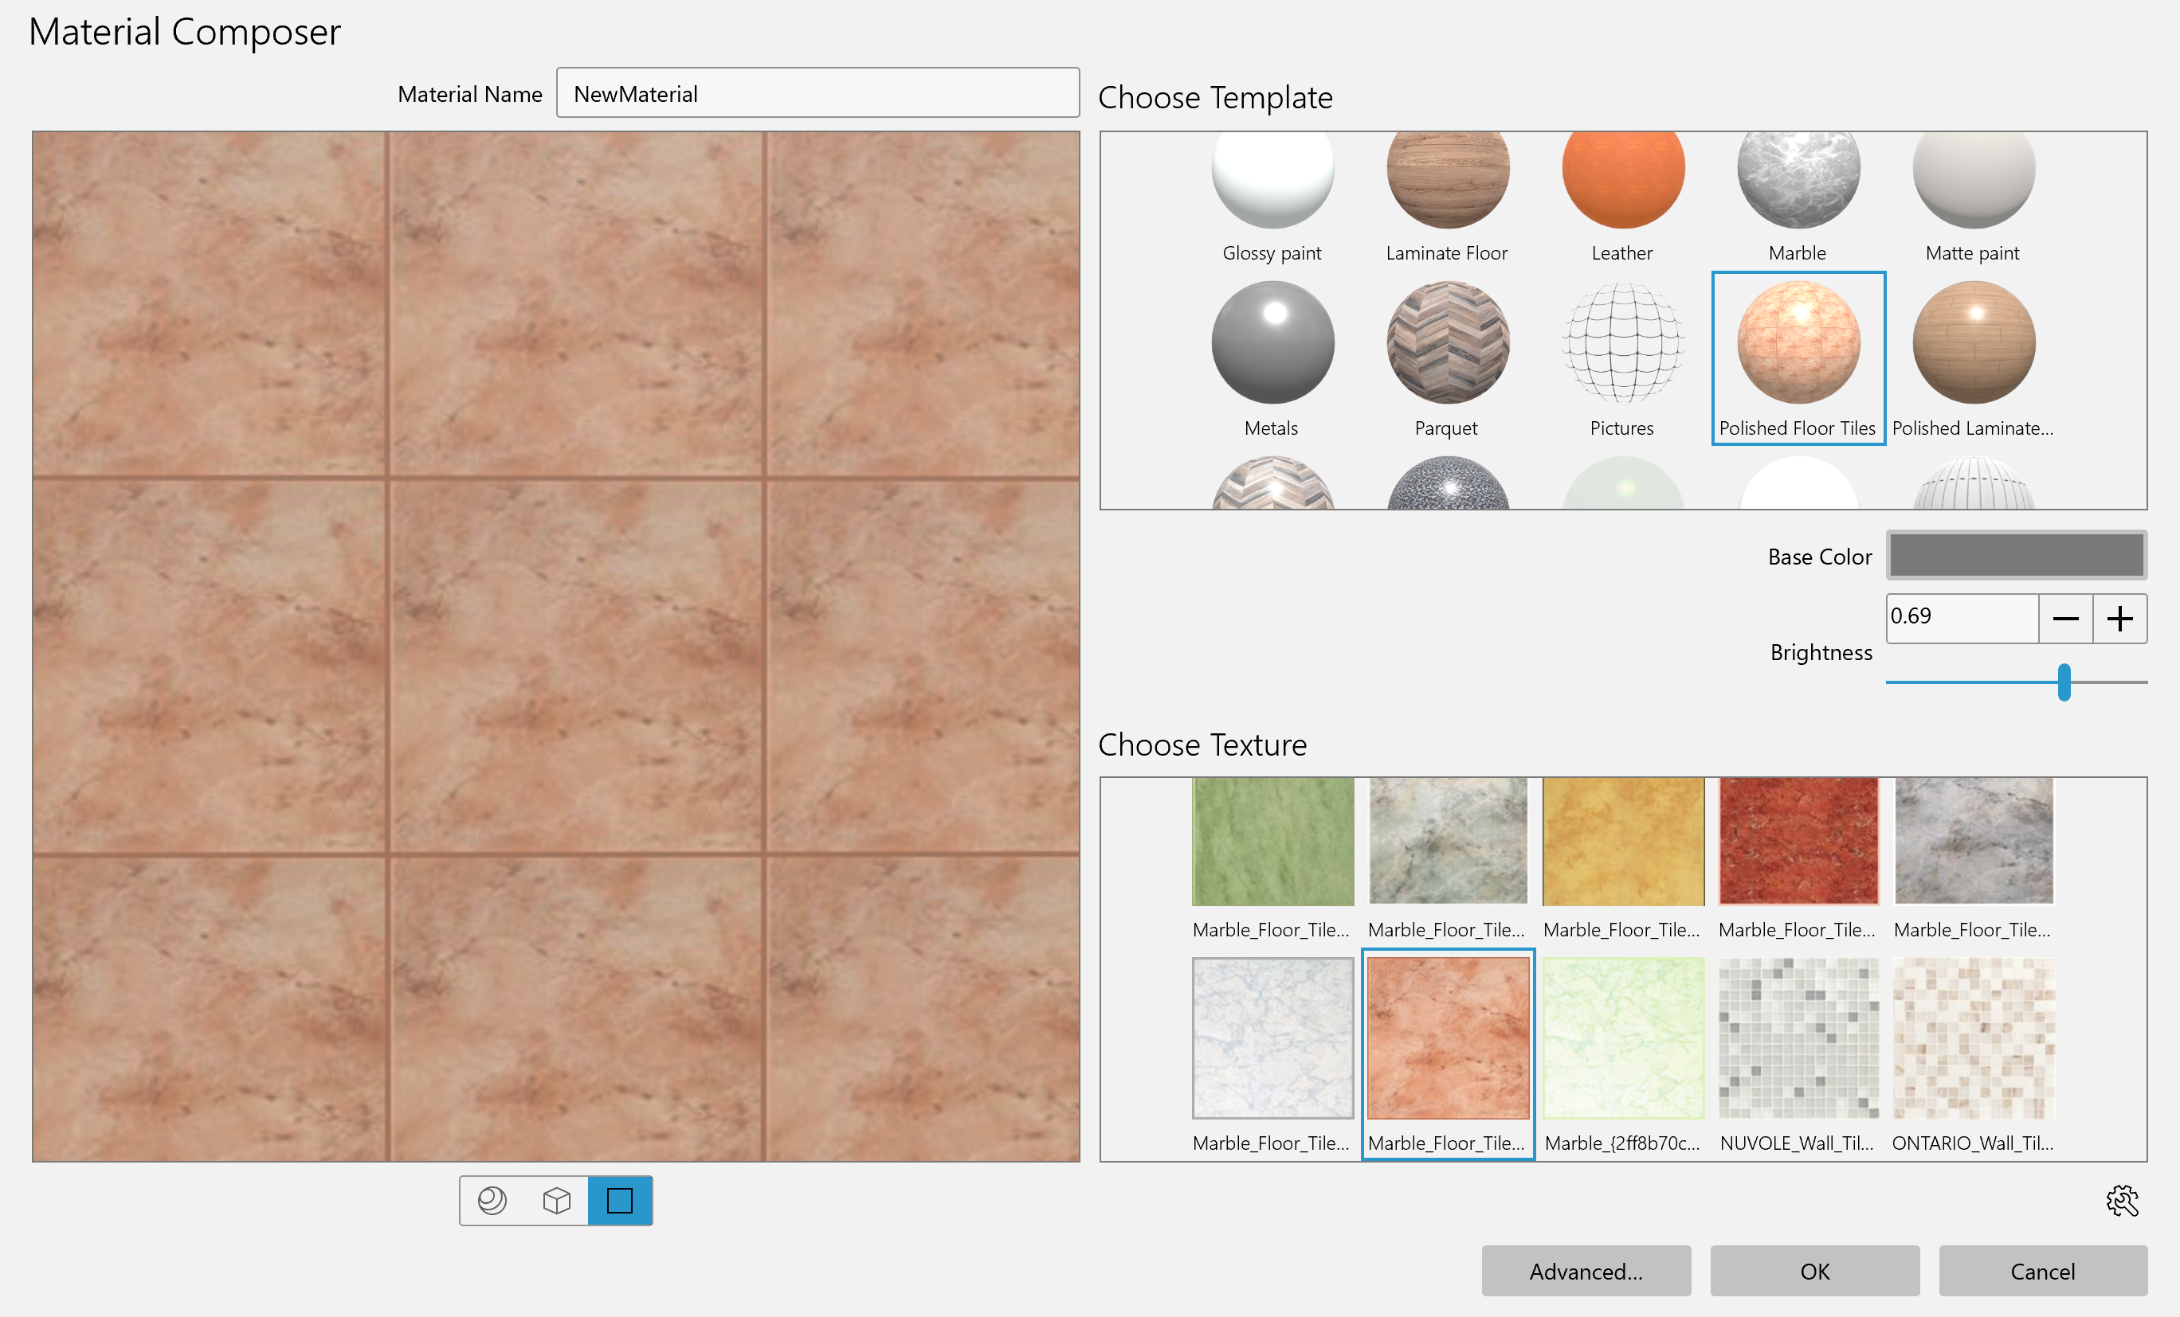
Using the buttons below the preview, choose the preview type. A selected material can be applied to a sphere, cube or flat surface.
Type in the material name. Try to use descriptive names.
Select a material in the Choose Template box. At this stage, think about the main properties of a future material: with or without texture, matt or glossy, and so on. A particular texture or color doesn't matter.
If you are creating a material with no texture, adjust the color and brightness of the material using Base Color and Brightness correspondingly.
If you selected a material template with texture, the Choose Texture box will display an appropriate category of textures. Click on a texture you like to select it.
You can access textures in other categories as well. To do this, click on the Parent Category icon in the upper row of textures. Then select a category.
You can also use your own image as a texture. Click on the gear icon below the texture library and select Import Custom Texture… Then navigate to a graphic file. To delete a custom texture from the library, click on it to select it. Then click on the gear icon and choose Delete Current Texture…
By changing the Base Color, you can tint the texture. To adjust the brightness of the texture, change the value of Brightness.
If you want to adjust all of the available parameters by yourself instead of using templates, click the Advanced… button to open the Material Editor. (Pro edition only)