Working with Objects
Type and Representation
The Type and Representation dialog contains object properties which define the object's appearance in the 2D and 3D views. To open the dialog, long-press on an object and choose the Type and Representation command from the popup menu.
The tools in the Type and Representation dialog, except for the Level of Detail, change only the current copy of the object. Other copies that may be present in your project remain unchanged.
The app uses the same 3D model for all object copies in the project. If you modify one of the copies, the app will have to create one more model especially for the changed object. Thus, using the Type and Representation dialog you can potentially increase the total number of object models in the project. This may decrease the app's performance.
The dialog works with only these object types: Furniture, Window, Door and Stairs.
Object properties are grouped into three sections: 2D and 3D representations, and also object type and geometric properties.
Object Properties
Object Type
The Type is the most important object property. It determines how the object interacts with other objects and which of the tools will be available when you select this object.
All imported objects become Furniture type by default. If you imported a window, door or staircase, you should choose the appropriate type.
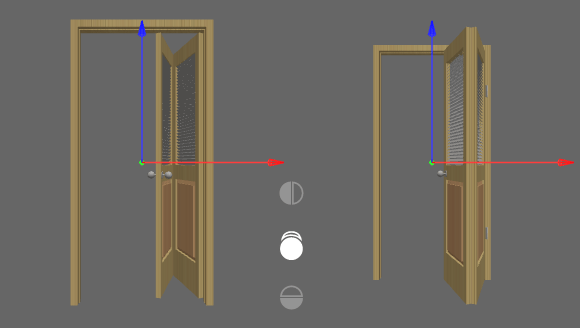
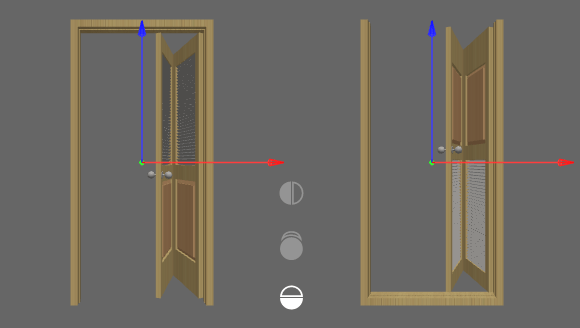
Object Origin
The object origin is a point on the object's bound or in the center of the object. It is used by the app to define the object's location in the 2D layout and in the 3D space. When you rotate an object on the floor plan, it rotates around its origin. The elevation of an object is actually the elevation of its origin point.
The location of the origin is defined in the three dimensions by the three pairs of switches (e.g. top and bottom). If both switches in a pair are cleared, the origin will be in the middle between specified points. For example, if Top is selected, the origin is on the top of the object's bound. If both Top and Bottom are deselected, the origin will be between them. When all of the options are deselected, the origin is in the object's center.
The default origin of library objects depends on the object. Furniture usually has the origin in the center of the bottom. The origin of wall pictures can be the center of the back surface. Ceiling lamps have it in the center of the top.
Object Size
In the Type and Representation dialog, you can scale an object by changing its dimensions. The aspect ratio will be preserved. If you wish to change the width, height or depth independently, use the Inspector. Since the Inspector can override object dimensions which have been set in the Type and Representation dialog, it is recommended that you change object size in the Inspector.
2D Representation
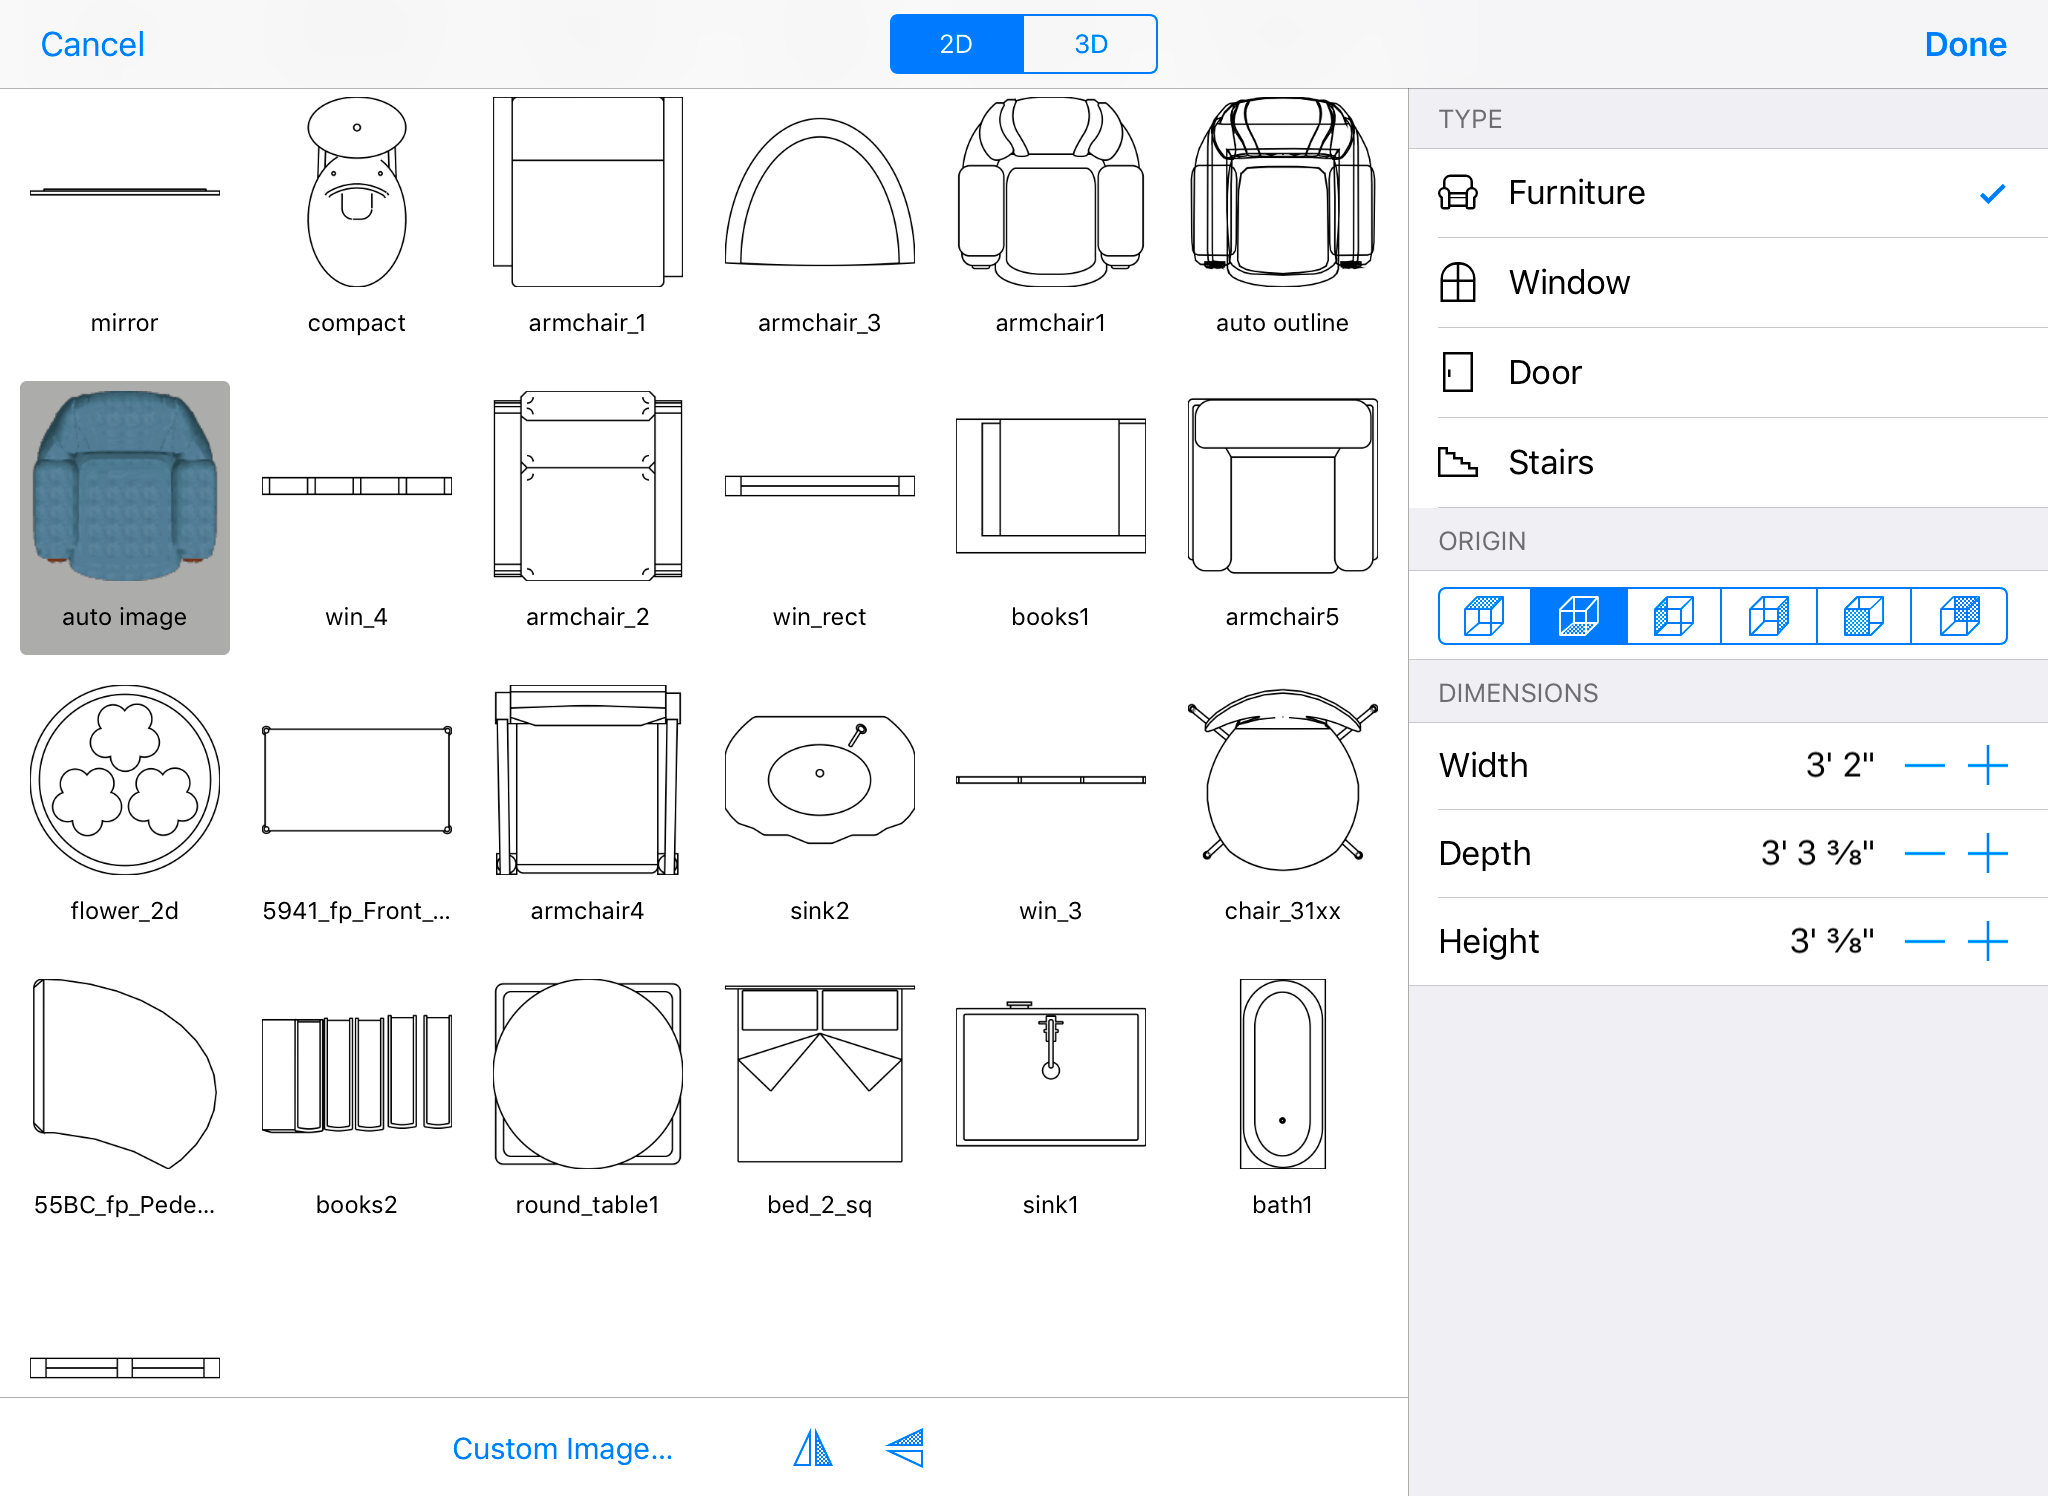
Image for the Floor Plan
The 2D section contains a library of object representations for the floor plan. You can choose one of the standard images. The app also automatically creates two images based on how an object actually looks from the top. One of them is a vector outline. Another is a raster image that is identical to how an object looks in the 3D view.
To use your own image, tap on the Custom Image… button and choose an image.
There are two Flip buttons below the image library which can mirror the selected 2D representation vertically or horizontally. Flipping is useful for matching the 2D representation with the 3D model. For example, you can move the door handle from the left to the right side.
Notice that the 2D and 3D flip tools work independently for better flexibility. Make sure the 2D representation matches the 3D object.
3D Representation
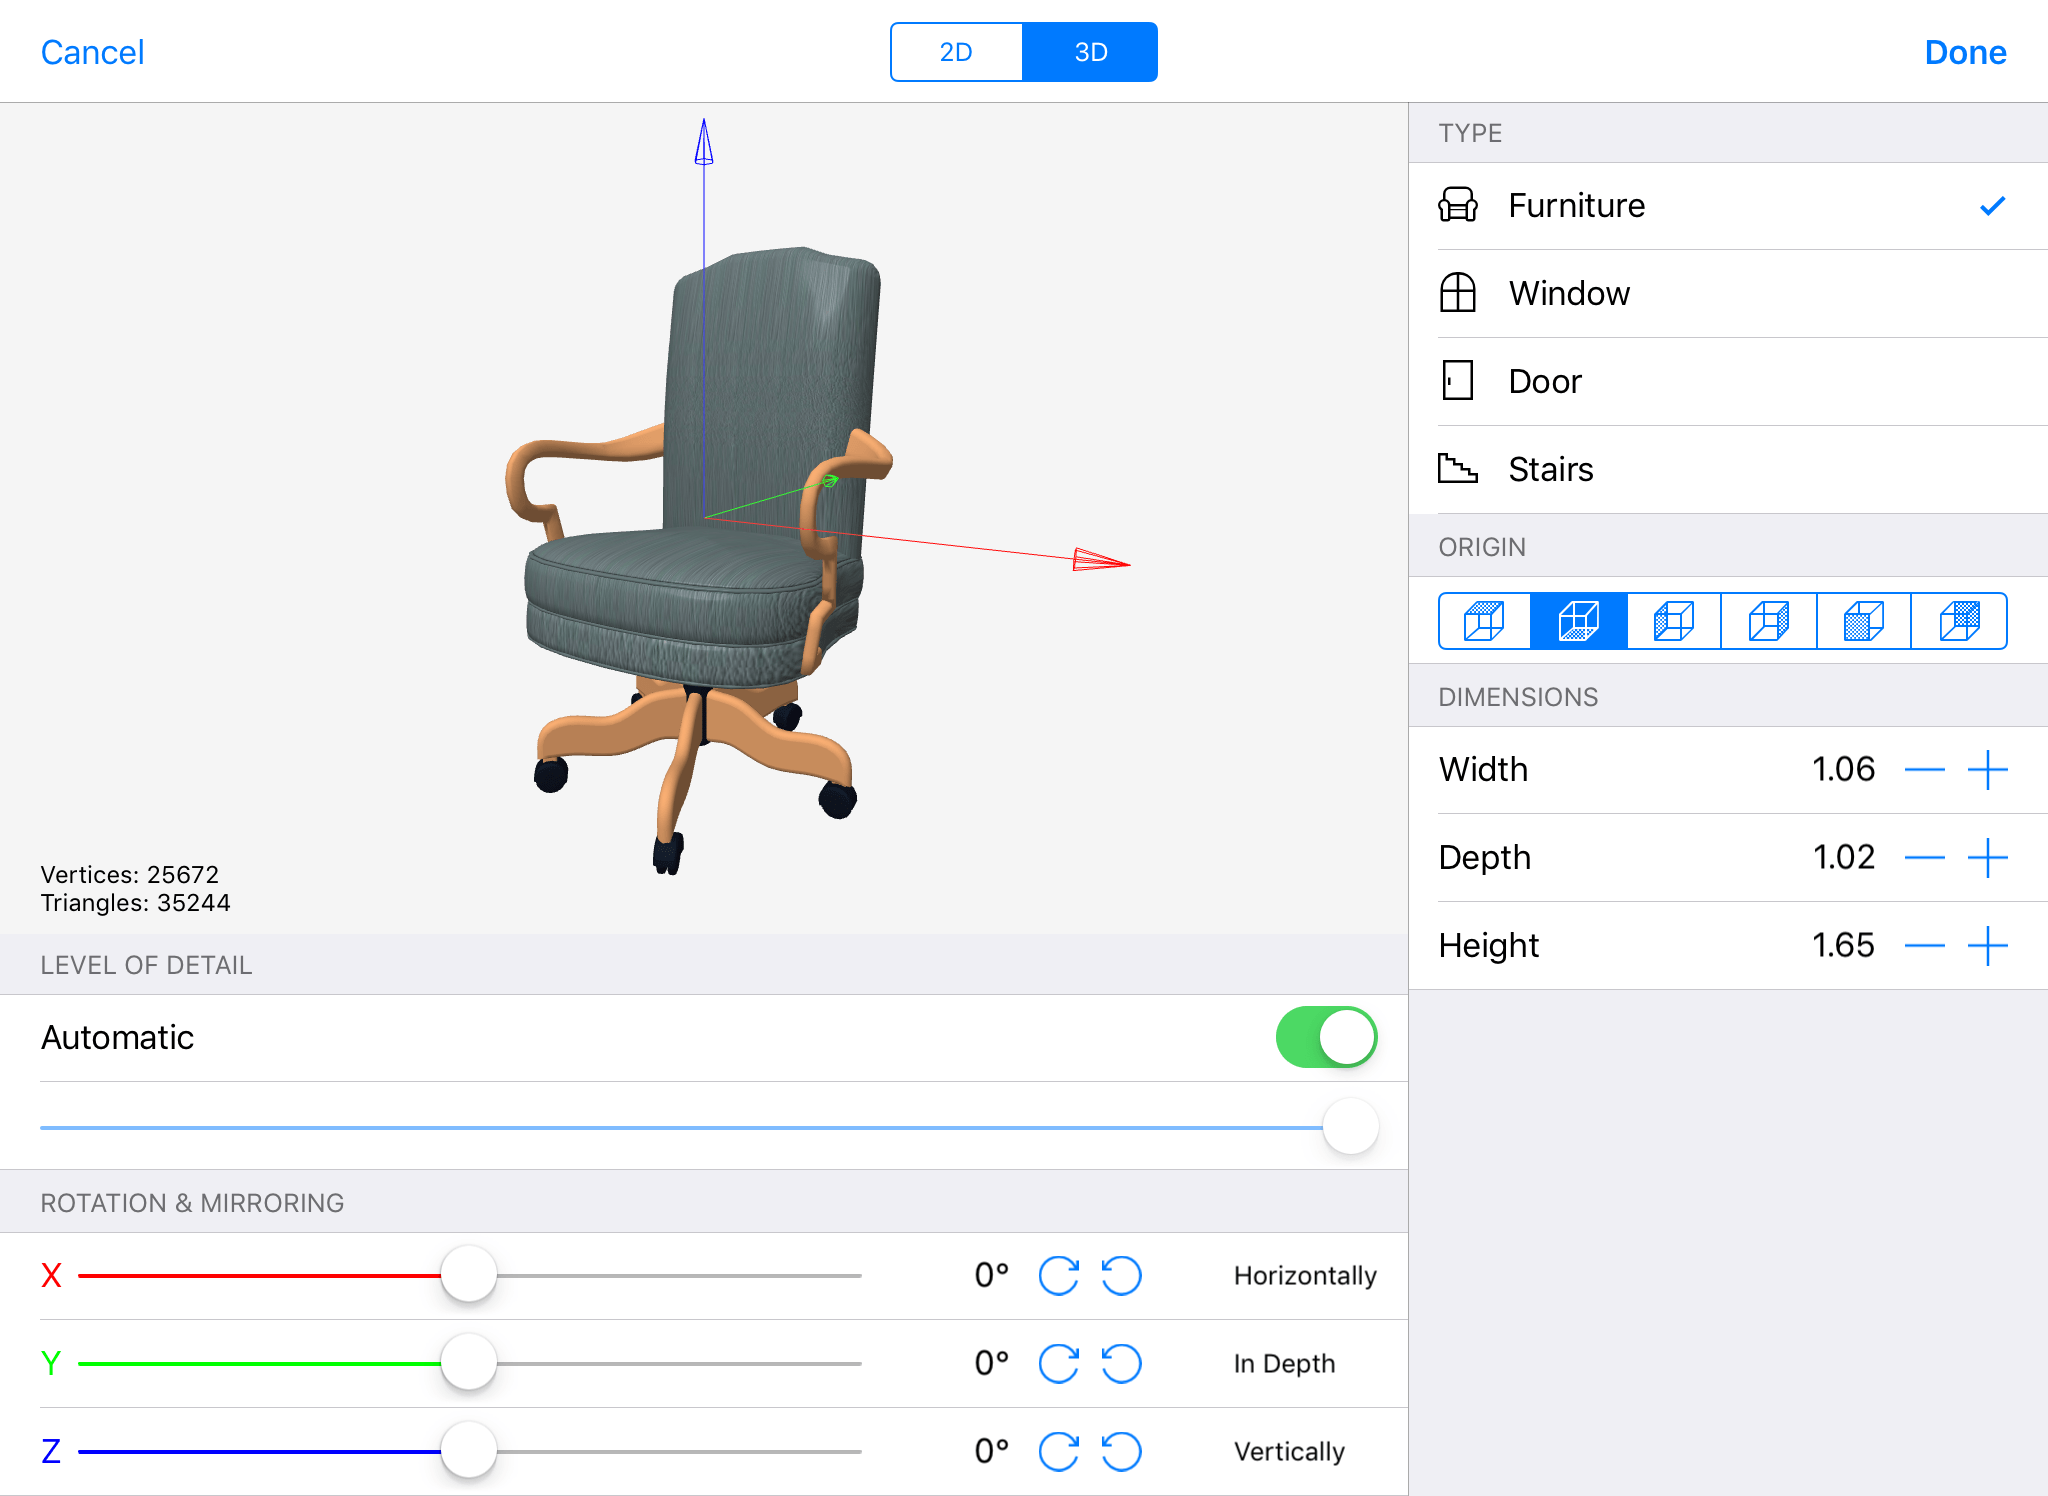
The Preview
The Type and Representation dialog displays the preview of a 3D model.
To zoom or rotate the model, use the same gestures as you use in the 3D view.
To restore the default orientation and magnification of the model in the preview, double-tap on it.
The orientation and size of an object in the preview does not affect the object in the project.
Level of Detail
The preview displays the number of vertices and triangles that create a 3D model. The number of triangles is also displayed in the Information bar located below the toolbar. The larger the numbers are, the more detailed the object is. More detailed objects take more time to be rendered in the 3D view. The 3D view can respond with a delay if your project contains many detailed objects.
A yellow sign with an exclamation mark below the preview indicates that the object may be over-detailed. The sign is displayed when the object has about 32000 or more vertices. This is not an error, but only a notification that the object can slow down rendering of the whole 3D scene. If this takes place, you can reduce the complexity of the object. Ideally, you should let the app control the level of detail automatically. Alternatively, you can decrease it using the slider until the yellow sign disappears.
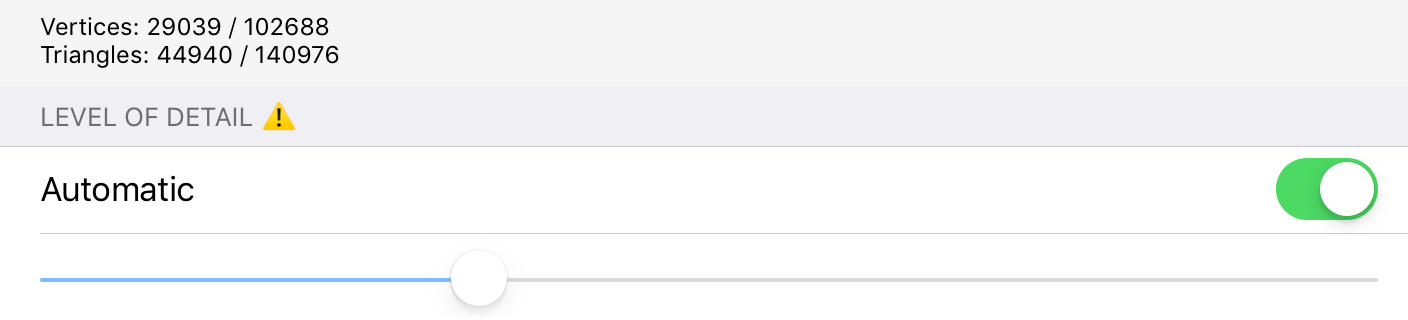
The Automatic switch allows the app to correct the level of detail automatically. It is activated by default.
The Level of detail slide bar lets you decrease the amount of details in the 3D model. The far right position of the slider corresponds to the original object. The preview shows how the object will look in the project.
After reducing the detail level, make sure that the object still looks smooth and has no defects. You can always reopen the Type and Representation dialog and restore the original quality of the object.
Notice that the Level of Detail tool affects all copies of an object in your project.
Too complex objects are marked with the warning sign in the Project Tree when:
- The Automatic switch is on.
- The Automatic switch is off, and the level of detail is higher than recommended.
Rotating an Object
By rotating an object in the Type and Representation, you can change its default orientation.
Changing the orientation of an imported object can be necessary when the object appears in the project upside-down, or when a door or window is inserted across a wall.
To rotate an object around the X, Y or Z axis, use the corresponding sliders.
3D Flipping
To flip an object, tap the corresponding 3D Flip button.
3D flipping lets you make several objects out of a non-symmetric model.
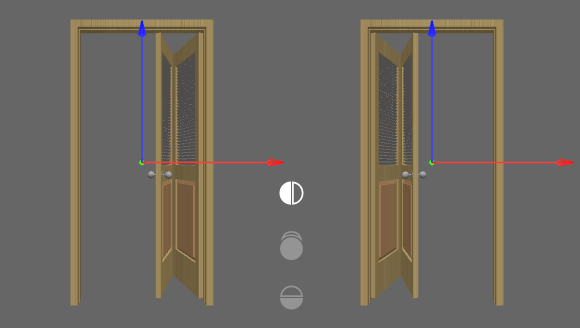
For example, by applying front-to-back or left-to-right flipping, you can create three new doors from a single door model. This is especially helpful when the door model has a handle on one side, but you need it on the other side.