Working with Roofs
Introduction to Roofs
A roof is a separate object type. Similar to walls, roofs are created inside the app and cannot be imported. When the app creates a roof, it takes into account the selected roof style (a template you choose in the Roof Assistant) and the outline of the external walls.
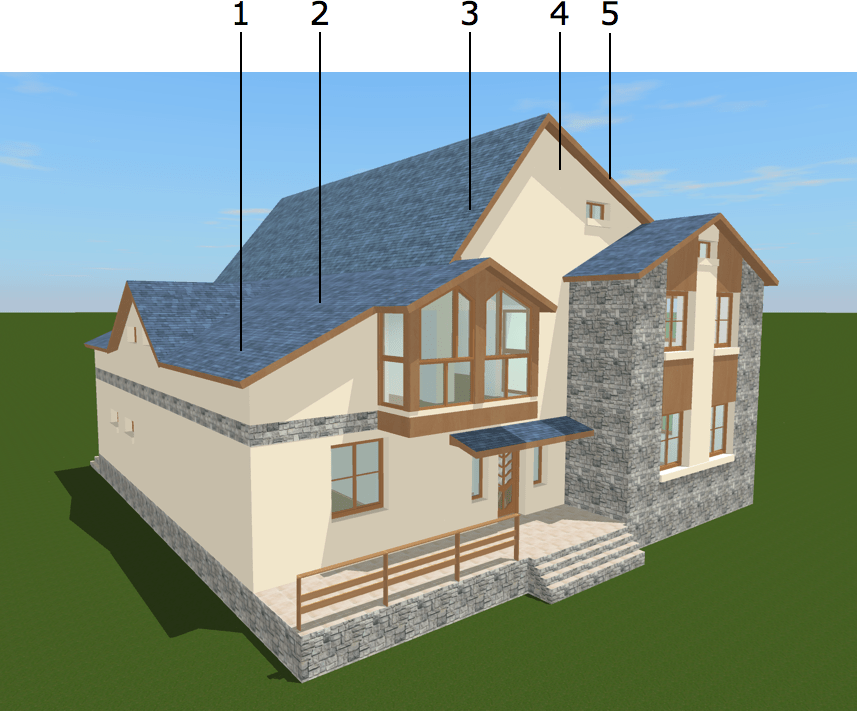
Any roof has several sides. Gables are also considered as roof sides. Thus, 1, 4 and 5 in the picture are roof sides. A roof side can have several segments. Side 1 has two segments: 2 and 3.
Similar to other objects, roofs are listed in the Project Tree. Roof sides are displayed in the Project Tree as sub-items of the corresponding roof.
The app can add a roof to any story that is entirely or partially under the open sky. A new AutoRoof object usually takes up the entire top of the upper story. An auto roof will change its shape dynamically if you change the configuration of the external walls on the floor below. The height of the roof is not limited by the corresponding story height.
The app also supports custom roofs (Pro edition only). A user can define the area a roof should take. It is possible to edit the shape of the area that the roof rests on. When automatic and custom roofs are present in the same area together, the custom roof takes the space which is defined by the user. The auto roof will take the rest. Several roofs cannot merge into a single roof.
To create a skylight, you can install a window into the roof.
To apply a new material to the roof, drag the material from the library onto the roof in the 3D view. See Applying Materials for more details. Panels can be used to create areas with different materials or colors on the roof surface.
The Roof Types
The Roof Assistant lets you choose one of the basic types such as gable, hip, mansard, and others. A more complicated roof can be created by adding or deleting roof slope segments and by changing their angles. The roof properties are located in the Object Properties tab of the Inspector.
Once a roof has been added to the project, you can open the Roof Assistant again by choosing the Change Roof Type command from the context menu of the roof and select another type.
Using Panels, Openings and Niches with Roofs
To add a panel, opening or niche to a roof, drag one from the object library onto the roof. This works in the same way as with walls.
You can draw any of those elements directly on a roof in the 2D Elevation view. (Pro edition only)