Live Home 3D Workspace
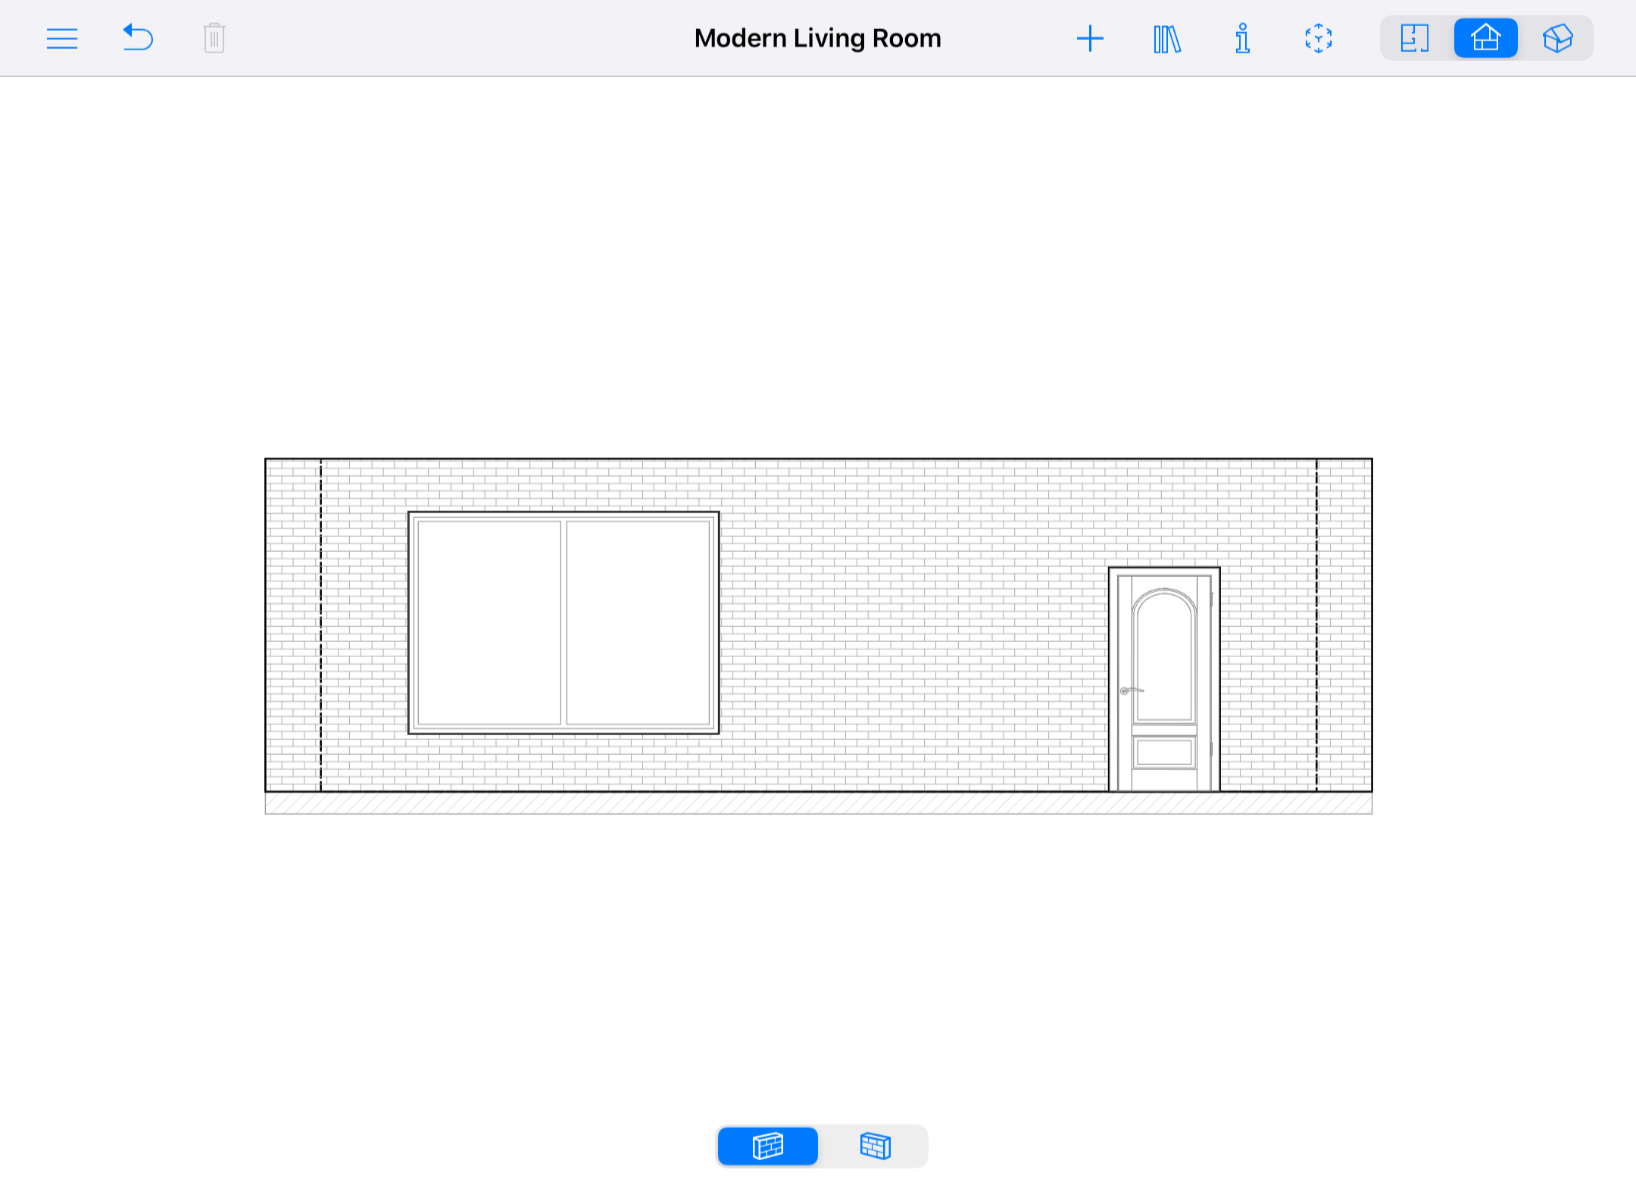
The 2D Elevation View
The 2D Elevation view displays the side view on walls and roofs. It is used to work with openings, niches and wall panels, and also to export and print elevations.
The functionality described in this section is only available in the Pro edition.
To open the 2D Elevation view, select a wall or roof segment, and tap on the ![]() button in the toolbar. You can do the same by selecting a niche, opening or wall panel, if this object is installed into a wall or roof.
button in the toolbar. You can do the same by selecting a niche, opening or wall panel, if this object is installed into a wall or roof.
The Elevation view can display the Information bar and rulers below the toolbar. In order to show or hide both of them together, use the Show Rulers option in the Settings.
The Toolbar
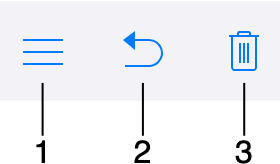
1 – Open the menu.
2 – Undo the last action. For Redo, tap on the icon and hold until a popup menu appears on the screen.
3 – Delete a selected object.
4 – Open the tools panel. The panel has two sections: Building and Auxiliaries. The first one includes tools for adding wall panels, niches and openings. Auxiliaries contains tools to add guide lines, blocks of text and dimensions.
4.1 – Building tools.
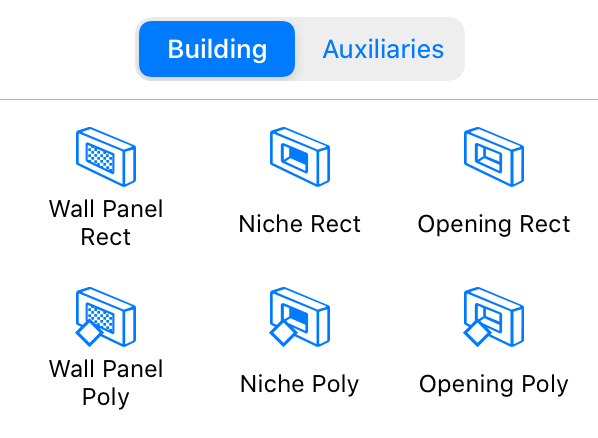
The Wall Panel Rect tool creates a rectangular wall panel.
The Wall Panel Poly tool lets you create a custom-shaped wall panel.
The Niche Rect tool creates a rectangular niche.
The Niche Poly tool lets you create a custom-shaped niche.
The Opening Rect tool creates a rectangular opening.
The Opening Poly tool lets you create a custom-shaped opening.
4.2 – Auxiliary tools.

The Dimension tool lets you measure the distance between specified points.
The Annotation tool adds text boxes for typing or pasting text.
The Add Horizontal Guide tool adds a horizontal guide line. By default, it passes through the center of the Elevation view.
The Add Vertical Guide tool adds a vertical guide line. By default, it passes through the center of the Elevation view.
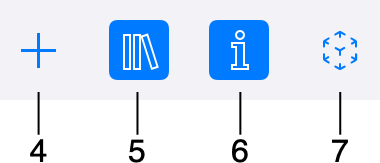
5 – Open or close the Library which gives you access to the library of materials, library of objects and Project Tree.
6 – Open or close the Inspector.
7 - Open the Model Setup panel for exporting to AR.
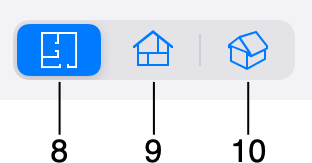
8 – Display the 2D Plan view.
9 – Display the 2D Elevation view. (Pro edition only)
10 – Display the 3D view.
Most of the tools remain activated after completing the dedicated action. For example, after drawing a niche, you can draw another one without activating the tool again. In order to deactivate a tool, tap on Complete in the toolbar.
The toolbar can also show the Done button after you added or selected an object. Tapping on Done just deselects this object. You can do the same by tapping on empty space in the drawing area.
Once a wall is selected, you can show its opposite side by tapping on the Flip Side button. It works with roofs as well. The button is located at the bottom of the canvas.
Adding Objects from the Library
The 2D Elevation view allows you to add objects to the drawing which can be installed into walls and roofs. These are niches, openings, doors, windows and wall panels. To add an object, simply drag and drop it from the library into the project.
Creating Objects
You can draw niches, openings and wall panels directly in the 2D Elevation view using the drawing tools mentioned earlier. Each of the objects has two related tools. One can draw rectangular shapes, and another can create polygons.
To add a rectangular object, activate one of the Rect tools. Touch the screen and drag your finger aside. This will specify the position of a corner of a new niche, opening or wall panel. Detach your finger off the screen at the point where the opposite corner should be located.
To add a polygonal object, activate one of the Poly tools. Touch the screen and drag your finger aside. This will specify the position of the first corner of a new niche, opening or wall panel. Detach your finger, and tap several more times to add more corners. Once the last corner was added, tap on the Complete button to deactivate the tool.
Changing the Shape of an Object
To modify the shape of niches, openings and wall panels directly in the 2D Elevation view, tap and hold your finger on an object until the popup menu opens. Then choose the Edit Contour command. The resize handles will disappear indicating the contour editing mode. The app will display the object's outline with diamond-shaped handles at the corners called "points". To change the shape of the outline, you can move the points.
To add a new point, tap and hold in order to open the popup menu. Then choose Add Point. To remove a point, tap on it and hold your finger. In the popup menu, select Remove Point.
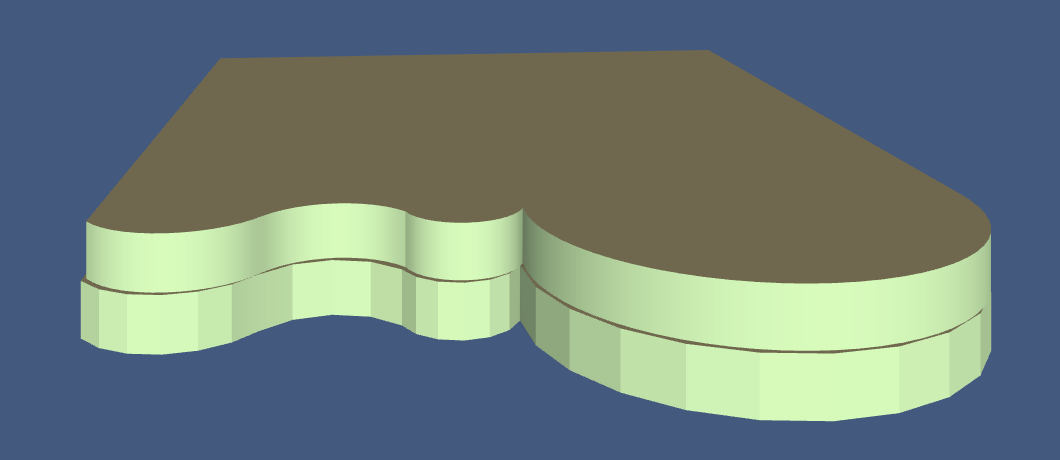
In the contour editing mode, the app also displays round handles in the middle of each side of the shape. If you move a round handle in one or another direction, the corresponding side will bend inside or outside of the shape creating an arc. While you are changing the curvature of a side, a number near the middle of the side changes from 0 (straight line) to 180 (semicircle). One of possible ways to create a circle is to draw a square and bend each side up to 90 degrees.

Rounded sides of the object can be displayed in the 3D view as a number of facets or as a smooth surface. To make curvatures more or less smooth, use the Smoothness slider in the Object Properties tab of the Inspector. Higher values may require higher computer performance while the 3D model is rendered. In the picture below, the two identical objects have minimum (at the bottom) and maximum (at the top) level of Smoothness.
When the Edit Geometry option in the Inspector is unlocked, you can activate the editing mode by double-tapping on the object.
Furniture in the Elevation View
In order to show or hide furniture and Building Blocks in the elevation view, use the Show Adjacent Furniture option in the 2D section of Settings.
A piece of furniture or Building Block will be displayed only if the gap between it and a selected wall is less than 1 meter or 39.4 in.
The 2D Elevation view lets you move furniture around and add new objects.