Guidelines and the Layout Grid
Guidelines
Guidelines are used to align objects on the floor plan or elevation view and also to mark up the layout before drawing or placing objects.
To add a guideline, tap the plus button in the toolbar and open the Auxiliaries tool set in the tools panel. Then tap the Add Horizontal Guide or Add Vertical Guide button.
To select a guideline, tap on it. The Information bar, which is above the horizontal ruler, displays the coordinate of the selected guideline.
To move a guideline, drag it.
To remove a guideline, long-press on it and choose Delete in the popup menu.
Like other objects, guidelines are listed in the Project Tree where they can be locked or made invisible.
Managing Guides in the Inspector
The Object Properties tab of the Inspector lists guidelines that are present on the current level (story or site). The Inspector lets you add and delete guides using the buttons below the list.
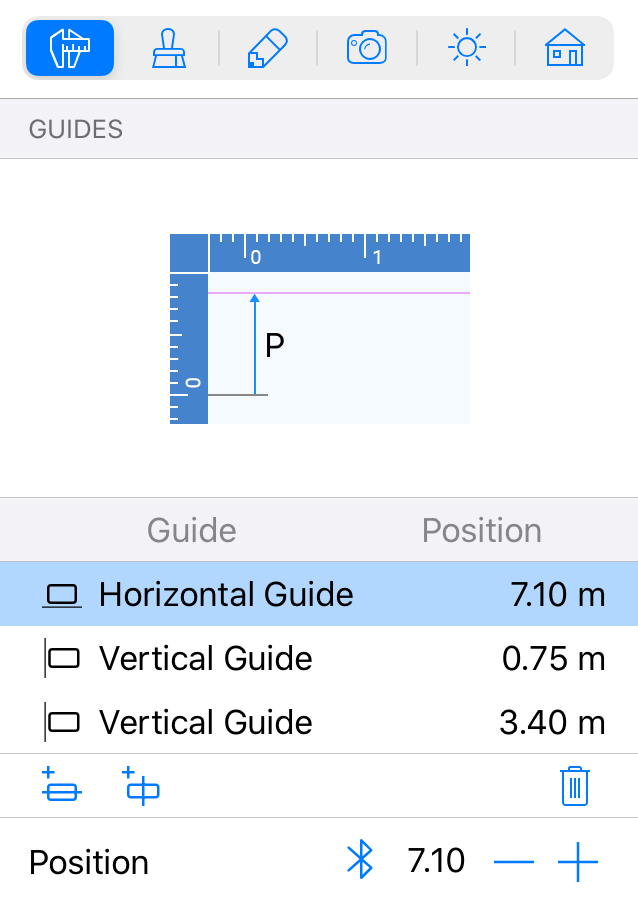
In addition to dragging guides on the floor plan or Elevation view, you can change the location of a guide using the Position field.
Smart Guides
There are also smart guides in the app. Smart guides are temporary guidelines that appear when you draw walls, floors or ceilings, and when you move objects.