Live Home 3D Workspace
The App Settings
The 3D Settings Tab
3D settings define the quality of the picture in the 3D view. At the same time, higher rendering quality requires more computer resources, and consequently, can make the program less responsive. You may need to find a balance between speed and quality.
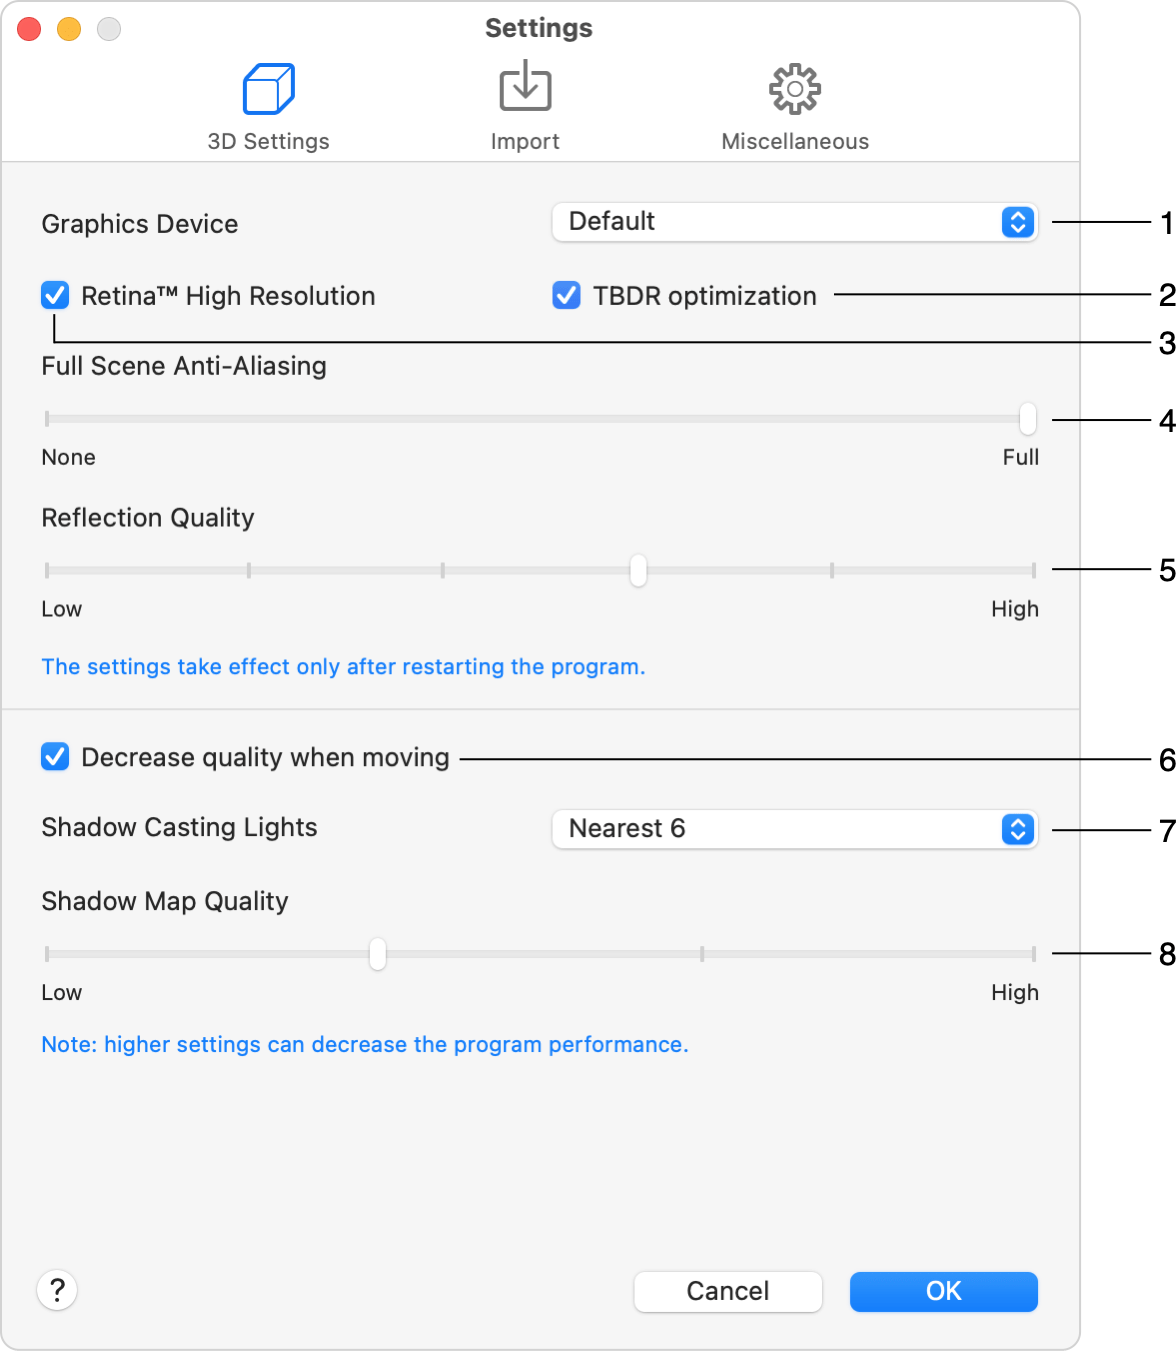
1 - Graphics Device
2 – TBDR optimization
3 – Retina™ High Resolution
4 – Full Scene Anti-Aliasing
5 – Reflection Quality
6 – Decrease Quality when Moving
7 – Shadow Casting Lights
8 – Shadow Map Quality
1 - Graphics Device. There can be one or more options apart from the Default. In the case of two graphics devices, one, as a rule, provides better performance while another consumes less energy. For comfortable work, choose the more powerful one.
2 – The TBDR optimization check box turns on the Tile-Based Deferred Rendering (TBDR) mode. With TBDR enabled, most of the work is performed on the GPU. It splits the image into tiles which are rendered separately. For that, the app uses the GPU memory which is very fast. The other advantages of the TBDR are the lower energy consumption and better utilization of the device memory. It is recommended that you have the TBDR option on, especially on mobile devices. On rare occasions, the app's screen may turn black when very complicated geometry of a particular project cannot fit the tile memory. In such a case, turn the TBDR optimization off.
3 – The Retina™ High Resolution check box enables the native high resolution for all the 3D renderings and auto-generated 2D representations (when activated) on computers with the Retina™ display. If you experience the decrease in performance, deselect this check box.
4 – Full Scene Anti-Aliasing makes the picture look softer by smoothing the edges of objects. A new value will take effect after restarting the program.


5 – Reflection Quality defines the quality of the reflections displayed in objects such as mirrors. This parameter affects the resolution of the reflections and also the strength of anti-aliasing. At lower quality, the picture may look more pixelated, but rendering will be faster. A new value will take effect after restarting the program.
6 – The Decrease Quality when Moving option can change the rendering mode automatically. When this option is activated, the program turns off reflections, shadows and lights while you are walking around in 3D. When you stay still, lights, reflections and shadows appear again. Note that if lights and shadows are already turned off in View > 3D View > Rendering Quality (or in the toolbar) then nothing will change when you start walking in 3D.
7 – Shadow Casting Lights defines how many light sources (including the sun and moon) are taken into account when the program is rendering shadows. At smaller numbers, rendering is faster.
Note that if the quantity of considered light sources is too small, you can get an unrealistic picture because you cannot see shadows that normally exist.
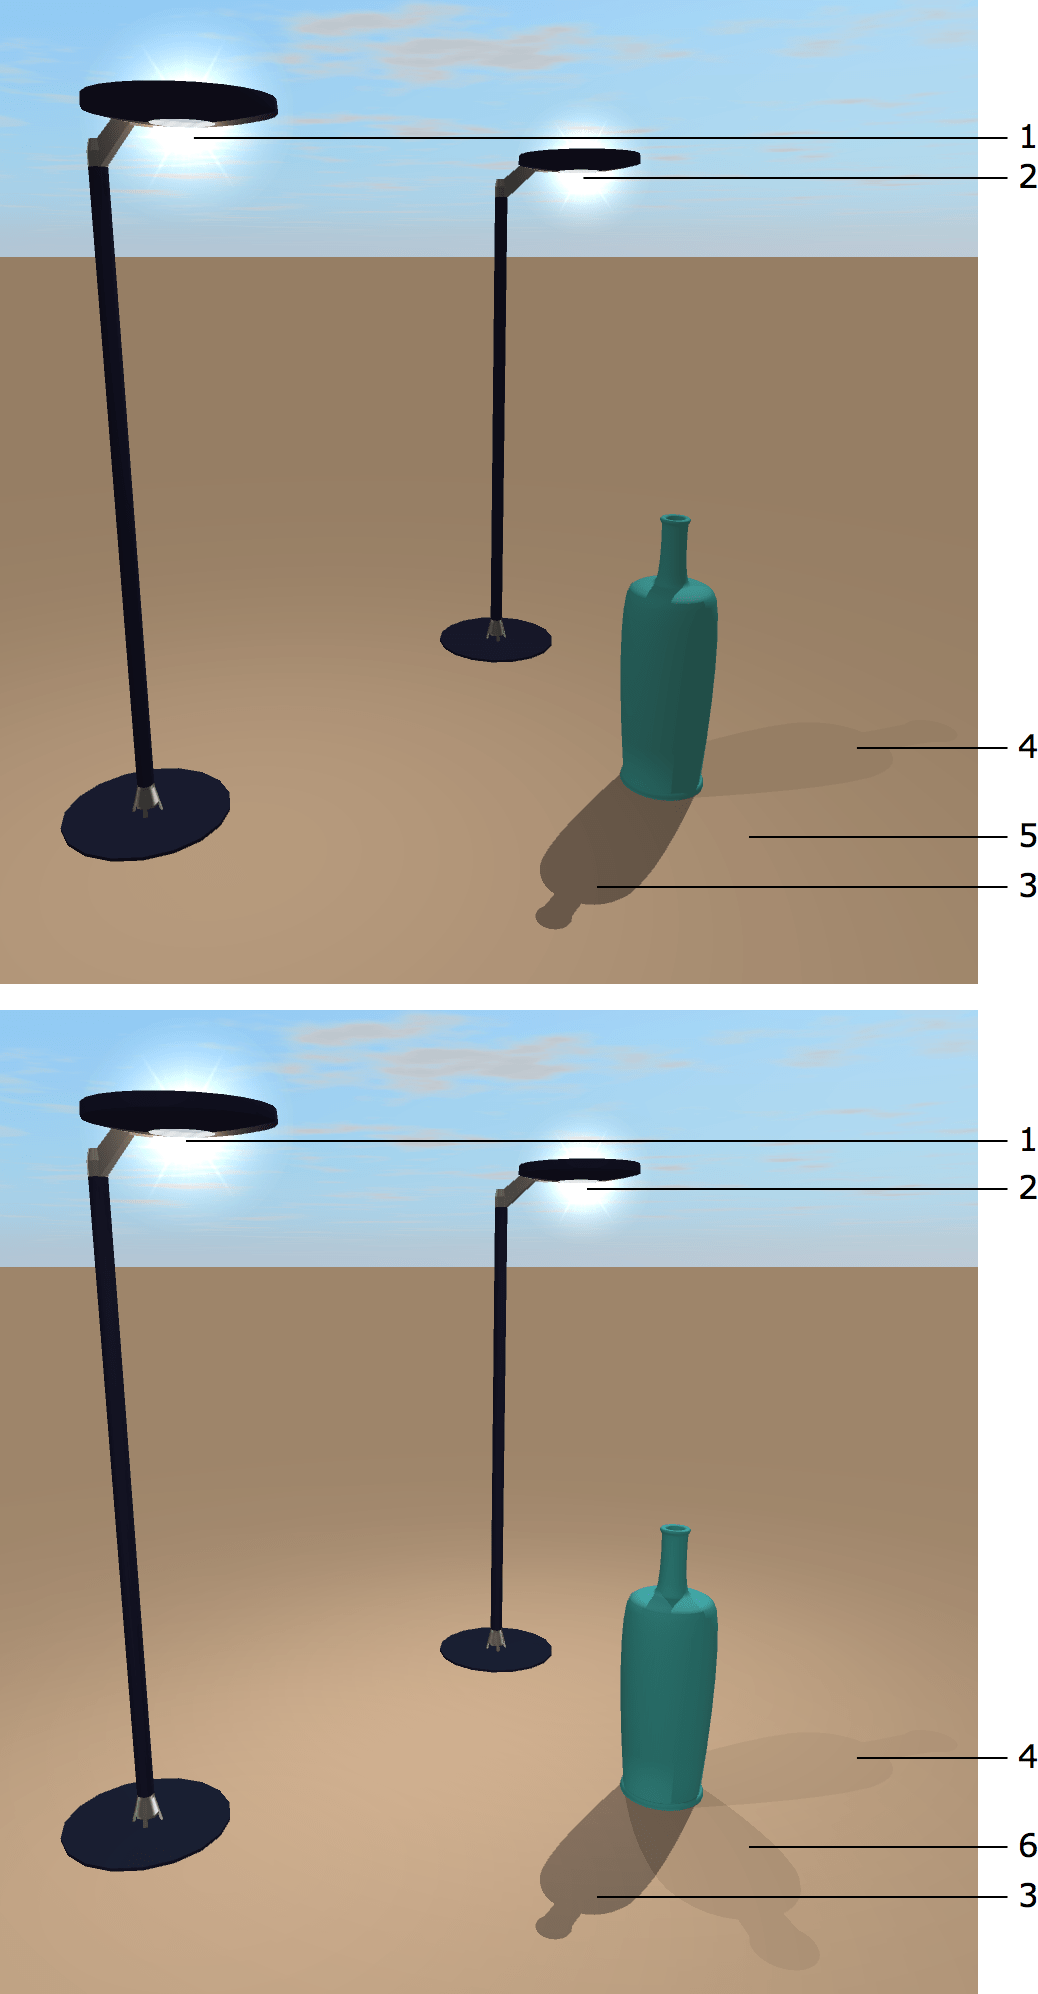
1 – Light source 1
2 – Light source 2
3 – Shadow from the sun
4 – Shadow from the light source 1
5 – No shadow from the light source 2 with Shadow Casting Lights set to Nearest 2
6 – Shadow from the light source 2 with Shadow Casting Lights set to Nearest 4
Limiting the number of objects that cast shadow can also increase the program performance.
8 – The Shadow Map Quality lets you adjust the rendering quality in the Shadow Maps mode. At low quality, shadows can look blurred.
The Import Tab
This section lets you set up the default state for the options that appear in the Import dialog. Read the Import Options section for more details.
The Miscellaneous Tab
Show Welcome window on start-up opens the Welcome window when you launch the program. This window gives you access to the online store.
Show Project Gallery on start-up opens the Project Gallery when you launch the program. In the Project Gallery, you can choose to open a sample project, one of your templates, or one of your recent projects.
Animate Library 3D Preview by default turns on or off the automatic rotation of a 3D object selected in the preview of the object library. You can activate and deactivate the rotation directly in the preview.
The Autosave modified projects option allows the program to automatically save a copy of a project to the same folder. If the program quits unexpectedly, when you start the program next time, it will open the autosaved copy of the project.
Snap Sensitivity on 2D Plan defines how close you need to bring one object to another before the objects snap together.
The Print images with resolution option lets you set up the resolution for printing raster graphics.
The Space bar activates 3D tool option defines which of the tools in the 3D view should be activated by pressing the Space key.
Automatically check for updates lets you specify how frequently the program checks for updates. (Not available in the application purchased on the Mac App Store.)
The Clear button removes unnecessary temporary files and thumbnails of library objects when there is no any open or unsaved document.