Working with Roofs
Adding and Deleting Roofs
The program lets you add automatic and custom roofs. Both roof types can be present on the same floor. In this case, a custom roof takes the specified area, and an auto roof takes the rest. It is recommended that you use auto roofs wherever possible. Custom roofs are only available in the Pro edition.
Adding an Auto Roof
Auto roofs are designed so that they take all of the available space. This area is defined by the contour of the external walls, or the contour of the floor.
To add or delete an auto roof, use the Building tab of the Inspector.
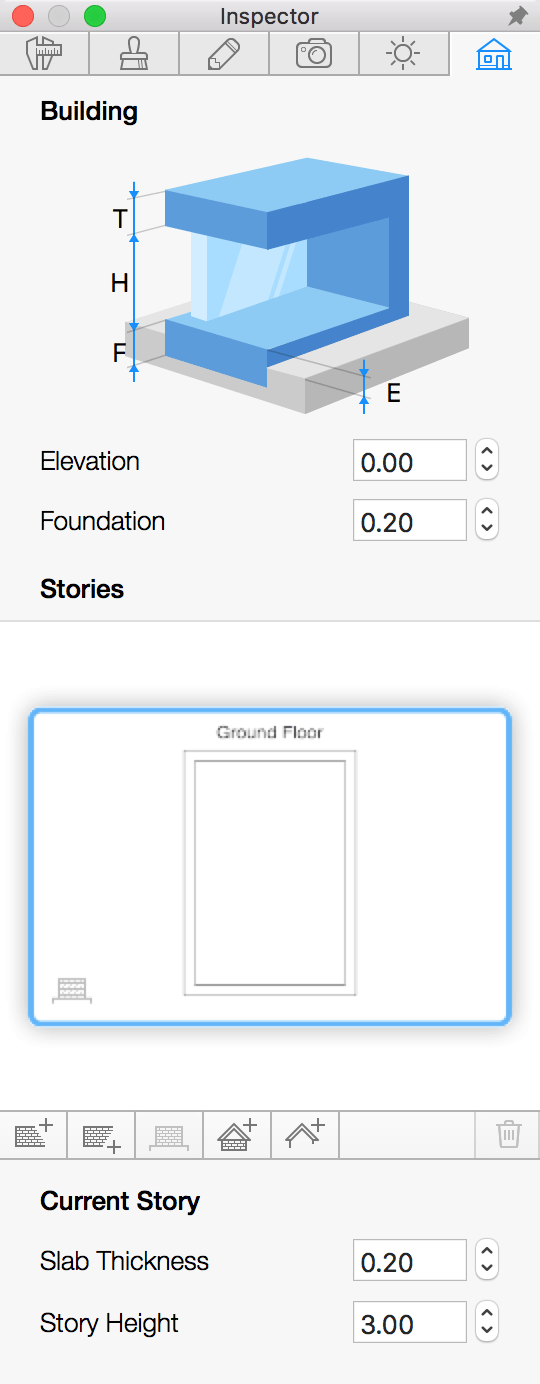
To add a roof on the story above the current one, click ![]() . If the upper story doesn't exist, it will be added automatically. To add a roof on the current story, click
. If the upper story doesn't exist, it will be added automatically. To add a roof on the current story, click ![]() . The program will open the Roof Assistant where you can choose the roof type (e.g. Gable or Mansard).
. The program will open the Roof Assistant where you can choose the roof type (e.g. Gable or Mansard).
Once a roof has been added, you can modify its properties using the Inspector. To change the roof type using the Roof Assistant, select the Change Roof Type command in the context menu of the roof.
After a roof has been created, the corresponding button in the Inspector changes its function from adding to removing: ![]() or
or ![]() .
.
To convert an auto roof to a custom roof, choose Make Roof Editable from the context menu of the roof. The reverse operation is not supported. In order to replace a custom roof with an auto roof, delete the custom roof and add a new auto roof. This feature is only available in the Pro edition.
Adding a Custom Roof
To add a rectangular roof, draw it on the floor plan using the Roof Rect tool. Click and hold down the mouse button to start drawing a rectangle. You should then move the cursor to a new position and release the button.
To add a polygonal roof, activate the Roof Poly tool. Click several times on the floor plan to add corners. Double click in order to specify the position of the last corner of the polygon and deactivate the tool.
As soon as you finish drawing a roof, the program will open the Roof Assistant where you can choose the roof type.
To change the shape or size of a custom roof on the floor plan, select the roof and drag one of its corner or side handles.
To modify the shape of a custom roof, right-click on it and choose Edit Contour from the context menu. The resize handles will disappear indicating the contour editing mode. The program will display the object's outline with handles at corners called "points". To change the shape of the outline, you can move those points.
To add a new point, right-click on the contour and choose Add Point. To remove a point, right-click on it and select Remove Point.
You can set up the properties of a custom roof in the Inspector. To change the roof type using the Roof Assistant, select the Change Roof Type command in the context menu of the roof.
The functionality described in this subsection is only available in the Pro edition.
Deleting a Roof
To delete an auto roof, select the story where the roof is located, and click ![]() in the Inspector.
in the Inspector.
To delete a custom roof, select it and press the Delete key. (Pro edition only)
The roof will also be removed if you delete the story that it rests on.
The Roof Assistant
The Roof Assistant helps you add a standard roof to your building.
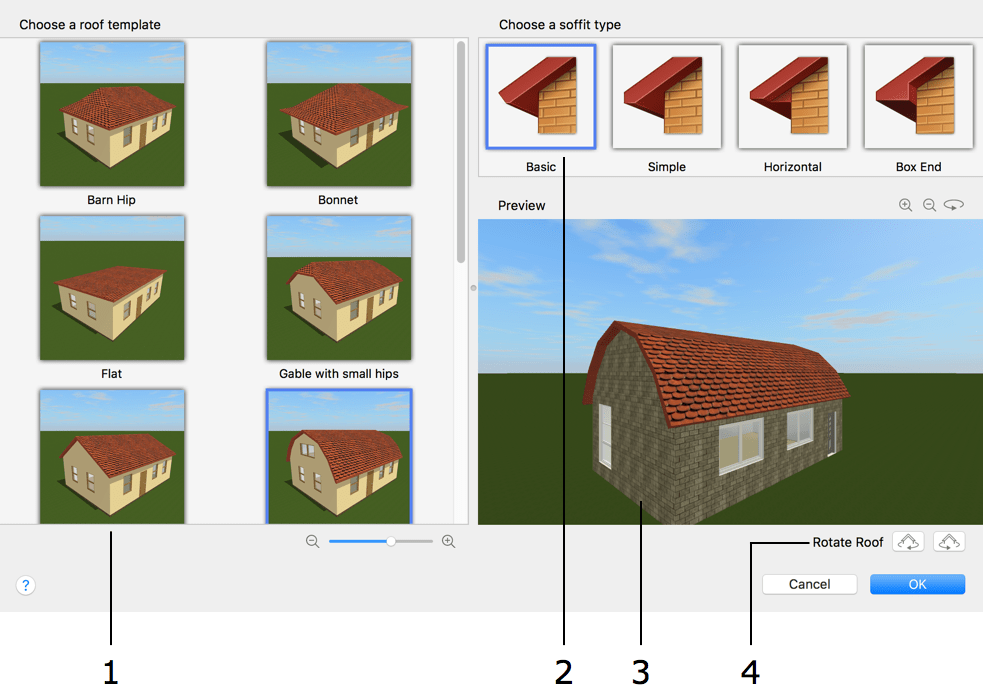
1 – Roofing templates.
2 – Soffit type. You can also change it in the Object Properties tab of the Inspector.
3 – Preview of your project with the added roof. To rotate the picture, drag it, or swipe with three fingers. To zoom in or out, use the zoom buttons above the preview, or the mouse wheel, or swipe up or down with two fingers.
4 – Roof orientation. You can turn the roof in 90 degree increments.
You can also move a custom roof one story up or down using the two buttons below the preview. (Pro edition only)
The Roof Assistant opens up when you add a new roof, and when you run the Change Roof Type command.
The Change Roof Type command actually recreates the roof from scratch. This means that the materials applied to the original roof will be replaced with default ones. All objects installed into the roof (e.g. windows or dormers) can disappear. The same happens when you call the Make Roof Editable command. You should, therefore, use these commands as early in your workflow as possible.