Modeling the Terrain
Creating a Custom Terrain
Add a Terrain
Before you start drawing a terrain, activate the Site layer. Then open the 2D Plan view.
The functionality described in this section is only available in the Pro edition.
In order to access the Terrain Rect and Terrain Poly tools, tap on plus in the toolbar. Then tap on the Site section. This opens a set of tools for working on the Site layer.
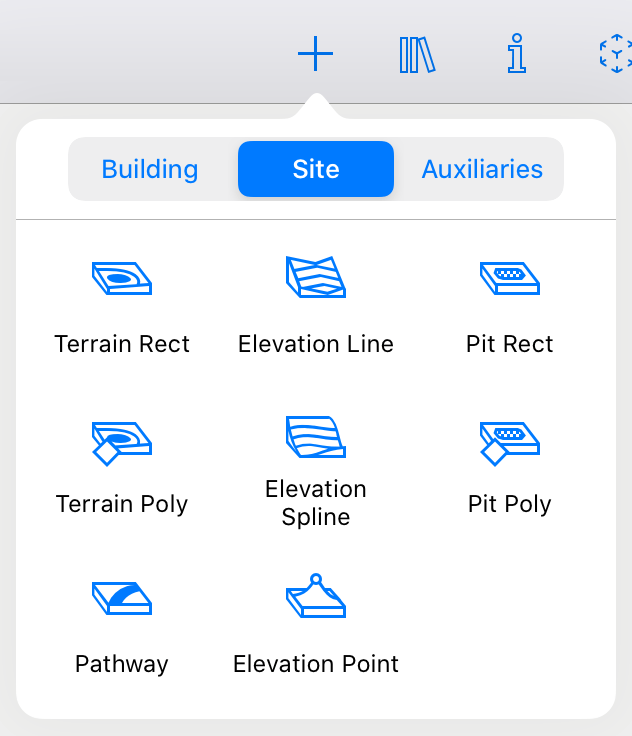
To add a rectangular terrain:
- Activate the Terrain Rect tool.
- Touch the floor plan and drag the finger aside. This will specify the position of a corner of the terrain.
- Detach your finger off the screen at the point where the opposite corner should be located.
To draw a polygonal terrain:
- Activate the Terrain Poly tool.
- Touch the floor plan and drag the finger to start drawing.
- Detach your finger off the screen to specify the end of the first side of the object.
- Tap on the floor plan multiple times to specify the locations of corners of the object's outline. The outline will update every time you add a new corner.
- Tap on the Complete button in the toolbar to deactivate the tool.
Properties of a Terrain
Most of the properties of a terrain are located in the Inspector.
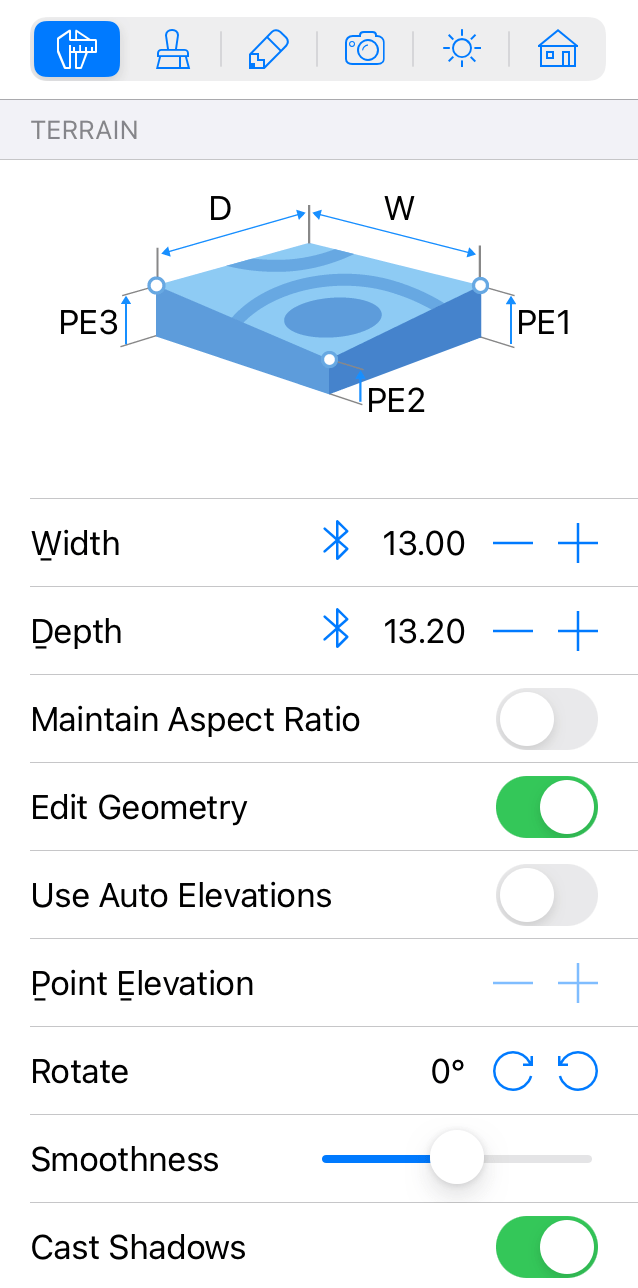
The Width and Depth properties indicate the dimensions of either rectangular terrain or bound of polygonal terrain. To resize an object proportionally, select the Maintain Aspect Ratio option.
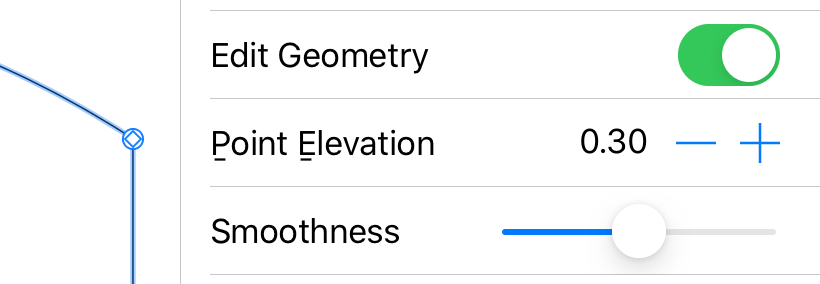
The Edit Geometry option allows or disallows modifying the shape of the terrain's outline. It also allows or disallows changing the 3D shape of the terrain.
The Point Elevation edit box lets you change the elevation of a point on the terrain's outline. Select that point on the floor plan to set a new elevation level.
The Rotate controls let you rotate a terrain around its center.
The Smoothness slider changes how curved sides of a terrain outline look in 3D. We'll discuss this feature later on.
The Cast Shadows option lets you control whether the object should cast shadows. Notice that shadows of some flat objects may make almost no difference to the 3D scene. Deactivating such shadows can improve the rendering speed.
Customize the Outline of a Terrain
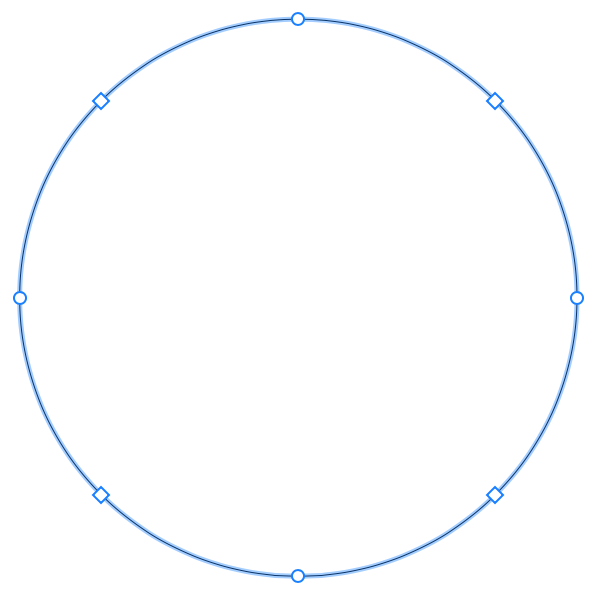
To modify the shape of a terrain, long-press on it and choose Edit Contour from the pop-up menu. The app will display the object's outline with diamond-shaped handles at corners. To change the shape of the outline, you can move those handles.
To add a new point, long-press on the contour and choose Add Point. To remove a point, long-press on it and choose Remove Point.
The shape of custom terrain objects can also be modified with help of the Combine operations. The outline of the result will depend on the location and shape of the original objects. To combine terrains, select at least two of them in the 2D Plan view, bring up the context menu and choose one of the operations.
In the contour editing mode, the app also displays round handles in the middle of each side of the shape. If you move a round handle in one or another direction, the corresponding side will bend inside or outside of the shape creating an arc. While you are changing the curvature of a side, a number near the handle changes from 0 (straight line) to 180 (semicircle). One possible way to create a circle is to draw a square and bend each side up to 90 degrees.
Rounded sides of the object can be displayed in the 3D view as a number of facets or as a smooth surface. To make curvatures more or less smooth, use the Smoothness slider in the Inspector. Higher values may require higher performance from your device while the 3D model is being rendered.
When the Edit Geometry option in the Inspector is unlocked, you can activate the editing mode by double-tapping on the outline of the object.
Make a Terrain Relief
So far, we learned how to edit the outline of a terrain in the 2D view. But it might still make no difference in the 3D view of your project because the elevation of all its points is zero.
There are several ways to add topographic features to a custom terrain.
Change the Elevation of the Terrain Points
To set a new elevation of a point, unlock Edit Geometry. Then double-tap on the terrain contour in the 2D view and then tap on the point to select it. This point will be marked with a circle in the 2D view. Then type in a new value into the Point Elevation field and hit Return.
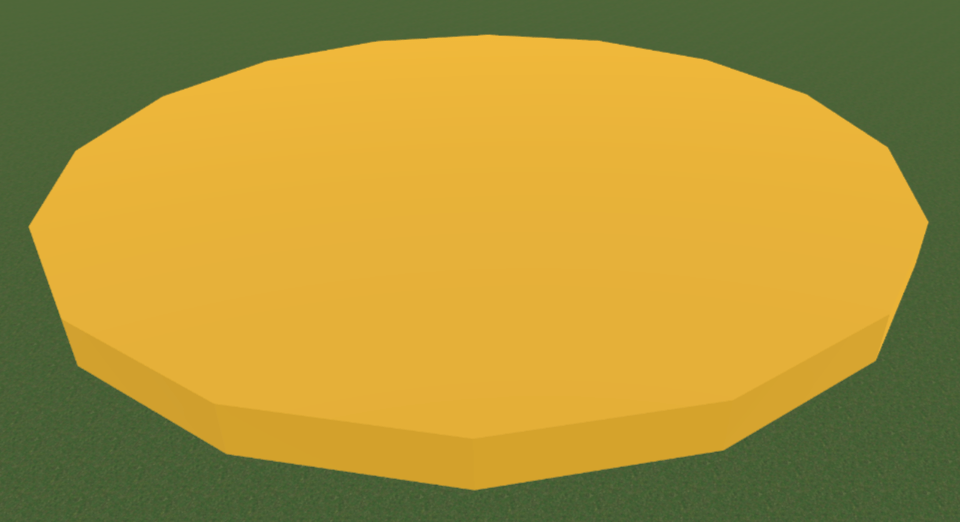
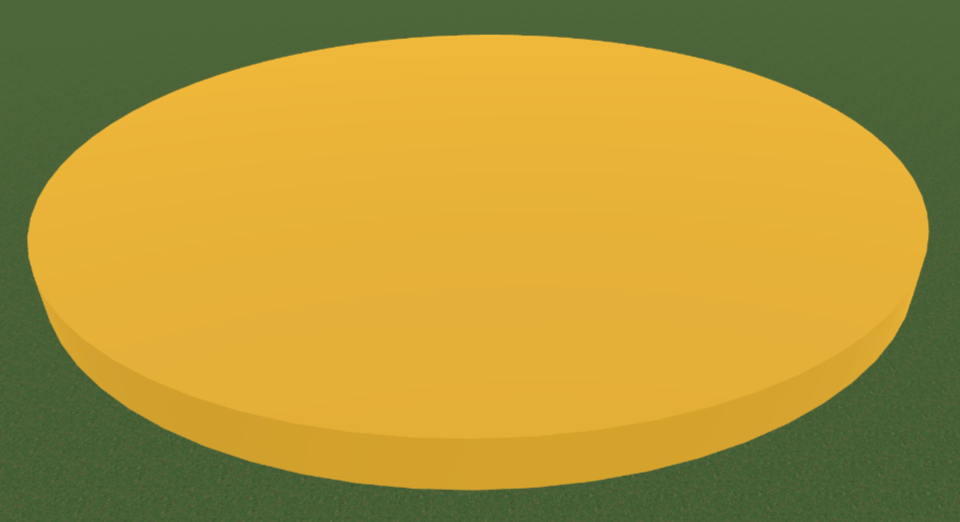
You can create a platform by setting the elevation of all of the points to the same value. An example of a circular platform is shown in one of the preceding subsections.
By defining the elevations of the terrain points, you don't change the elevation of the middle part of the terrain directly. Instead of that, the app calculates the elevation of intermediate points to create a transition from one specified point to another.
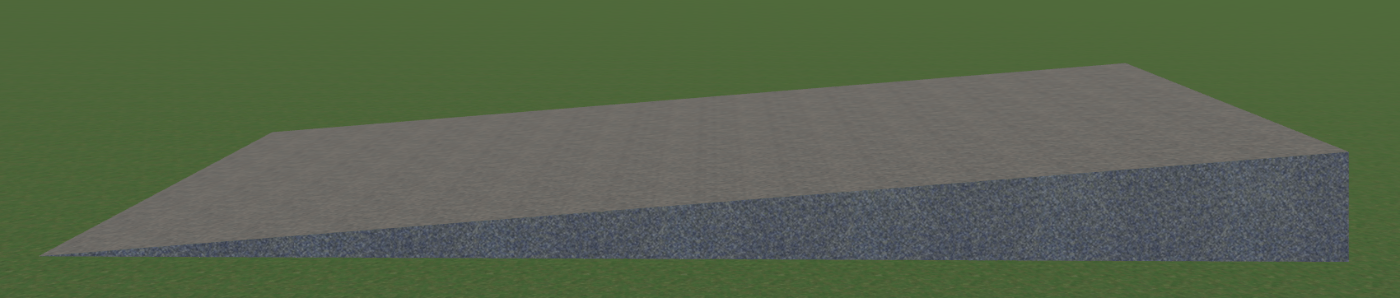
The best way to create a slope is to make several points of the terrain elevated in relation to others. For example, we can add a rectangular terrain object and raise two of its points. The elevation of the middle will gradually change from the lower to higher points.
Use the Elevation Line and Elevation Spline Tools
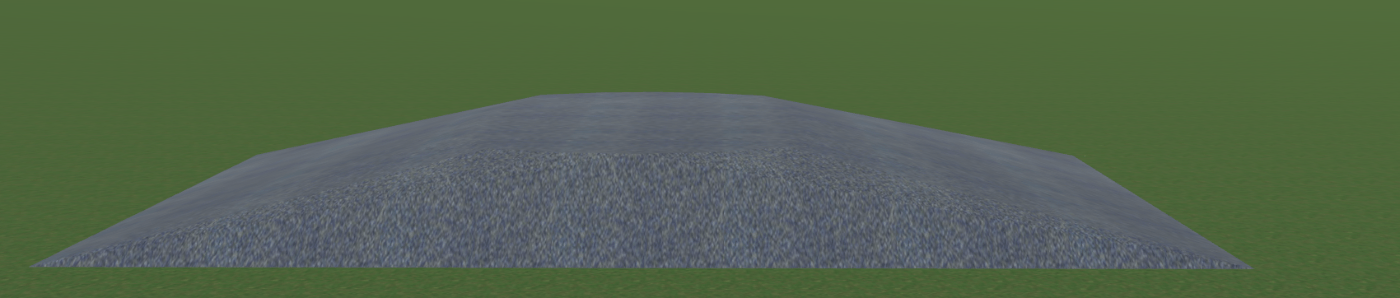
The Elevation Line and Elevation Spline tools let you control the elevation in the middle of a terrain. A line drawn by any of these tools defines a set of points with the same elevation. So, if you draw a circle in the middle of a terrain and increase the circle's elevation, it will look like a gently sloping hill.
These tools are described in more detail in the Editing the Elevation section.
Use the Elevation Point Tool
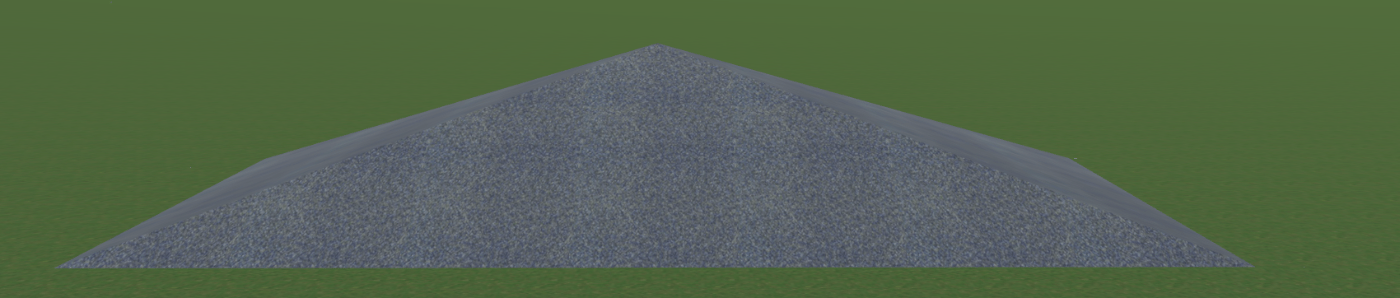
The Elevation Point tool adds a point with a particular elevation. A single point would create a pyramid-like shape.
This tool is described in more detail in the Editing the Elevation section.
Use the Pit Rect and Pit Poly Tools
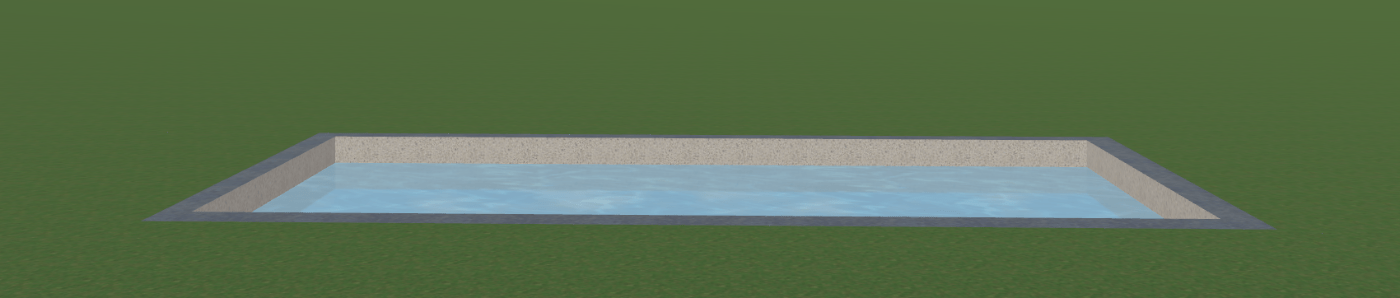
The Pit Rect and Pit Poly tools let you add a rectangular or polygonal pit. These tools help you create an area below the ground level such as a pool.
These tools are described in more detail in the Editing the Elevation section.