Creating Screenshots and Videos
Camera Properties in the Inspector
The Camera Properties tab of the Inspector lists all of the cameras in the current project.
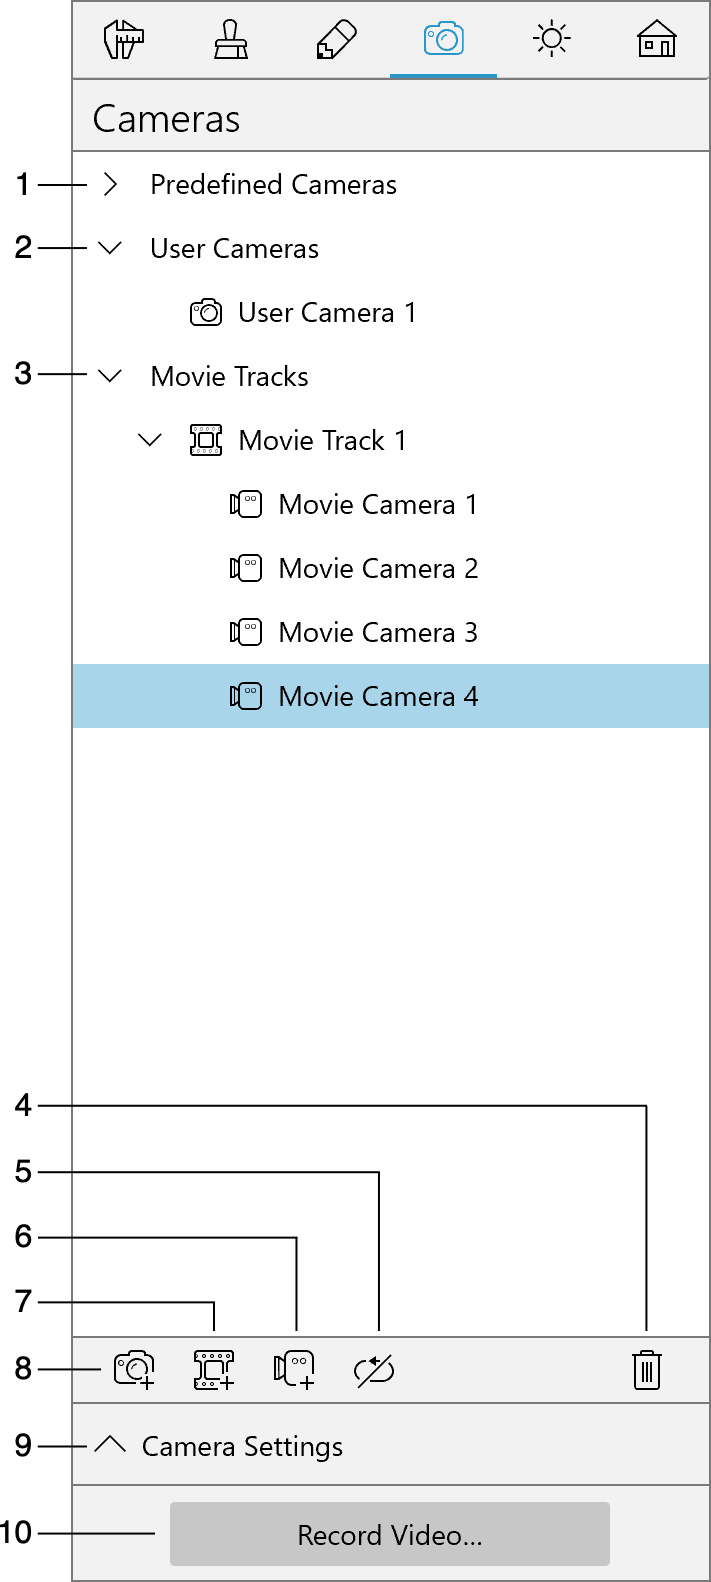
1 – The list of predefined cameras. Their quantity, location and orientation cannot be changed.
2 – The list of the user's cameras.
3 – The list of movie tracks. Movie tracks consist of movie cameras. For more information, see Creating a Movie Track.
4 – Delete a selected user camera, movie track or movie camera. It is not available for predefined cameras.
5 – Loop a movie track in order to make its start and end points be located at the same place. This option is used to loop videos.
6 – Add a movie camera to the end of a selected movie track. The added movie camera will display the same view that you can see in the 3D view. The button is activated when the 3D view is visible. This button will create a new movie track if none of them is currently selected. The first camera of the track will display the same view that you can see in the 3D view.
7 - Create a new movie track.
8 – Add a new camera. The location and orientation of the added camera will correspond to the current 3D view.
9 – Show or hide the camera properties.
10 – Export an image or create a video. The function of this button depends on what is selected in the list. Export 3D View… exports a picture from the current 3D view or from a selected camera. The same can be done by choosing Menu > Export > Export 3D View… The Record Video… button lets you create a video from a selected movie track.
11 - Export a 3D view using Cycles.
User cameras and movie tracks have default names. To change the name, right-click on one in the Inspector and select Rename.
Camera Properties
Camera and movie camera properties are located below the list of cameras in the Inspector.
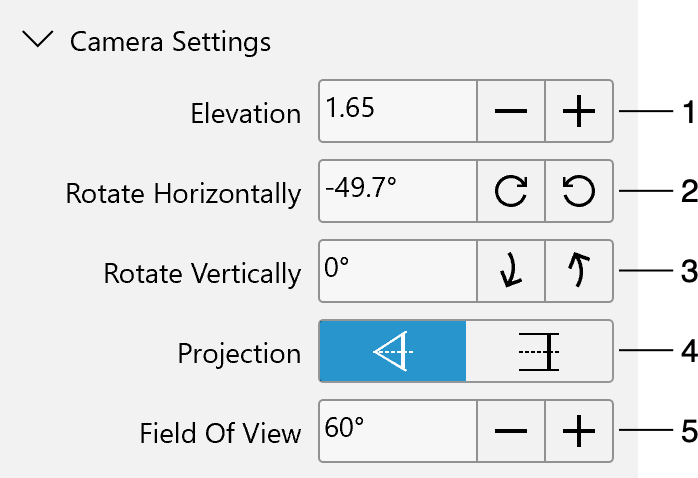
1 – Camera's elevation in relation to the ground level or to the current floor level.
2 – Horizontal angle of a camera.
3 – Vertical angle of a camera.
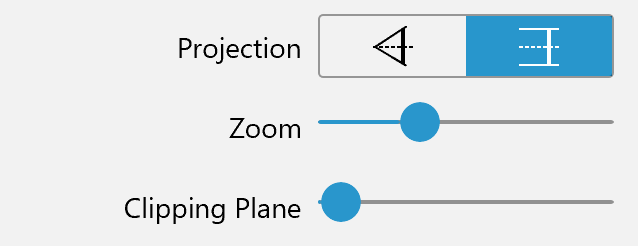
4 – Choose between the Perspective and Orthographic views. The Perspective view shows a regular picture in the 3D view. It lets you adjust the camera's field of view. The Orthographic view is designed to create the top or side view without the effect of perspective. The Orthographic top view resembles the floor plan. (Pro edition only)
5 – The vertical field of view of a camera. It works as if you zoomed in or out using a regular photo camera. Wider angles may create distortions near the picture sides. (Pro edition only)
When the Orthographic view is selected, you can adjust the Zoom and Clipping Plane parameters. Zoom lets you zoom in or out. Clipping Plane moves the section plane to or from the point of view. Using this parameter, you can show the top view of the ground floor while your house has the first floor or roof. (Pro edition only)