How to Make a Picture With No Frame in Live Home 3D Pro
Users with the purchased Pro features have access to the simplest ways of adding a picture (or a painting) on a wall. If you haven’t yet unlocked the Pro features, scroll down to the next section of the article called How to Make a Picture With No Frame in Live Home 3D.
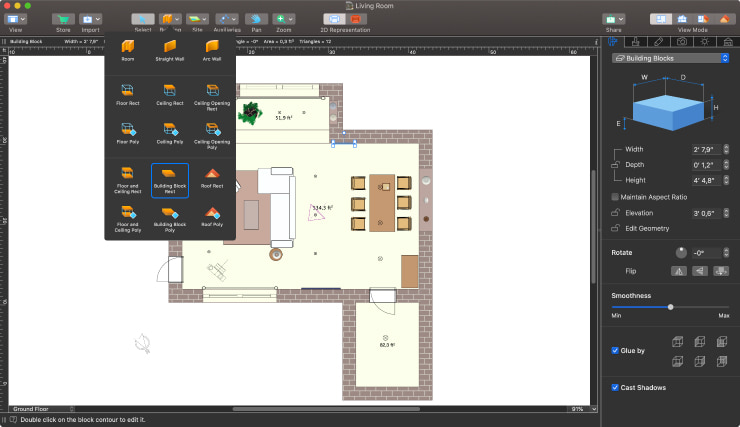
To start the process, switch to the 2D plan and choose the Building Block Rect tool. Using this tool, draw a picture on the wall with the necessary dimensions. Note that you can always adjust them (width, depth and height), either on the 2D plan or in the Object Properties of the Inspector. Lift the picture higher on the wall by changing the Elevation parameter in the Object Properties of the Inspector.
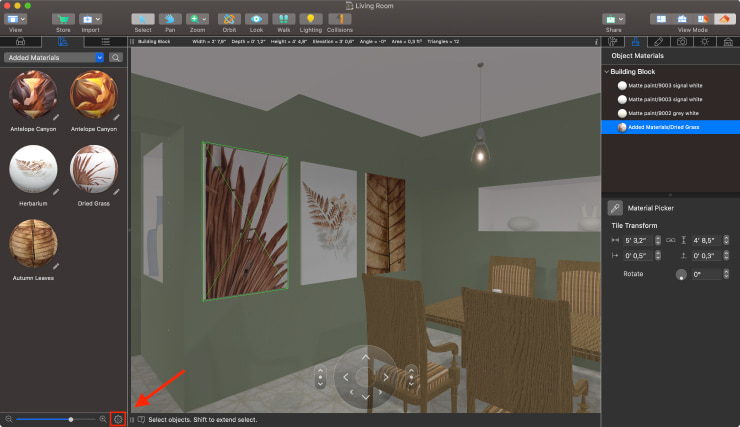
Now, all that is left is to apply the custom material to a picture (or a painting) to the base that you have just created. Switch to the 3D view mode to upload the picture from your device into Live Home 3D by clicking on the Settings icon at the bottom of the Material Library.
Check the article on how to import a material in which we described the whole process in detail. Drag and drop the added material to the base for the picture that you created using the Building Block Rect tool.
Use the Tile Transform tool to adjust the scale, size and position of the image on the picture.
How to Make a Picture With No Frame in Live Home 3D
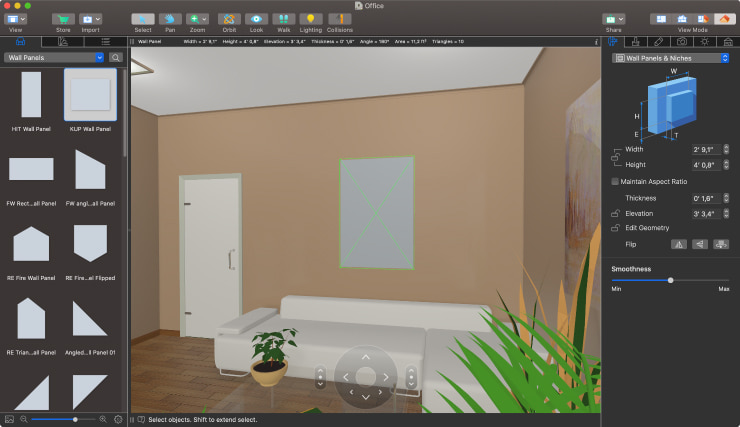
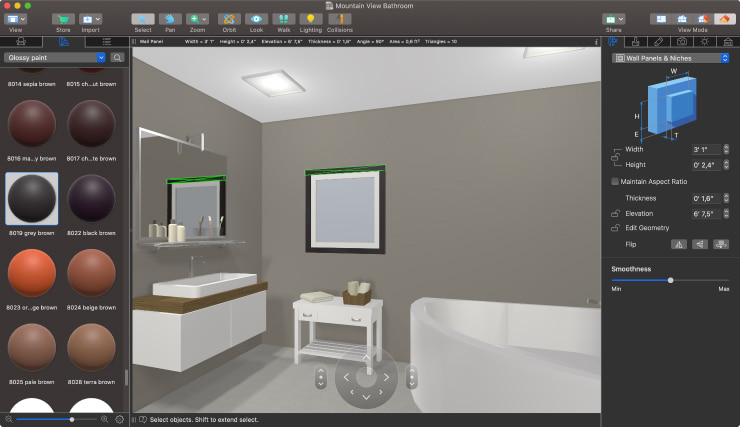
Users of the Free version of the app or those who own Standard features can design a picture with the help of the Wall Panels or Shapes. In our example, we will use Wall Panels.
Switch to the 3D view and open the Wall Panels category in the Object Library. Choose any suitable panel and place it on the wall by dragging and dropping the wall panel. In the Object Properties tab of the Inspector, adjust the width, height, thickness and elevation of the wall panel to achieve the desired dimensions.
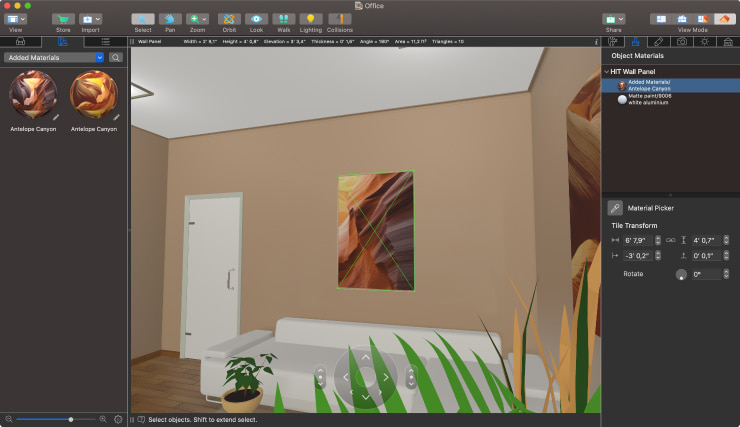
Now, import a material with the necessary picture (or a painting) from your device into Live Home 3D by clicking on the Settings icon at the bottom of the Material Library. Drag and drop the added material from the Material Library to the structure you created using the wall panel. You can look up the details of this process in the article on how to import a material into Live Home 3D. Use the Tile Transform tool to adjust the scale, size and position of the image on the picture.
How to Make a Framed Picture in Live Home 3D (Free, Standard and Pro)
Using Wall Panels is the most convenient way of creating a framed picture on the wall. Although this method is available for every Live Home 3D user, those who own Pro features have access to the Elevation view, which allows users to look at a house from each side. This feature is especially helpful when you need to insert panels, niches or openings into a wall. If you don’t have Pro Features yet, you can repeat the whole process described below in the 3D view.
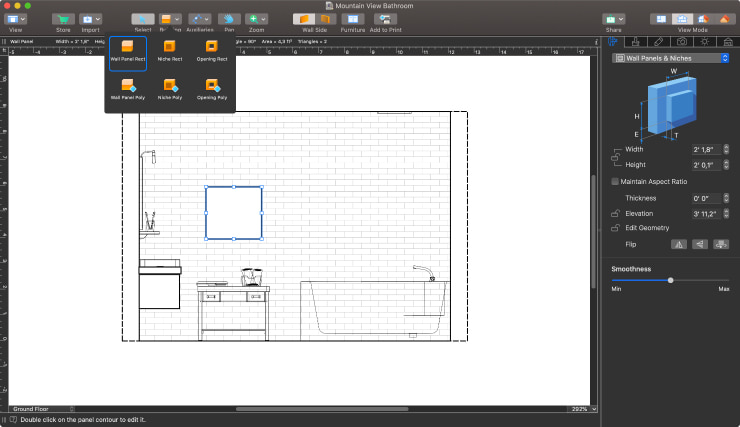
To see a wall in the Elevation view, you first need to select it on the 2D plan. The first click on the wall selects the whole room, while the second one selects the necessary wall. Now tap on the Elevation button and then switch from the outer side of the wall to the inner one, if needed, using the buttons on the panel above.
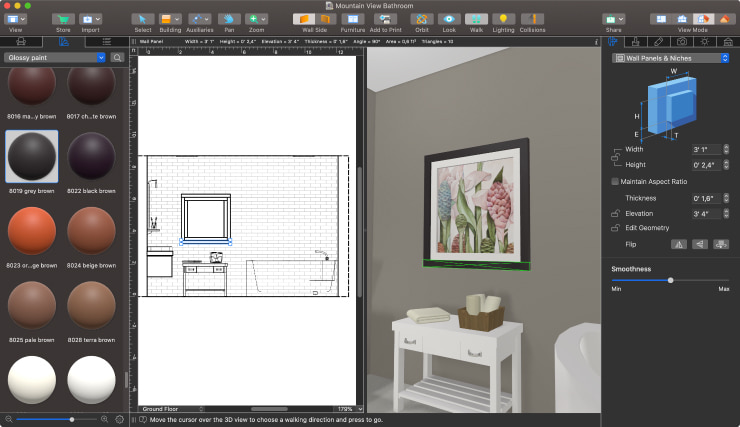
Next, choose the Wall Panel Rect tool and start drawing a square for the picture on the wall. Adjust the width, height and elevation, if necessary, to get the right dimensions and placement.
Users of the Free version of the app or those who own Standard features can use the wall panels available in the built-in library and adjust the dimensions in the Object properties tab of the Inspector.
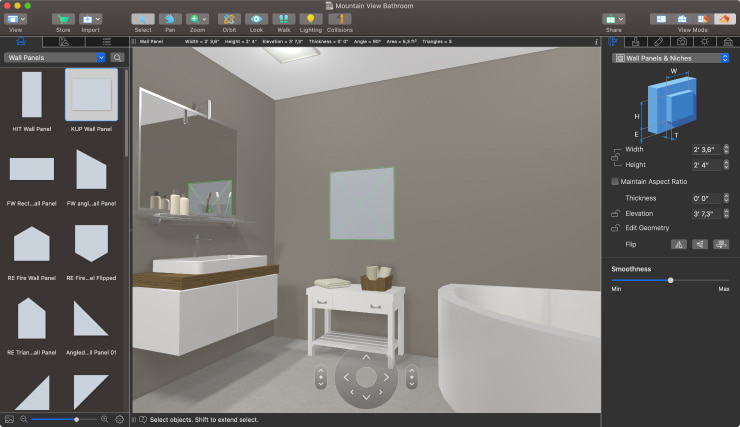
Now draw the frame using the same Wall Panel Rect tool or use the wall panel from the Object Library, if you are working in 3D view mode. You can copy and paste some of the frame panels (note that they cannot be rotated), so you don’t have to draw them again from scratch. Adjust the Thickness of the frame’s parts to achieve a realistic look. In our example, we used 0.8 inches for passepartout (the white space between the picture and the frame) and 1.6 inches for the frame.
Finally, switch to the 3D view and apply the necessary materials to the picture itself, the passepartout and the frame by dragging and dropping the materials from the Material Library. Look up the details of this process in our article on how to import a material into Live Home 3D. You can use the Tile Transform tool to adjust the scale, size and position of the image on the picture.