What Is the Purpose of a Raised Platform?
Modern interior design trends prioritize functionality, so, apart from the decorative purpose, a raised platform must serve a certain practical function.
It Visually Adjusts the Proportions of the Space
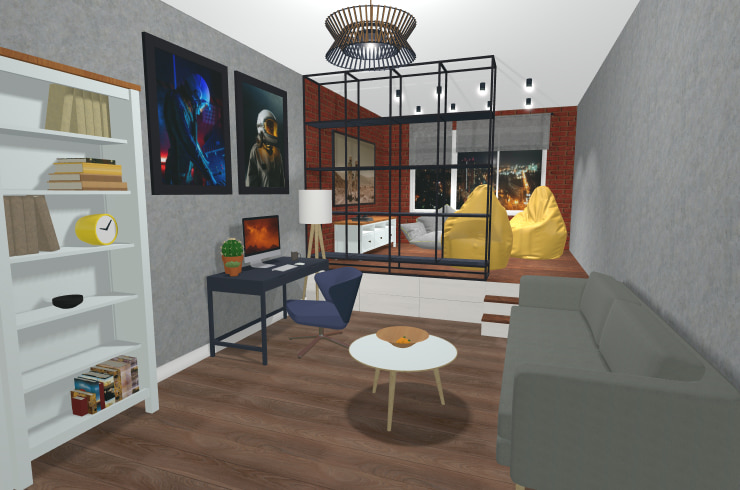
Zoning the space is one of the main functions of the raised platform. Another benefit of such a structure is that it can visually modify the proportions of the living area. Raised platforms can make a ceiling that is too high appear lower or make a narrow room seem a little more spacious.
It Can Double as Storage
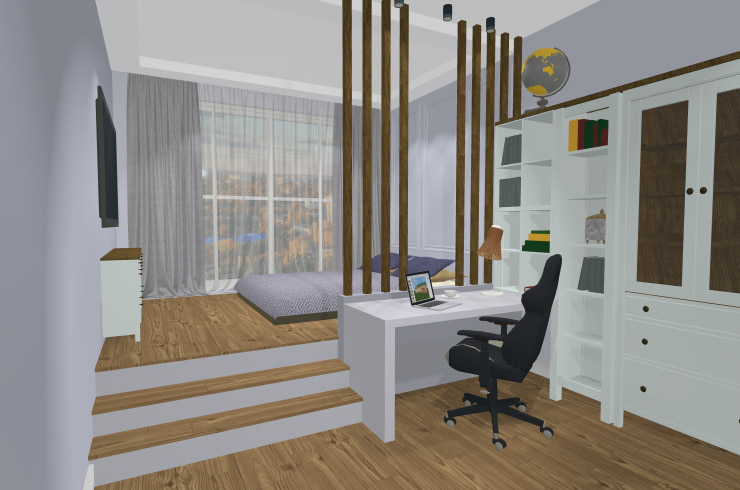
Raised platforms with installed drawers can serve as a means of storage. You can use it instead of a closet or a dresser, if you are short on square footage. A bed, a working/studying area or a lounge can be situated on top of such a structure, which makes it a great solution for a tiny apartment.
It Can Help Conceal the Plumbing Structures
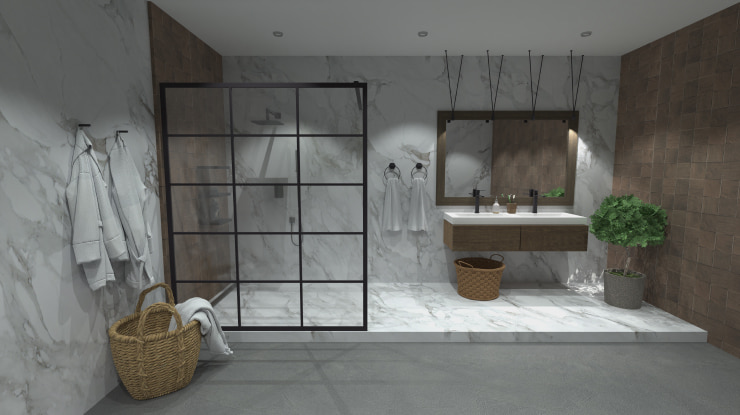
Another function of a raised platform is purely technical. It is a decorative way of concealing a sewer system. This solution is often seen in bathrooms, when a shower drain needs to be installed, but the screed is not high enough for hiding all of the plumbing structures inside the floor and getting the necessary slope for the trouble-free sewerage.
It Creates a New Functional Area in Your Apartment
Last, but not least, a raised platform can serve as a separate functional zone. For example, it can perform the function of a pull-out bed (the main one or the one for the guests) or a retractable table if you need a place for working or studying.
Now that we have discussed the functions of such a platform, let’s find out how to make a raised platform in Live Home 3D.
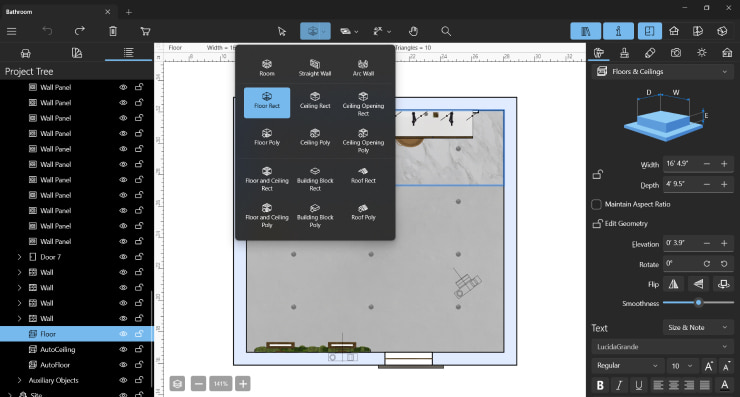
Use Custom Floor Tools
To start working using this method, tap on the Building icon and choose one of the following tools: Floor Rect or Floor Poly. Next, draw a rectangle or any other shape that you’ve chosen for the raised platform. Note that you can edit contour anytime—simply drag the control points in the necessary directions or choose Edit Contour in the context menu. You can also click on the contour of the drawn floor in order to quickly switch to the edit mode. Add or remove as many points as needed to create the necessary shape.
Some segments of the floor can be made curved. If you want to create a structure with curved elements, you can use the Smoothness parameter in the Object Properties tab of the Inspector. By amplifying or reducing smoothness, you will achieve either a slick or more angular surface of the curved elements.
Once you have finished working with the contour of the custom floor, you can set the necessary height for it. By default, such a structure has a 0 height, which means that it is on the same level with the floor of the room. To change that, set the new Elevation parameter in the Object Properties tab of the Inspector. Note that Elevation can be changed to below 0, as well. This is used for making a drain, a tray or any other floor cavity.
If you decide to move the raised platform to another wall, the Rotate parameter and Flip buttons in the Object Properties tab of the Inspector can come in handy. Finally, choose and apply a material for the created structure.
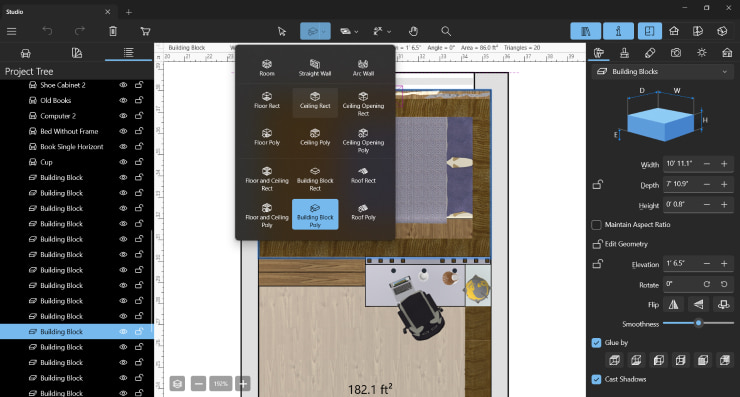
Use Building Block—the Most Versatile Tool in Live Home 3D
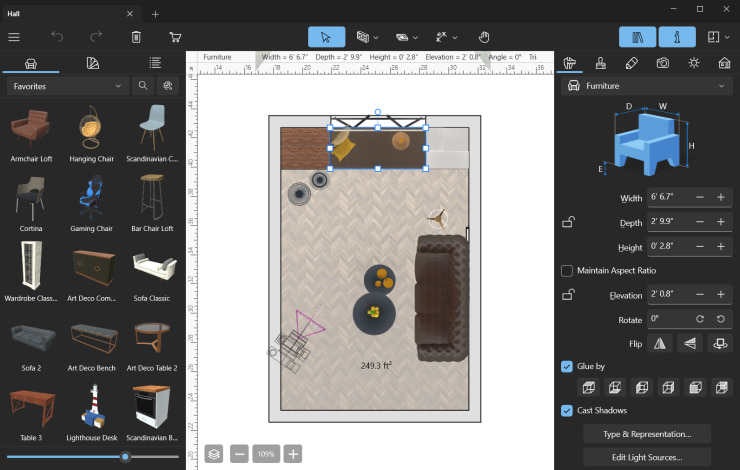
To create a raised platform using this method, tap on the Building icon and choose one of the following tools: the Building Block Rect or the Building Block Poly. The working principle of this tool is similar to one of the Custom Floor; however, the Building Block tool is multifunctional—besides a raised platform, we used this tool to build the stairs, veneers, racks and a work desk for our sample project.
Once you have chosen the tool, draw the contour of the raised platform. Use the Building Block Rect for simple rectangular shapes and the Building Block Poly for more complex polygonal shapes. The size of the contour can be changed with the help of the control points or by changing the dimensional parameters in the Object Properties tab of the Inspector.
To transform the rectangular shape into a more complex one, choose Edit Contour in the context menu to make the contour editable. Add or remove the control points using the corresponding commands in the Context menu.
Now you can set the desired height value in the Object Properties tab of the Inspector. Unlike the Custom Floor, Building Block can be assigned a certain height parameter in space—Elevation. In our sample project, this function was used for creating veneers, racks and the table top of the work desk.
The final touch is applying a material to the Building Block. You can choose one from the built-in library or create a new material. To open the Material Editor, open the context menu in the Materials section of the library and choose New Material (for a brand new material) or choose New From Selected (if you are going to create a new material on the base of the existing one).
What if you need more materials in the library, but you don’t want to create them yourself? For this purpose, Live Home 3D offers more than 600 additional materials that you can purchase in the app’s embedded store.
Use Shapes
This method is the most accessible. Go to the Shapes section of the library and choose any of the suitable shapes. Gather and connect the structures just as if you were making a tower from the toy cubes. Change the size of these objects, if needed, using the control points or in the Object Properties tab of the Inspector.
If you need to change the shape’s position in the space, open the Context menu and choose Type & Representation. In the pop-up window, you can rotate the object along any of the coordinate axes, reflect the object, set a new starting point or a new type of an object in the library.
Just like with the Building Blocks, you can set the necessary Elevation for shapes, rotate and reflect them and also assign them light sources, if needed.
Let’s say you want to design a raised platform with illumination. To assign a light source to an object, open the Context menu and choose Edit Light Source. Here you can add and remove light sources and adjust their position, direction and intensity.

Don’t forget to apply a material for the shapes. Mix and match materials for different surfaces. In our sample project, we used shapes to make the raised platform, the front of its storage drawers and the steps and veneers.
Use Furniture and Combine Various Tools
Using furniture might not be the most obvious method of creating a raised platform, and even though such a structure only conditionally can be called a platform, this solution is the most functional.
If you need to create a raised platform that will serve as additional storage, but you don’t want to work on every detail manually, this method can be a quick solution.
Choose any object from the built-in library and drag it onto your project—either on the 2D plan or the 3D view. Set the necessary dimensions (and Elevation, if needed) using the control points or in the Inspector. If you haven’t found a suitable item in the Object library, you can check out our additional furniture packages: Scandinavian or Asian style. Alternatively, you can download any object from Trimble 3D Warehouse™ or import 3D objects downloaded from other third-party services.
To make the movement of the objects on the 2D and 3D plans easier, Live Home 3D provides snap functionality. You can glue your object to other surfaces by Bottom, Top and Sides. The corresponding buttons can be found in the Object Properties tab of the Inspector. The guides on the 2D plan are also designed to make positioning of an object more convenient. These guides are enabled by default and show up automatically when the object is being moved on the 2D plan. You can disable the guides or adjust the sensitivity of a snap in the Main Menu: go to Live Home 3D > Preferences > Miscellaneous > Snap sensitivity on the 2D plan.
Finally, choose and apply a material for the object in the Object Materials tab of the Inspector. The basic RAL color palette is available in the Glossy Paints and Matte Paints sections. It’s a good opportunity to try out the colors and textures of the paints, wallpapers, floor coverings and fabrics in Live Home 3D before purchasing them in a store.
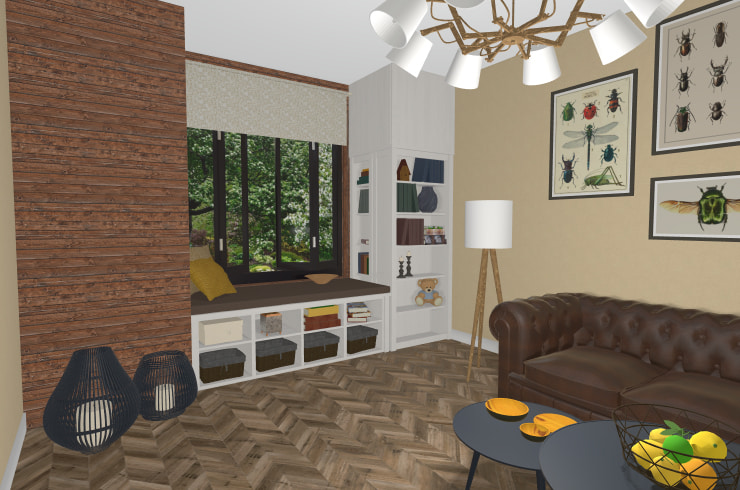
Optionally, you can enhance your design by creating a beautiful view from the window by adding a picture of a cityscape or natural scenery, or with different plants. Many species are available in the built-in library, but you can get even more with our additional plants pack.
Now that you have learned about all the ways of creating a raised platform in Live Home 3D, you can easily incorporate this structure in your future designs!