The Armchair

To begin, it is worth searching through the built-in library of models. If you are lucky, the needed models will be found in a couple of minutes. You can use the search tool, but you might feel that it’s better to look through the library by yourself. The Window > Object Library menu opens the library. Choose the Armchairs category from the drop-down list. There are two handles near the top and bottom of the library on the right side with three vertical lines as an icon “|||”. Drag the handle all the way to the right in order to show more thumbnails at the same time. Some categories in the library (like Tables or Kitchens) have a pretty large collection of 3D models. If you work on Windows, click the Library button near the top left corner of the program window, and choose the object library right below. For iOS/iPadOS and Android users, click the Library button near the top right corner, next to the “i” button, and choose Objects.
While looking through the models, try to abstain from looking at colors. At this stage, only the shape is important. The color (also called material) can be chosen later.
To get a better view of the model, right-click on its thumbnail and select Show 3D Preview. You can rotate the model in the preview box by dragging it with the mouse. To preview another model, click on its thumbnail without closing the preview box. The 3D preview is only available in Live Home 3D for Mac.
If you feel that some model could pass your project, but you cannot decide right now, drag the model from the library into the project. This will help you not to lose the found models. Then continue your search. When you have run through all of the library items, return to your project and revise what has been found. You will probably have found several variants to choose from. Models you cast away can be simply removed from your project. A more professional approach is to use the Favorites or a custom category as a storage for objects you might use in the project. You can right-click on an object in the library and select Add To Favorites.
In case nothing from the library catches your eye, it’s time to check alternatives. If you are not a guru in 3D modeling, or if you don’t have the time or proper software for this, search for ready-made models on the internet.
Live Home 3D can import from various formats including 3DS, Trimble SketchUp and Collada. 3DS models are created in Autodesk® 3DS Max® software. This type of model is usually commercial and made by professionals. SketchUp (*.skp) models are created in the Trimble SketchUp software.
Trimble 3D Warehouse™ is an online collection of 3D models created by amateur and professional designers. Live Home 3D can import 3D objects from this collection directly into your project. You can also download a model using a regular web browser and then import it to your project. Models in Trimble 3D Warehouse™ are usually stored in several formats you can choose from. Users of Live Home 3D for Mac can import objects in SketchUp or Collada formats. Live Home 3D for Windows, Android and iOS/iPadOS supports Collada and Google Earth KMZ.
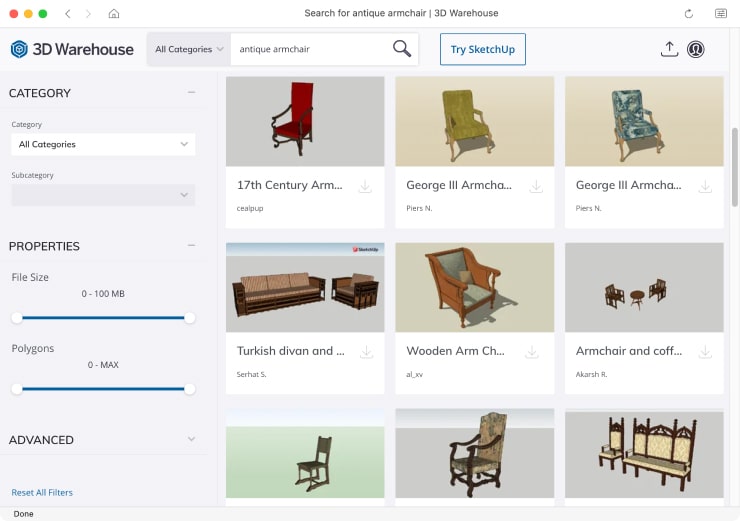
Let’s see how the direct import works. To access the 3D model collection, you should bring up the 3D Warehouse browser. On Mac, select Window > Trimble 3D Warehouse™ in the menu. On Windows, Android, iOS and iPadOS open the menu and choose Import > From Trimble 3D Warehouse™. The 3D Warehouse window that will pop up is a simplified web browser that displays the 3D Warehouse website. Its toolbar has customary navigation buttons to go to the previous, next or home page (of the 3D Warehouse, of course).
Search for 3D models. For example, type “armchair” with some description into the search box and click Search. Once you have found one you like, click on its thumbnail to open the model’s page. There will be a bigger picture of the 3D model and some technical details. Click the Download button and then click on one of the file formats to start downloading. During the download process, the object may be shown in the project as a dummy object (cube). Just wait until it is downloaded completely.
A 3D model that is imported directly will be saved in the project. You can add it to the internal object library to use in other projects. To do this, open an appropriate object category in the library using the drop-down menu. Then right-click on the object and select Add to Library in the context menu. If you are going to import a lot of 3D objects, it may be useful to create a new category for them. In this way, objects you have selected for your project will not get mixed up with those that come with the program.
You can also check out the built-in store. It offers several sets of 3D objects you can purchase. To open the store on Mac, select Live Home 3D > Store in the main menu. On Windows, iOS or iPadOS, Android tap on the Menu button and choose Store.
Changing the materials (colors) of an object is discussed below.
The Yellow Wallpaper
The built-in library of materials in Live Home 3D lets you change the object’s color or material. To access the library, choose Window > Material Library from the menu on Mac, or click the Library button and select the section with materials on Windows, Android, iOS and iPadOS. The number of glossy and matte paint colors is bound to satisfy your needs. These materials don’t have textures. If you want, you can add even more colors.
Another matter is textured materials. No library can cover the whole diversity of textures. Multiply this by the variety of colors. The collection of textured materials in Live Home 3D is good enough for most common tasks. Before you decide that none of the supplied materials can be used for your project, browse the library of materials once more. The material editor in Live Home 3D Pro lets you create a copy of the existing material and edit it. You can change colors (not radically), rotate and scale the texture. The picture below lets you compare an original material from the standard library with its copy where the texture size and color were changed.

The Standard edition of Live Home 3D doesn’t have the material editor, unlike the Pro edition. So, editing colors in the Standard edition is not possible. But, you still can adjust the texture size using the Tile Transform tool in the Inspector. Note that it can modify materials already applied to objects, and only certain types of objects are supported (e.g. walls or floors).
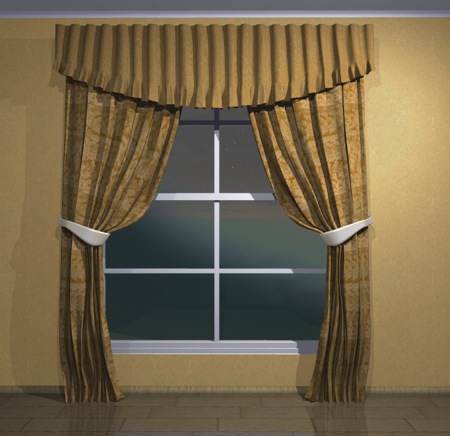
Let’s imagine that you are designing a room in yellow colors, and you have found a nice 3D model of curtains.
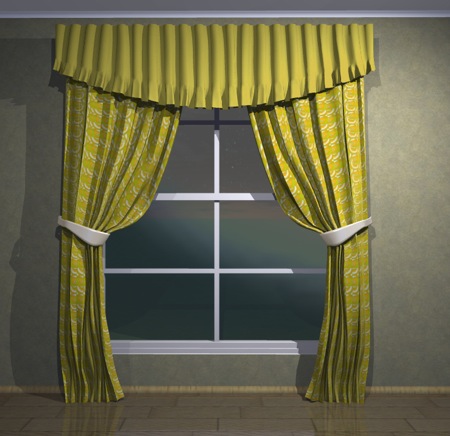
The next step is to change the curtain’s fabric for a different color and pattern. Suppose that you chose the “65 Gold leaves” material in the Fabric category. Now you need to apply the new material to the object. So, just drag and drop the material from the library onto the object.
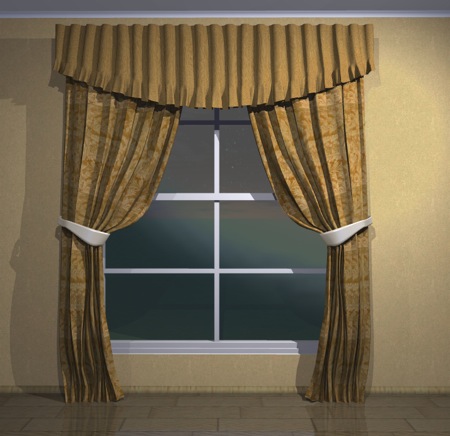
Now, a different task. The texture of the wallpaper is alright, but the color is too dark in shadowed areas. Let’s make it brighter. To do this, we’ll use the material editor. Remember that it is possible only in the Pro edition. The program doesn’t allow us to edit the supplied materials in order to keep the standard library intact. We have to create a copy of our material to adjust its colors. So, right-click on the material in the library and choose New From Selected. The program will create a copy of the material and open it in the material editor. The Base Color was made darker.
The Ambient Color was changed from gray to yellow. The Diffuse Color became darker. The Specular Color was turned from black to dark gray.
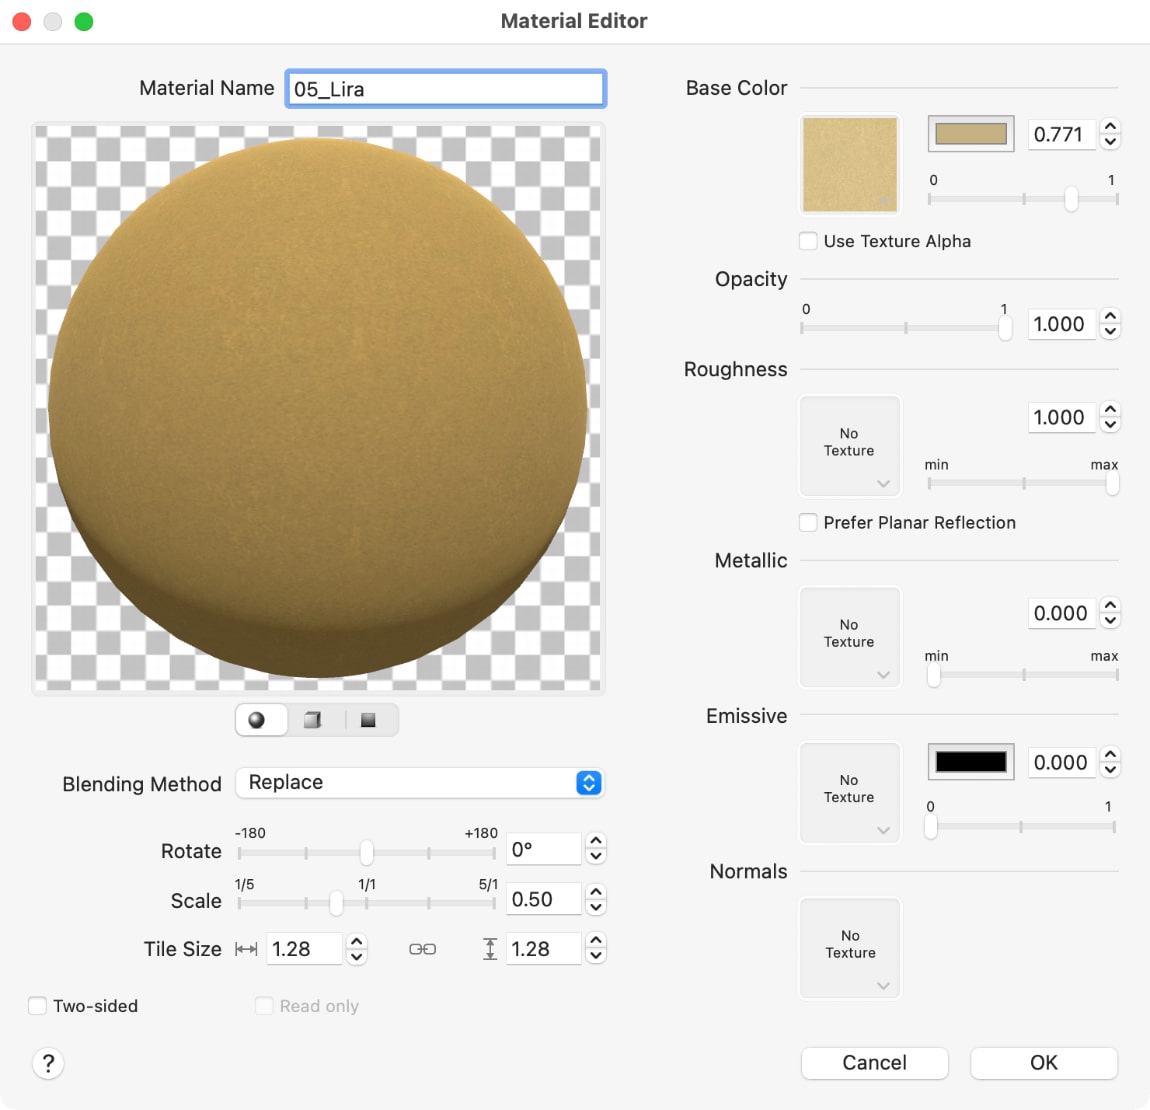
If it’s necessary to scale the texture or even rotate it, you can use the Scale and Rotate sliders in the editor.
The creation of a new material may consist of several iterations. You change the settings of the material, check how it looks in the project, and, if necessary, return to the material editor. This happens because the lighting in your project may differ from the one in the material editor.
You are not limited to the materials you see in the library. Live Home 3D can import images for using them as textures for your own materials. You may also get more materials from the built-in store. Just select Live Home 3D > Store in the main menu on Mac. On Windows, iOS or iPadOS, Android tap on the Menu button and choose Store.
Revised: February 2025