
Light Source Editor
We will start by exploring the Light Source Editor. This advanced functionality is available for users with the Pro features unlocked. If you haven’t unlocked the Pro features yet, visit the built-in store inside the app. In addition to the lifetime purchase, we have affordable subscription options that you may find suitable.
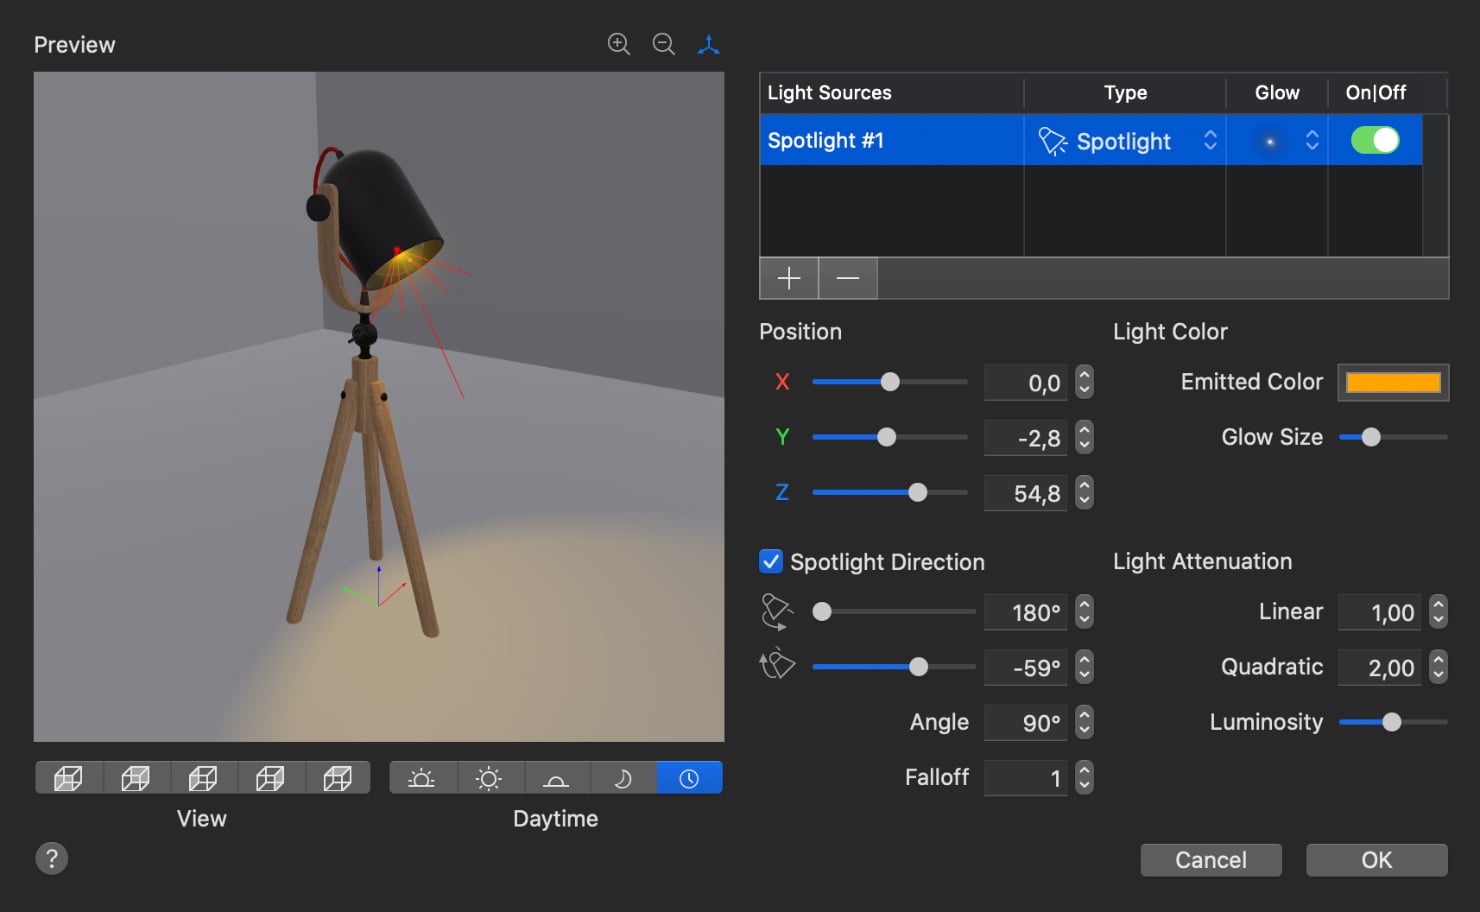
To open the window of the Light Source Editor, choose an object that you want to serve as a light source, or an object that already performs a function of a light source, e.g., a lamp. To see or adjust the settings of an existing or a future light source, right click on this object (double tap on the iPhone and iPad version), and choose the Edit Light Source option in the context menu.
Point Light and Spotlight
The Light Source Editor has two types of light sources—Point Light and Spotlight. By default, every new light source you create has a Point Light type, which stands for a light source with rays of light shining in all directions. It is great for candles, lights that are not covered with plafonds or lampshades, lamps with transparent plafonds and decorative light bulbs.

The Spotlight type, on the other hand, shines only in one direction, which you set using controls. It has an illumination angle and an attenuation coefficient (falloff). You can change the type of a light source by tapping on its name in the Type field of the Light Source Editor window or by checking the Spotlight Direction box.
By default, the Falloff value is 1. We recommend using this value, but you can change it as you see fit. Below you can see a comparison of spotlights with two different attenuation settings.
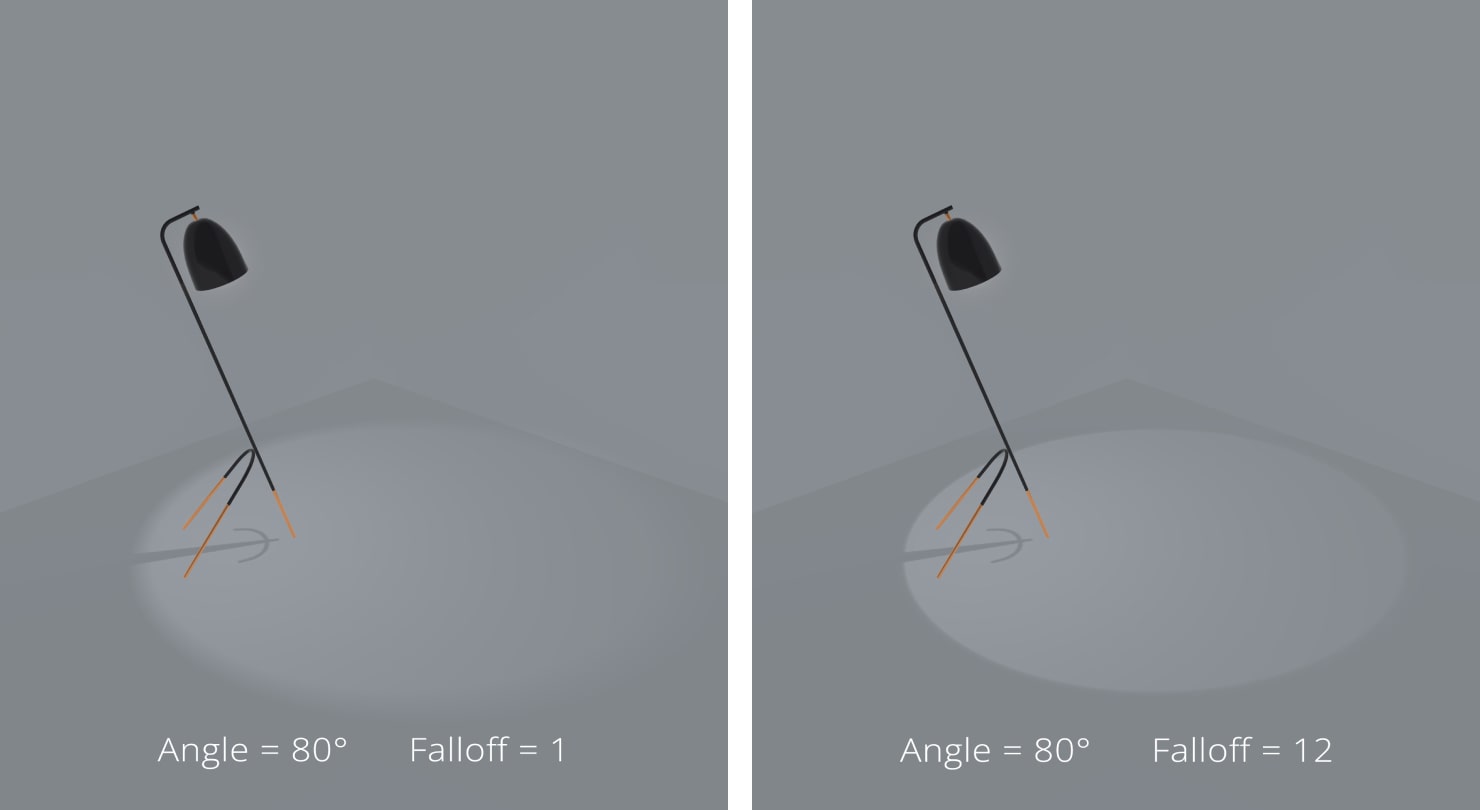
The attenuation is also influenced by the illumination angle. Usually, the value of this parameter depends on how much the light source is covered with a non-transparent plafond or a lampshade. We recommend experimenting with different illumination angles and attenuation coefficients to find the best suitable combination for your particular needs.
Light Source Editor Settings
The rest of the Light Source Editor parameters can be applied to both Spotlight and Point Light types. You can choose the Glow Type or completely ignore this parameter, if that’s what is convenient for your design. The X, Y, Z controls help you determine the position of the light source in space (it also determines the tilt for a Spotlight).
In an adjacent column, you can set the Glow Size (if you have this parameter turned on) and the Emitted Color. In the window that pops up after you tap on the Emitted Color option, you can choose a color from the RGB model to create colored lighting. Note that it is possible to use different settings for each light source within one object.
With the help of the Emitted Color parameter, you can also simulate the color temperature of the light source (calculated in degrees Kelvin). For example, choose the light orange shade if you want to simulate the lamp with 3000K. It is the kind of light that a candle or the Edison light bulb has, the so-called “warm white” light. Alternatively, you can leave the white color, set by default, which corresponds to the temperature of 5000K (daylight with neutral color).
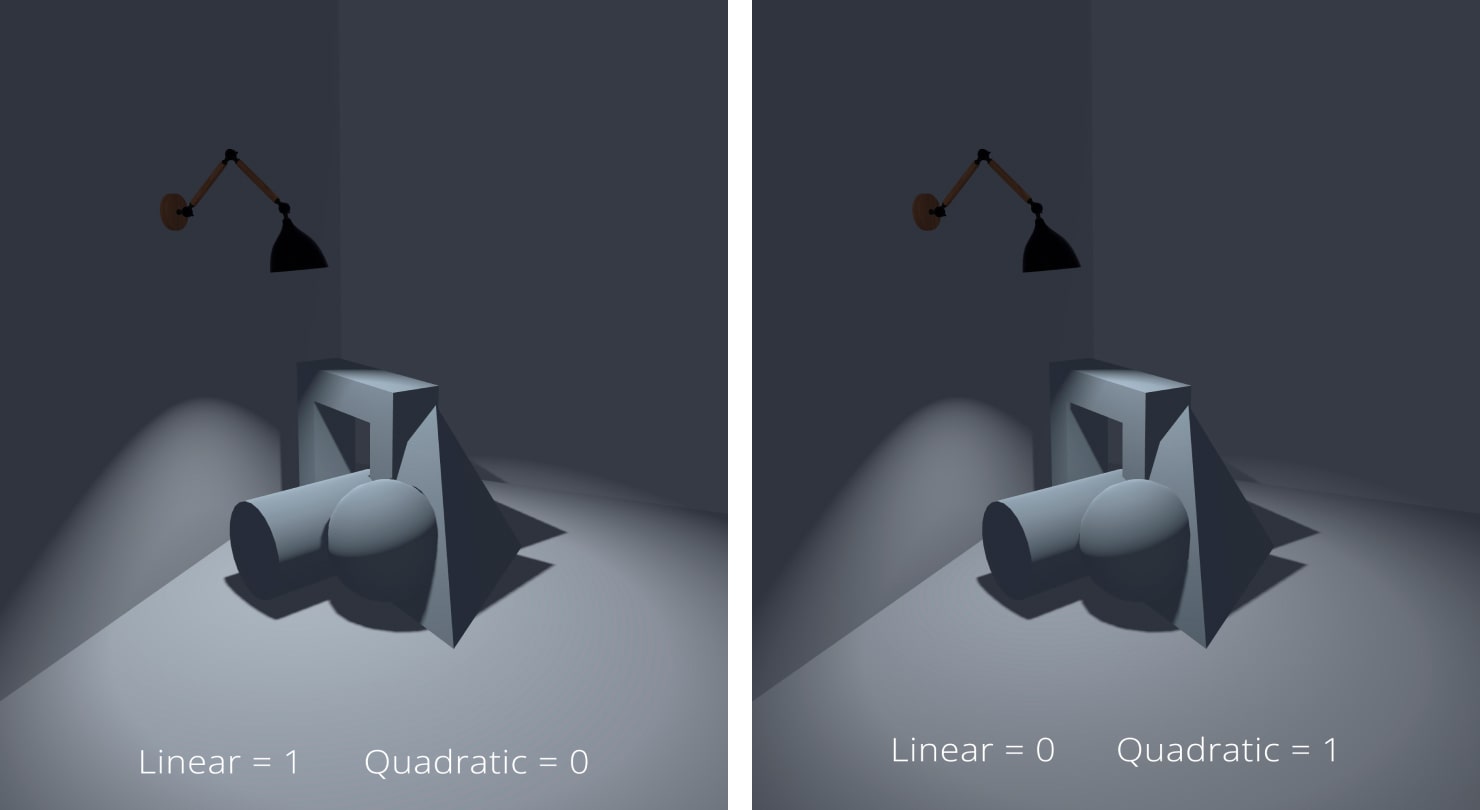
The Light Attenuation settings determine how fast the light disappears depending on the distance to the light source.
In case of a Linear attenuation, the intensity of illumination decreases in proportion to the distance from the light source to a point in the 3D space. In case of a Quadratic attenuation, it decreases in proportion to the square of the distance. The Quadratic attenuation is suitable for photometric light sources, which are used in cases where the special effects are required to light a scene.
The Luminosity parameter determines the intensity of light. It can be adjusted in both the Light Editor and in the Light Properties tab of the Inspector.
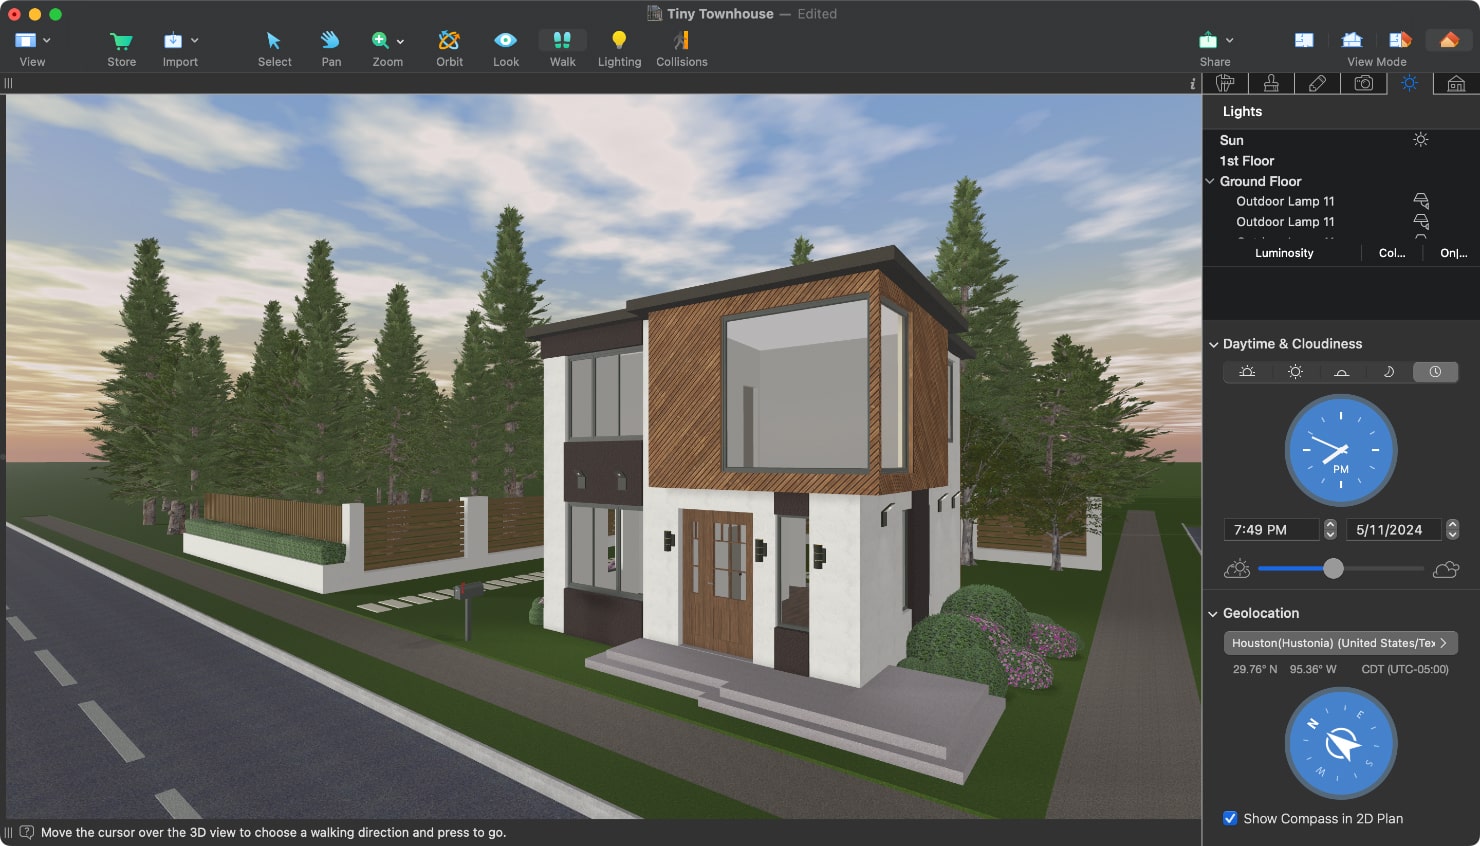
The Light Properties Tab
Besides adjusting the luminosity, you can turn the light sources on and off in the Light Properties tab. You can do it by either working with each light source separately or by turning them all on or off at once.
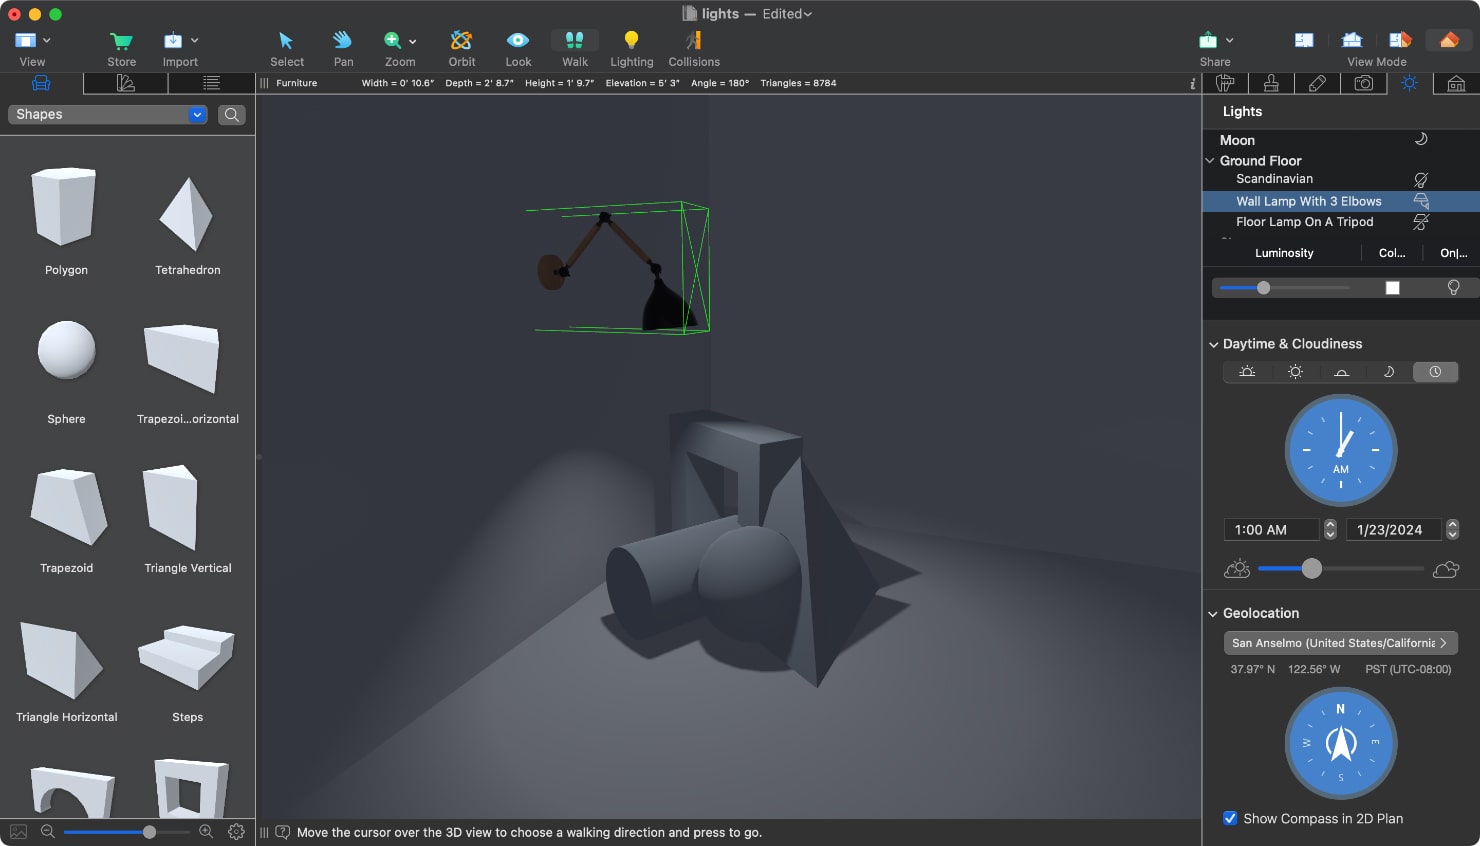
In the Light Properties tab, you will find the necessary settings for illuminating the outdoor scene. These parameters are the most effective for working with the exterior. You can set the position of the sun and moon according to the time of the day and adjust the cloudiness. Additionally, in this tab, you can set the geographic location of the object and the orientation to the cardinal for the most realistic results. These settings help you recreate the environment around a real house with a high level of accuracy.
LED Stripes, LED Panels and Self-Luminous Materials
One of the most frequent user questions is how to create LED strip lights and LED panels in Live Home 3D. The actual LED strip has a high number of light points that would consume an enormous number of your device’s resources in the 3D-modeling scene. Users with unlocked Pro features can simulate an LED strip or panel using the Material Editor. In the advanced version of the Material Editor, you can find the Emissive parameter, which allows you to control the material’s self-luminosity.
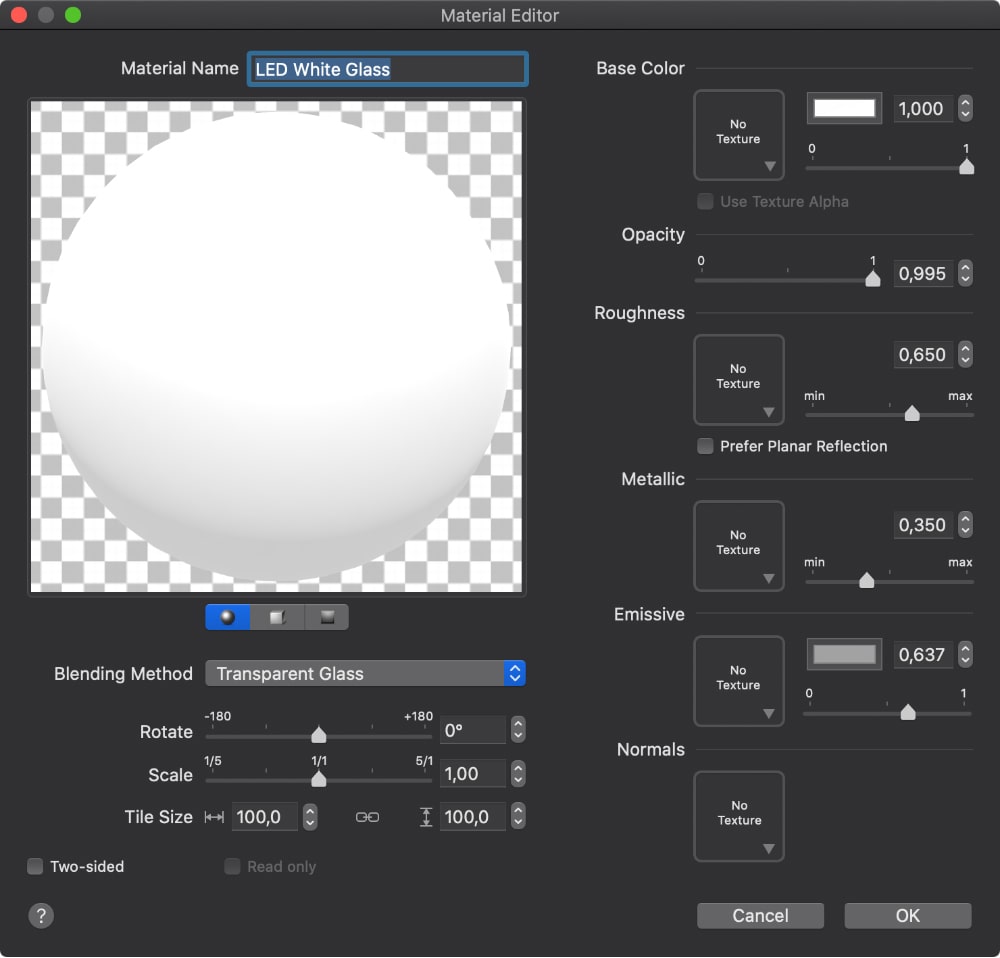
You can work with the Emissive in the same manner you work with the Luminosity parameter. By default, the Base Color in the Material Editor is white. If you choose to work with the default color, after adjusting the Emissive parameter, the material will exude the daylight white light. By changing the color in the Base Color window, you can simulate the colored RGB strips and lamps. Moreover, if you add the basic texture, you will get a glowing image that can serve as a screen for different devices like notebooks, smartphones, TVs, etc.
However, note that the glow effect is not visible in the real-time rendering. To improve the performance of your device, the glow effect is only visible after you process the scene with the built-in AMD Radeon™ ProRender (available in Live Home 3D for Mac) or with the Cycles render (available for Mac and Windows devices).
Radeon ProRender and Cycles
Live Home 3D for Mac provides the ability to create AMD Radeon™ ProRender and Cycles. But what lighting settings should be used for rendering? The lighting settings used for real-time rendering may not be suitable for rendering with Cycles or AMD Radeon™ ProRender. In the rendering settings window, you will find the parameter called Environment Light Intensity. Its value is 1, and it is the optimal parameter for a clear sunny day when you render the exterior scene.
We also don’t recommend rendering the scene on high settings straight away. The illumination parameters that are perfectly suitable for the real-time rendering can create an effect of an overexposed scene, or, on the contrary, the scene would significantly lack brightness after being processed in detail with the RPR or with Cycles.
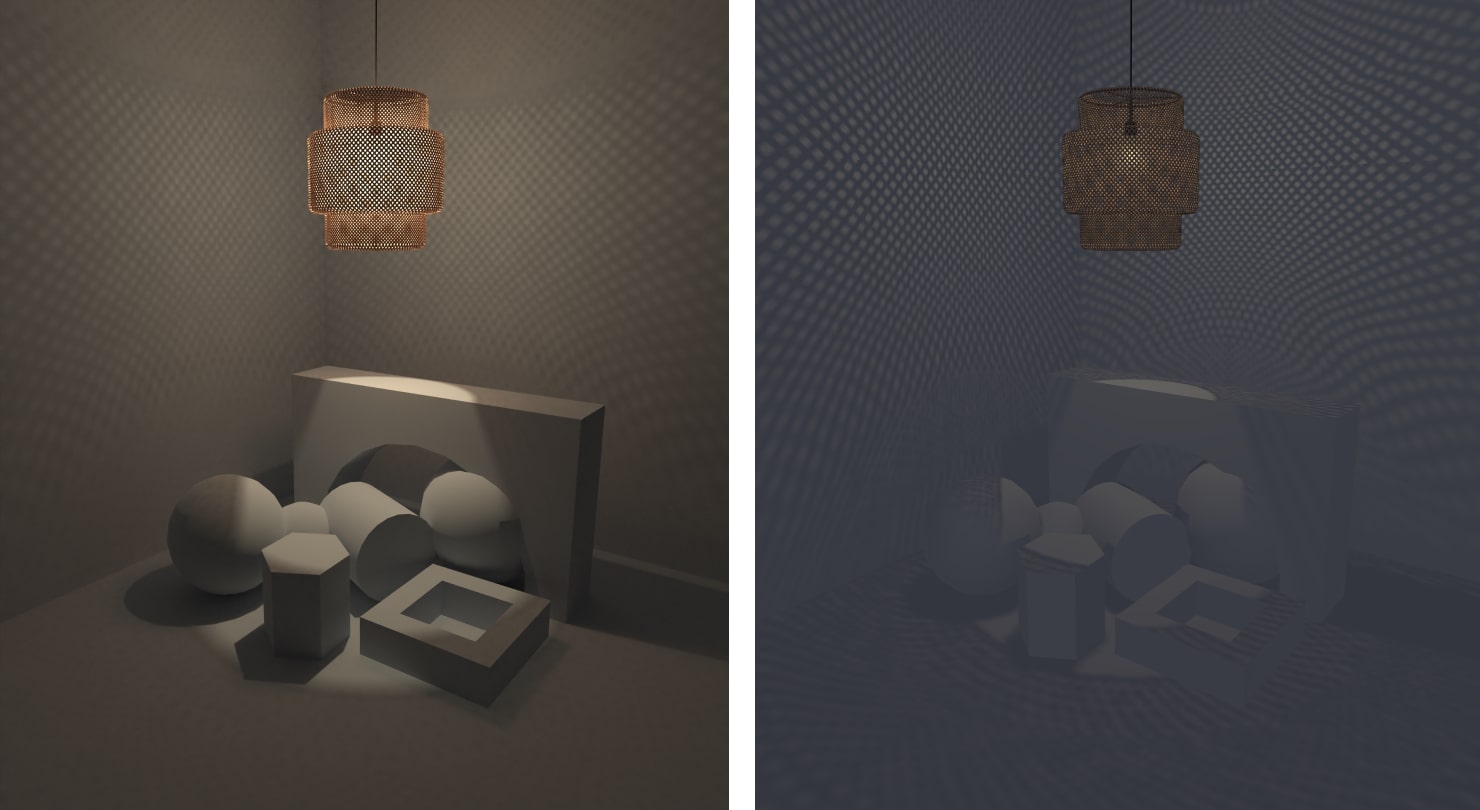
Here’s an example of the same scene rendered in real-time and with Radeon™ ProRender.
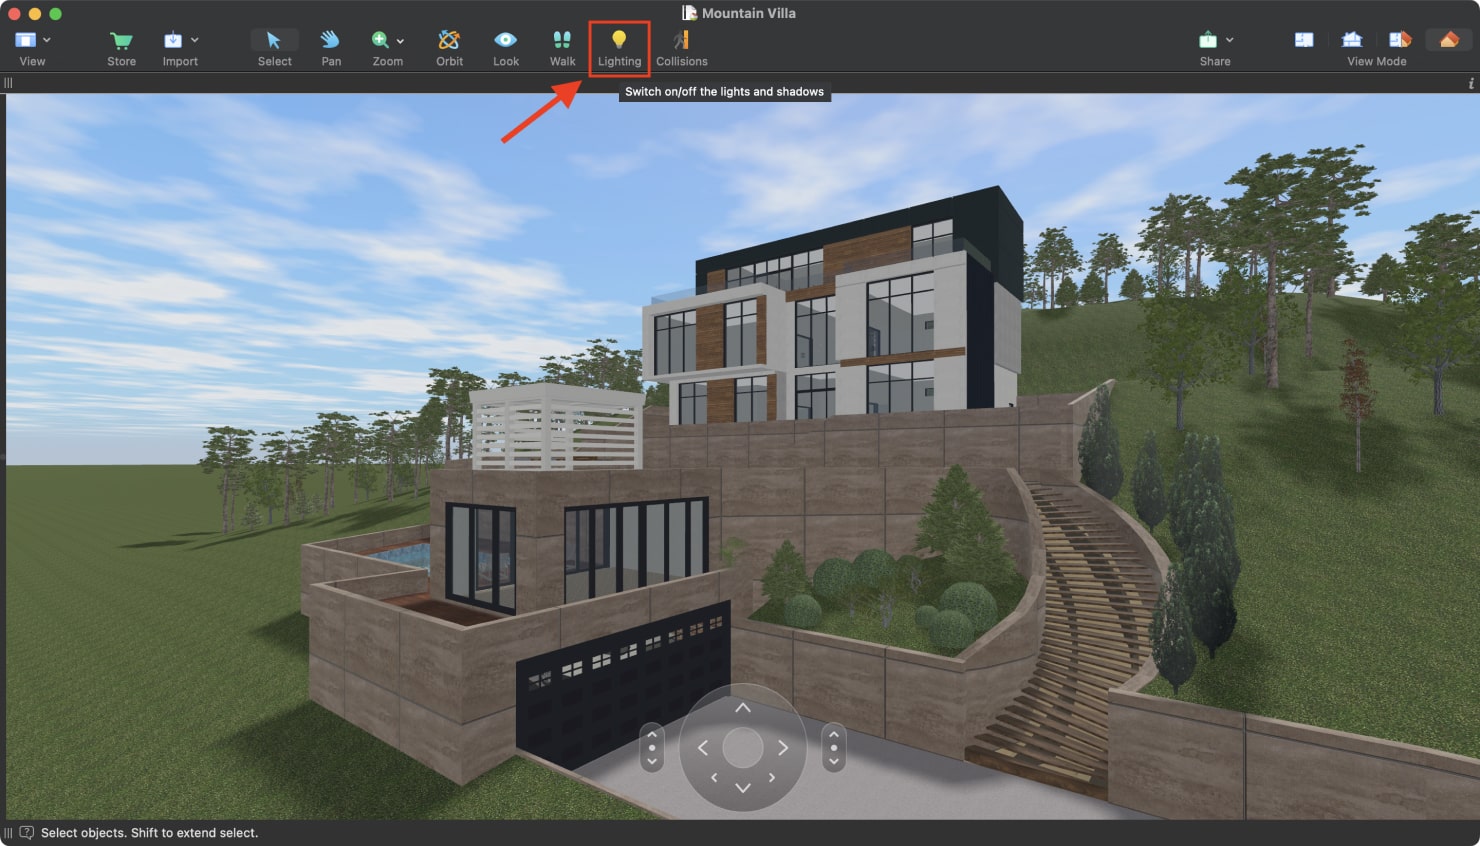
Keep in mind that the abundance of the light sources in your project can significantly slow down your device and the movement in the 3D view tab. Thus, if you are not working with the lighting at the moment, but instead you are engaged in other stages of your project, you can turn off the lights and shadows (as shown in the screenshot below) to substantially speed up the app’s performance on your device.
Now you know everything about light sources in Live Home 3D and how they work. We hope that this information will allow you to use the capabilities of the light in the program to its full potential and create stunningly realistic projects!