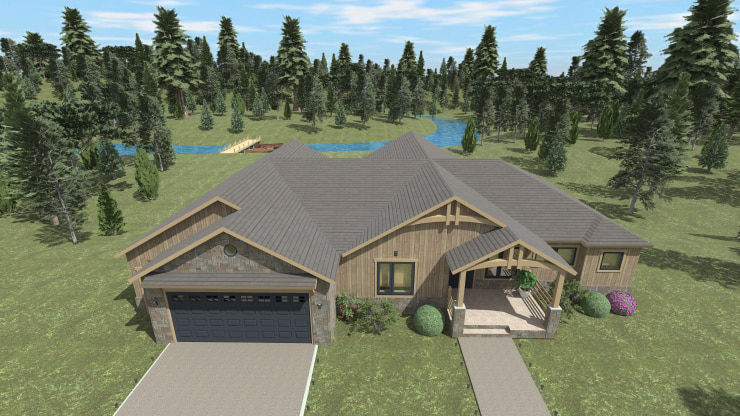
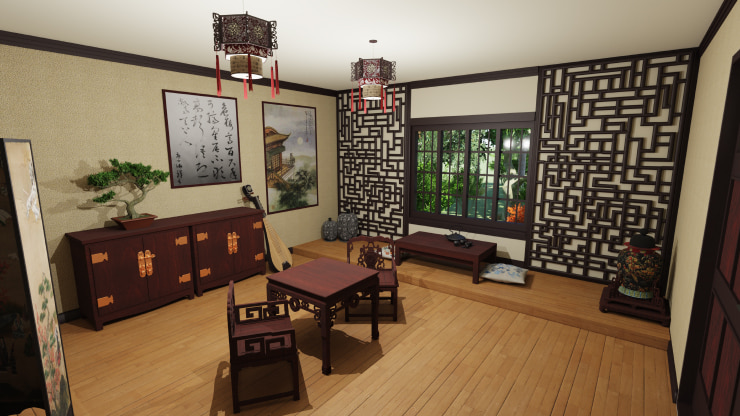
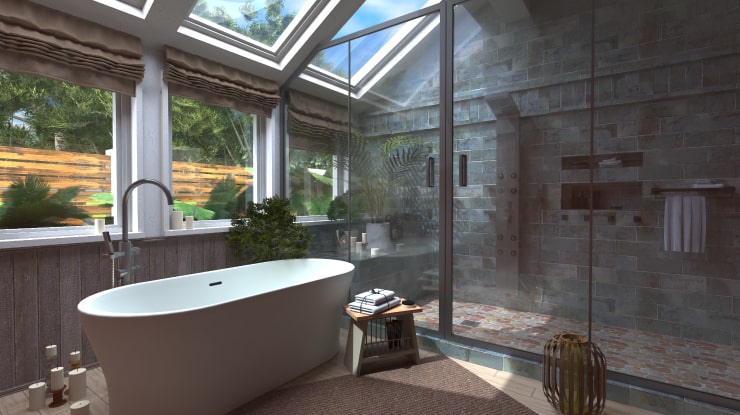
True-to-Life Renders Become a Reality
Take a look at some impressive samples of the rendered scenes:
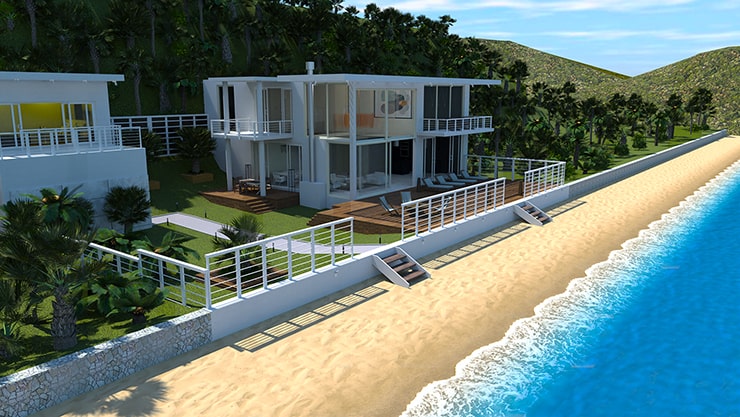

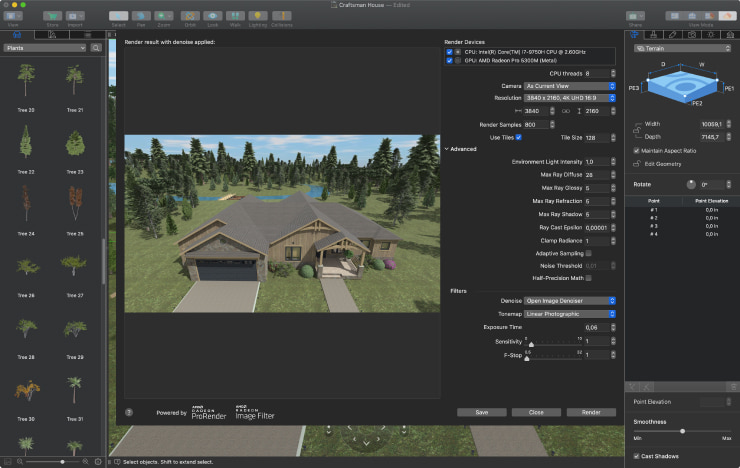
Let’s Take a Closer Look at the Rendering Process
The renderer is based on the principles of path-tracing algorithms, as well as premium industry standards and requirements. However, Radeon™ ProRender makes rendering more accessible and efficient than ever before.
The first command you need to perform for starting your work session is File > Export > Render with Radeon ProRender in the Main menu.

The list of available CPU and GPU devices is located in the Render Devices box. The CPU Threads indicates the number of CPU threads that will be used for the renders.
You need to select the camera view you want to use for rendering in the Camera drop-down list. You can use the predefined dimensions for your render images or adjust them with the Resolution and Size controls.
The process of creating a high-quality final image implies making many iterations, each time casting multiple light rays on each pixel and choosing the average color. The higher number of samples you set in the Render Samples, the better the result will be. Please remember that this parameter influences the rendering process time immensely—longer rendering time means better quality.
To proceed with the rendering process, you need to click the Render button. The Stop Render and Save buttons will cancel the process and save the file.
Those who need to render objects with high resolution may face a problem—their devices may not be able to support such advanced functionality due to the lack of device memory.
In this case, each image can be split into multiple images or tiles, and each of them will be rendered separately. When the process is finished, these tiles will be united into one object once again. All you need to do for switching tiling on is click on the Use Tiles option. The tiles’ dimensions can be set up in the Tile Size field.
Basic Rendering
Rendering duration may last very long even with the average dimensions in the Resolution list and with the number of Render Samples below 100. It is recommended that you start with renders of lower quality and then gradually improve the quality. It will help you understand how to make your 3D scene brighter and more eye-catching.
The resolution of 800x600 pixels and 30-50 samples will be enough for evaluating the attractiveness of the 3D scene. The render will take about one minute, though the result will be noisy. You can run further tests increasing the image size and render samples values.
In the Filters section, it is recommended that you turn on the denoiser in the Denoise drop down list. Experiment with different Tonemap filters that may help correct too light or dark spots on the scene.
When you’re satisfied with the resulting image, run the final render with the needed resolution and 100 render samples (this quantity should be enough for most projects).
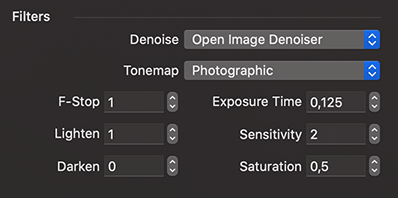
Using Filters
Without a doubt, the Filters section of Radeon™ ProRender is what allows users to make more personalized and individual images. The collection of filters is similar to those of the photo cameras. Here you can adjust brightness, contrast and decrease the noise level.
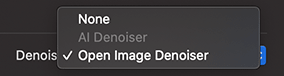
Denoise
Reducing the noise of the image is possible even without increasing the Render Samples values. You can do this by selecting any option in the Denoise field. The render will be performed quicker, and the noise will be removed. If None is selected in the Denoise drop-down list, the Denoiser will not work.
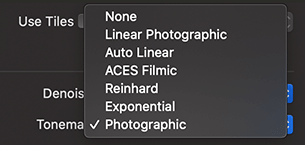
Tonemap
The visibility of the scene details is extremely important, and tone mapping helps to enhance it. The Tonemap dropdown list uses the power of light to highlight or hide some tones and accents. For those who are interested in getting HDR images (it refers to High Dynamic Range here), this is a must-have setting. Choosing “None” turns tone mapping off.
If you don’t like the results of your manipulations, you can return to default settings by selecting the Reset button.
The good news is that filters are applied to the final image and can improve the scene without the need for re-rendering.
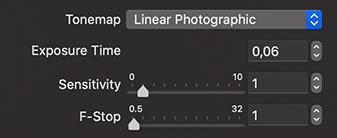
Linear Photographic
These settings are always available in the digital and film cameras.
- Exposure Time adjusts how long the light sensor is exposed to light.
- Sensitivity is ISO, which defines the camera (film) sensitivity to light.
- F-Stop is the camera’s aperture regulating how much light reaches the film sensor.
Auto Linear
Auto Linear displays the Linear Photographic enhancements made in the auto mode, without any effort on your end. This resembles the camera with automatic settings.
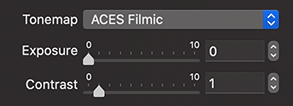
ACES Filmic
This tonemapper is related to the standards used in TV and films and are supported by ACES (Academy Color Encoding System).
- Exposure makes the image brighter or darker.
- Contrast controls the image contrast.
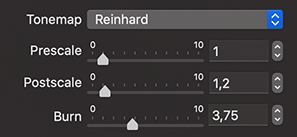
Reinhard
The Reinhard tonemapper adds more contrast to the image.
- Prescale controls the brightness of dark areas.
- Postscale adjusts the brightness of the whole image.
- Burn controls the brightness on light areas.
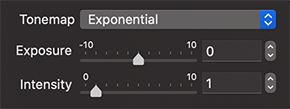
Exponential
The Exponential tonemapper adjusts saturation in connection with brightness.
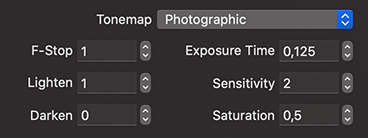
Photographic
This tonemapper imitates the photo camera.
- F-Stop emulates the camera aperture and regulates the light amount that reaches the film sensor.
- Lighten brightens the highlighted areas.
- Darken darkens the areas that are in the shadow. Higher values will make these areas closer to black.
- Exposure Time regulates the duration of the light sensor’s exposure to light.
- Sensitivity is ISO defining the film or camera sensitivity to light.
- Saturation computes sensitivity.
Advanced Rendering Settings
Apart from the standard options, feel free to view the Advanced section for more opportunities. To open it, click the v-shaped icon.
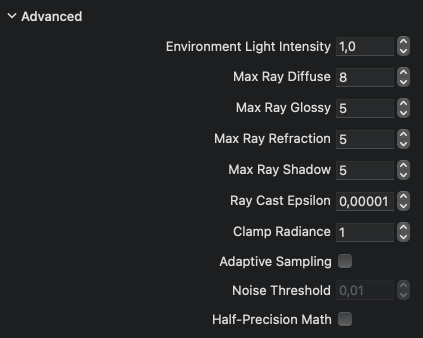
- The Environment Light Intensity parameter adjusts the brightness of the sunlight or moonlight. It is used to render indoor scenes in which daylight is meant to be the main source of illumination. If that’s not the case, change the brightness of lamps in your project. Return to the default value of 1, if an outside scene is excessively bright.
- Max Ray Diffuse indicates the maximum number of times the light is reflected from the diffuse surfaces.
- Max Ray Glossy indicates the maximum number of times a light ray bounces from specular surfaces.
- Max Ray Refraction indicates the maximum number of times a light ray is refracted. This parameter is used for transparent materials like glass.
- Max Ray Shadow controls the accuracy of shadows from transparent objects, which are similar in terms of the noise level. In this case, the quantity of the Render Samples is predetermined by the program itself.
- Ray Cast Epsilon sets an offset that moves rays of light away from the geometry for ray-surface intersection calculations. This allows you to avoid self-shadowing and lighting artifacts common with ray tracers.
- Clamp Radiance controls the intensity or the maximum brightness of samples in the scene. For brighter images, use higher values.
- Adaptive Sampling identifies noisier areas and more sampling iterations are produced for them. This is helpful as sometimes the noise level becomes sufficient even before producing all potential samples. Further sampling will not improve the image significantly; thus, the rendering process can be stopped. Turning this parameter on is recommended for most situations.
- Noise Threshold stops sampling for the areas in which the noise is below the indicated level. To decrease the noise, the Noise Threshold should be lower. Setting 0 in this field is the same as choosing the Fixed Sampling mode (with the number of samples indicated in the Render Samples field) or switching off the Adaptive Sampling.
- The Half-Precision Math option increases performance and saves memory at the cost of somewhat reduced quality.
During the Fixed Sampling mode, samples of the whole image are made. This method is good for images with similar noise level in all areas. The Render Samples field defines the number of samples.
Experiment in Live Home 3D
Try creating and rendering your projects in Live Home 3D for Mac! You are welcome to download a sample project and try rendering it on your Mac. Feel free to use these render properties recommended by our designers for the best results.
This render was made in Live Home 3D Pro, but it is also available in Live Home 3D, which can be downloaded and used for free. Please note that the most stunning image quality is available only with the Pro features.
Download and open the project below. Set up the desired camera position (in our case, use User Camera 1).
Use these parameters when rendering it:
NOTE: To open the project, you need Live Home 3D for Mac installed on your computer (no purchase of the app is necessary).