Working with Materials
Editing Materials
To open the Material Editor, right-click on a material in the Material Library and choose Edit Selected Material… The program doesn't allow editing of the standard materials. Thus, if you wish to modify any of them, create a copy and then customize it. To duplicate and edit a standard material, right-click on it in the Material Library, then select New From Selected… in the context menu.
The functionality described in this section is only available in the Pro edition.
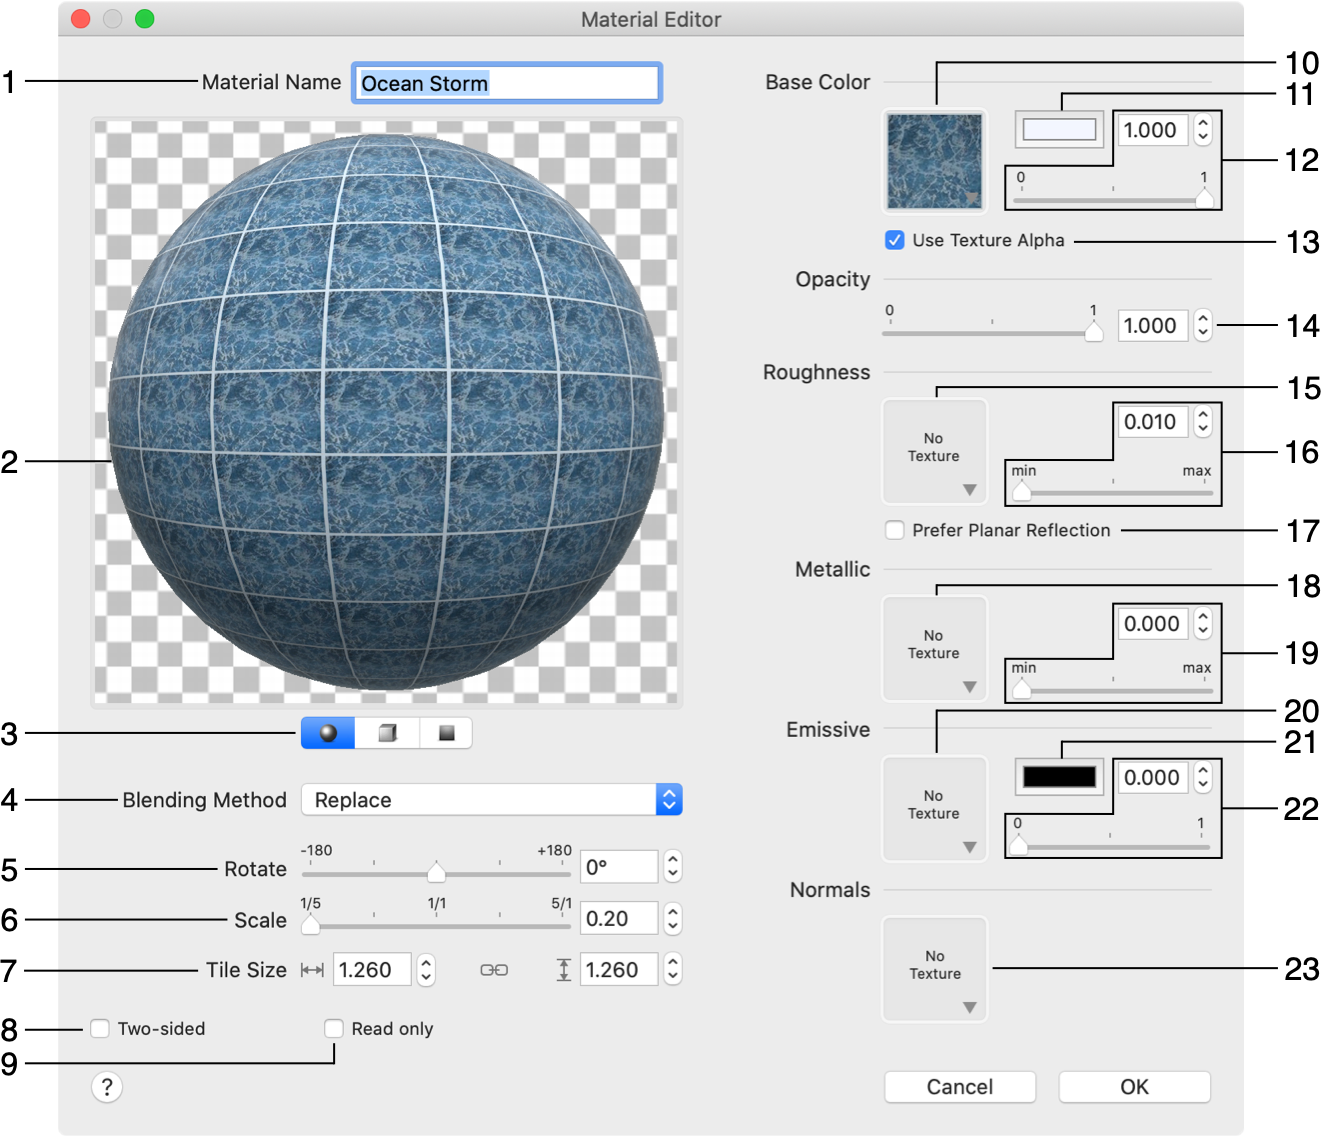
1 – The name of the material. You can see it in the Material Library.
2 – The material preview. To zoom in or out, place the cursor over the preview. Then scroll up or down. If there is a sphere or cube in the preview, you can rotate it in 3D by dragging it with the mouse.
3 - The preview mode. The preview can show the material applied to one of three objects: sphere, cube or flat surface. To choose one, click on the corresponding icon below the preview. The preview simulates reflections from a spot and ambient light sources.
4 - The blending method.
5 - Rotate the material.
6 - Scale the material.
7 - The size of texture tiles in measurement units used in the floor plan. The chain icon in the middle lets you resize textures with or without preserving the aspect ratio.
8 - Make the material two-sided. Some objects look normal when you look at them from outside, but they appear to be transparent from inside out. This option applies the same material to the internal surface.
9 - Make the material read-only. This prevents it from further editing.
10 - The texture of the material.
11 - The tint color of the material's texture.
12 - The brightness of the texture. At "1", the texture looks normal. At "0", it becomes black.
13 - Take into account transparent areas of the texture.
14 - Opacity of the material. At "0", the material becomes transparent.
15 - The texture for the Roughness effect.
16 - The amount of material's roughness. At "0", the material looks finely polished. At "1", it becomes matte.
17 - The Prefer Planar Reflection check box lets you set up the Roughness for an uneven surface which has areas with different glossiness. For instance, a material may represent a glossy wall tile with matt grout lines between tiles. To apply different roughness to different areas, you should activate the Prefer Planar Reflection option and choose a texture in the Roughness section. A dark color in the texture defines a glossy area (e.g., black for the tile), while a bright color defines a matt area (e.g., white for grout). Notice that materials with the Prefer Planar Reflection option activated make the rendering of the 3D scene slower. So, you should avoid or limit the use of such materials in order to have higher program performance.
18 - The texture for the Metallic effect.
19 - The amount of the Metallic effect. At "1", the material looks like a metal surface. At "0", it looks nonmetallic.
20 - The texture for the Emissive effect.
21 - The color of the light that the material emits.
22 - The amount of light the material emits. When this parameter is greater than zero, the material would look like it is under ambient light. This is not a replacement for light sources. Self-illuminating materials can be used for objects such as a light box, glass-shade or computer screen. If you set this parameter to zero, you should also remove the texture since it makes no sense without any illumination.
23 - The normal map. Applying a normal map can make a surface have features like bumps.
The Texture Size and Scale
The size of the material's texture applied to an object is defined as the texture size multiplied by the scale. So, the object can look the same with different combinations of the size and scale. However, the Tile Transform controls in the Inspector display only the tile size. If your material should mimic a structure with known dimensions, you can use the Scale to adjust the texture size in order to make the Tile Size value match the actual size (e.g., a wall tile).
Using Textures
One or multiple textures can be used in a material. Each block of settings, that can accept a texture, has a small preview to show a selected texture. You can see that in the Base Color block. If a texture was not selected, the preview just displays "No Texture".
To choose a new texture or remove the present one, click on the corresponding preview area. This will open the texture library.
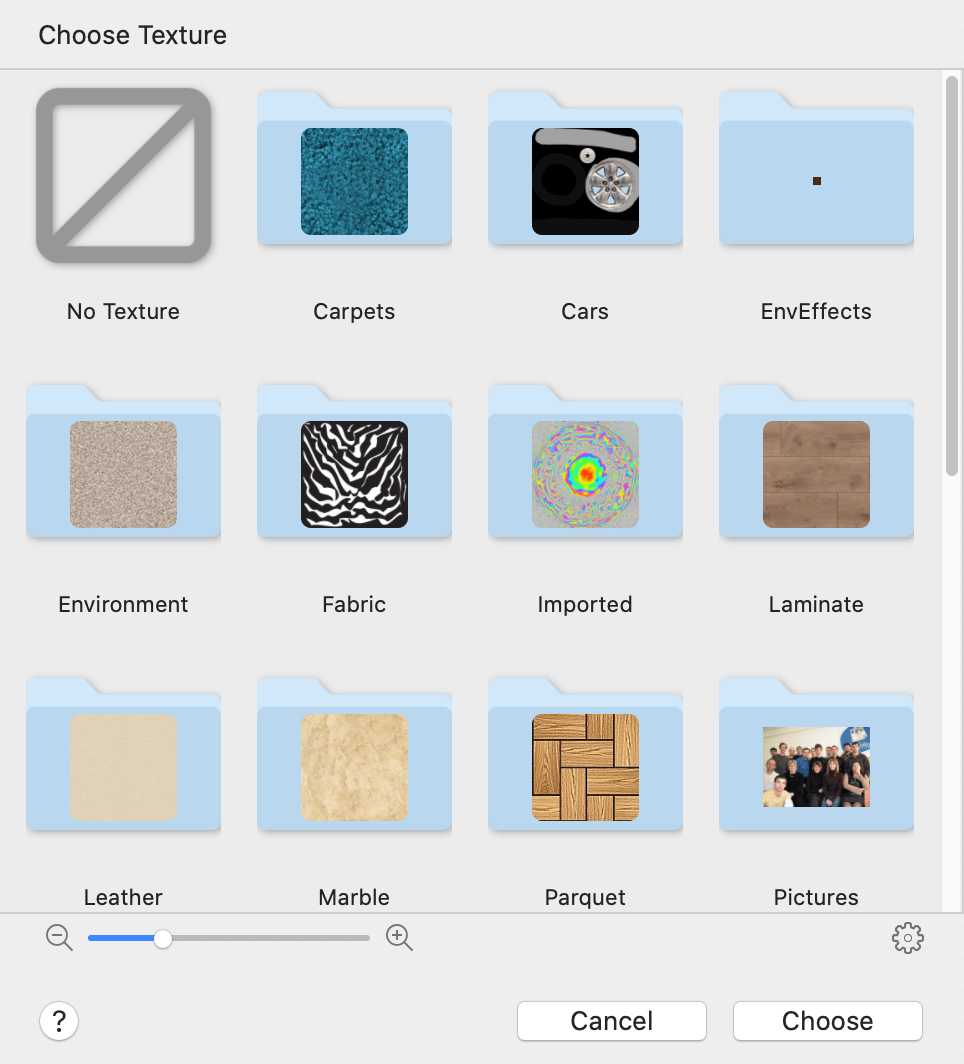
The library displays a list of categories. To go inside one of them, click on its icon.

In order to choose a texture, click on it. Then click the Choose button.
To make the material have no texture, click on the No Texture icon in the library.
In the lower part of the dialog, you can find a gear icon. Clicking on it displays a menu with options to import a texture from a graphic file, and to remove the currently selected texture. Textures imported by the user can be deleted, but default ones cannot.
An imported texture will appear in the currently open category.