Lighting
Managing Light Sources in the Inspector
The Light Properties tab of the Inspector controls light sources. To open this tab, choose Window > Inspector > Light Properties.
The list of light sources in the Inspector contains light sources actually present in the project. Artificial light sources are grouped by floors.
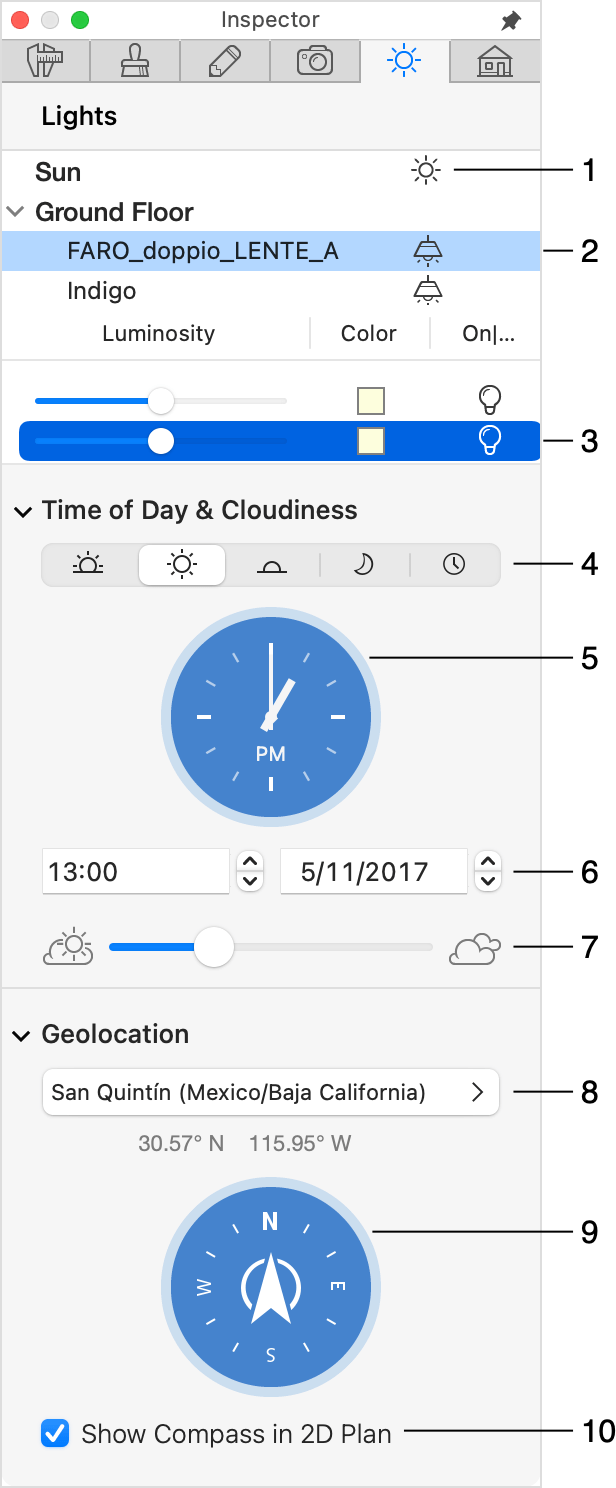
1 – The light source that emulates the sun- or moonlight. It is always present in the list. To turn the light off or on, click on the sun or moon icon.
2 – A selected lamp. To turn the light off or on, click on the icon. You can select several lamps to switch them on or off together. A crossed out icon indicates that the light is off.
3 – Settings of the selected lamp. A lamp can have one or several light sources which can be adjusted independently.
4 – These buttons let you set up lighting in the morning, midday, evening or at midnight. The rightmost button lets you set up the time. The selected option affects the sunlight and sky. See The Daylight Settings for details.
5 – The clock displays the time in your project. You can drag the handles to change the time. Click on "AM" to switch to "PM", and vice versa. The time is shown digitally in an edit box below the clock.
6 – The date for which the sunlight is simulated. Click on the edit box to choose another date from a calendar.
7 – The Cloudiness slider only affects how the sky looks without changing the amount of the sun or moon light.
8 – The Geo Location section lets you set up the geographic location by clicking on some point on the map, or by inputting the coordinates. This information is used to simulate the daylight. See The Daylight Settings for details.
9 – The compass lets you set up the direction to the North in your project. You can rotate the compass with the mouse.
10 – Show or hide the compass on the floor plan.