Working with Projects
Printing
To print your project:
- Choose File > Print (Cmd-P) to open the Print Layout dialog.
- Select a printer, if several of them are installed on your computer.
- Select a paper format.
- Choose the paper orientation. If most of your 3D views or floor plans have a horizontal orientation, activate the landscape mode.
- Set up the margins.
- Set up the scale.
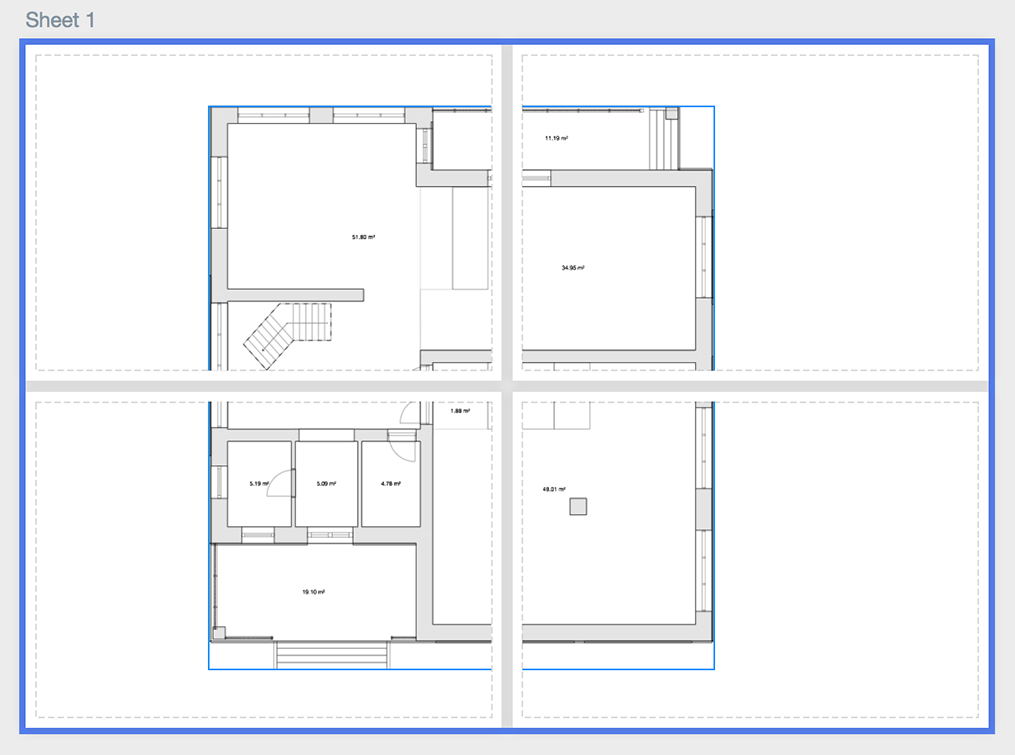
- Drag and drop 3D views, floor plans, or elevations that you want to print from the left panel onto sheets. You can add as many sheets as you need.
- Click Next to proceed to the system Print dialog. Set up the standard printing options.
- Click Print to send your project to the printer, or click PDF > Save as PDF to export it as a file.
You should distinguish the two terms that appear in this section. We will use the "page" term for paper sheets that you feed into the printer. The "sheet" term will be used for sheets in the preview. A sheet can consist of several pages depending on the size of an image that you will print.
The Print Layout Dialog
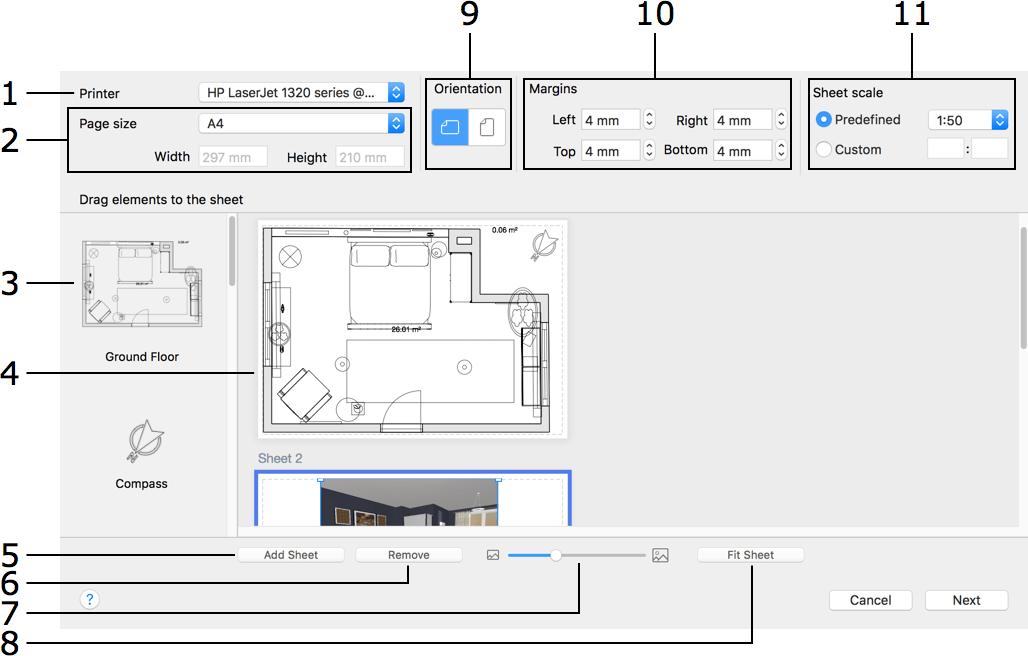
1 – Select the printer that you are going to use. The list of compatible paper formats depends on the selected printer.
2 – Select a paper format. You can either choose a standard paper size or type in custom dimensions. The selected paper format will apply to all pages.
3 – Previews of all floor plans, 3D views and elevations you can print. To print any of these items, drag it onto a sheet in the middle. Each floor plan corresponds to one of the floors in your project. Each 3D view corresponds to one of the standard or user's cameras. An elevation appears in the left panel only if it was added by a user.
4 – These are the sheets where you compose the printing layout. Drag images to arrange them on a sheet. To resize a 3D view, select it and drag one of the corner handles. To resize a floor plan or elevation on the selected sheet, change its Sheet scale.
When necessary, the program automatically adds more pages to the layout to increase the area of the sheet. As a result, the contents may be laid out over several pages. After printing, you can glue the parts together.
5 – Add a new sheet.
6 – Remove the selected sheet. You cannot delete the last sheet.
7 – The zoom tool of the layout preview. You can also right-click on the preview area and choose one of the zoom options.
8 – Fit the selected sheet to the preview area.
9 – The page orientation. All pages have the same orientation.
10 – Margins help you define the amount of blank space along the page sides. Certain printers cannot print near the edges of the paper. You may need to increase the margins to meet the capabilities of your printer. By setting up margins, you can ensure that no graphics will appear in the unprintable area. All pages have the same margins.
11 – The Sheet scale lets you set up the scale for floor plans and elevation views. The default scale is the same as selected in the project. You can set the scale of any sheet individually.
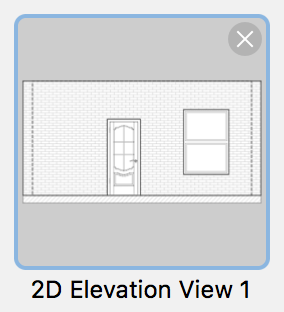
Printing Elevations
In order to print one or several elevations, you should display each of them in the 2D Elevation view, and click the Add to Print toolbar button. The selected views will appear in the left panel of the Print Layout dialog.
You can delete elevation views from the list in the left panel. To do this, click on the thumbnail of the elevation view. Then click the Delete button in the top right corner of the thumbnail.