Working with Objects
Smart Group Resize
When you resize a group by dragging its handles or using the Inspector, the app can scale its members intelligently rather than stretching everything uniformly. Each object inside a group can be configured with an individual Group Resize Behavior, accessible in the Object Properties tab of the Inspector when the object is selected inside the group.
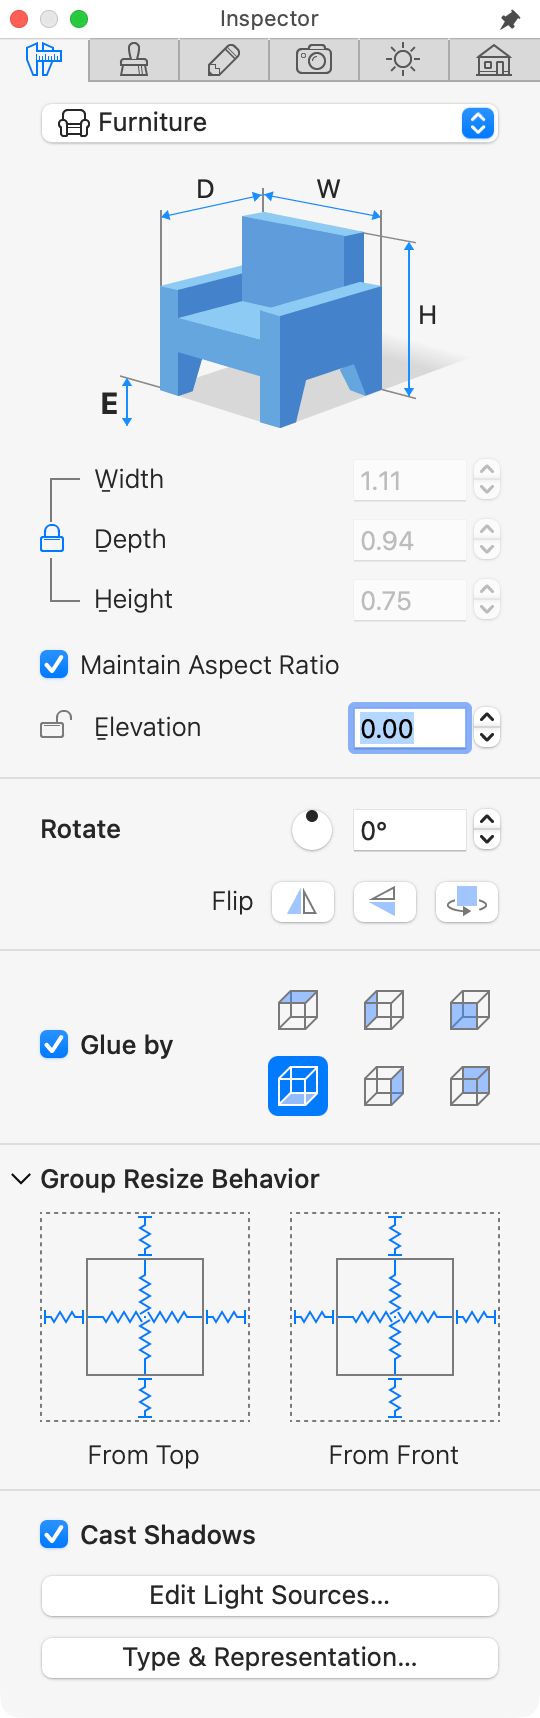
The available behaviors are:
- The object is scaled proportionally along with the group boundary. This is the default behavior.
- The object stretches to fill the available space as the group is resized.
- The object keeps its original size.
- The object’s position within the group shifts as the boundary changes.
- The object keeps its distance to one or several boundaries of the group while the latter is resized.
By combining different behaviors for different objects within the same group you can, for example, keep the same size of chairs while stretching the table in front of them.
In order to set up how the object’s size and location should change in relation to the group, select the object. Then set each of the object’s dimension and distance options to either the invariable or the variable state. Those options are displayed in the Group Resize Behavior section as zigzag lines when the corresponding value can change (e.g., the object can stretch vertically). An invariable value is displayed as a straight line. By clicking on a line, you can change its state from invariable to variable and vice versa.
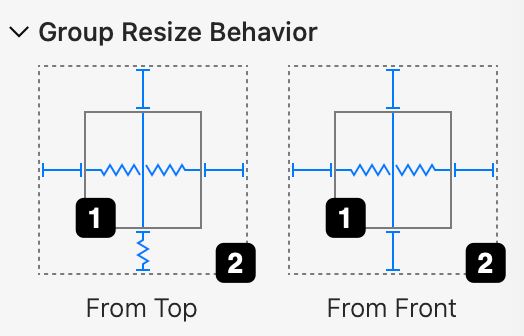
1 – The solid line displays the object’s outline.
2 – The dashed line displays the group boundary.
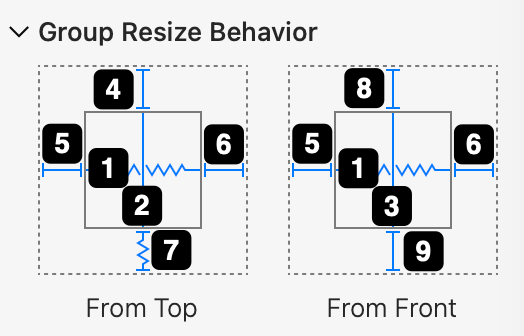
1 – The object’s width.
2 – The object’s depth.
3 – The object’s height.
4 – The distance from the object’s back to the group boundary.
5 – The distance from the object’s left side to the group boundary.
6 – The distance from the object’s right side to the group boundary.
7 – The distance from the object’s front to the group boundary.
8 – The distance from the object’s top to the group boundary.
9 – The distance from the object’s bottom to the group boundary.
Clicking on any object in a group selects the entire group. In order to select an individual object, click a second time on the same object. In some cases, it is more convenient to select an object in the group using the Project Tree by clicking on the object’s name.
Example with Object Settings
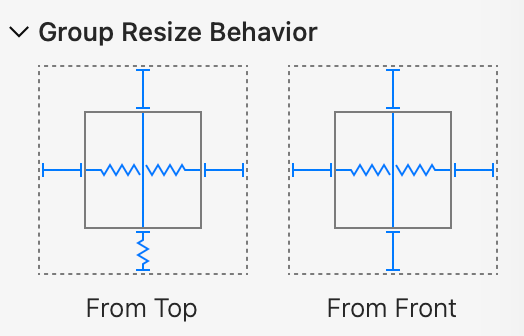
In the example above:
- The object’s width is variable. It will stretch in the direction from left to right if you resize the group.
- The object’s depth and height will not change.
- The distance from the object’s front to the group boundary will change if you resize the group.
- All the rest distances from the object to the group boundary will not change.
Example with a Resized Group
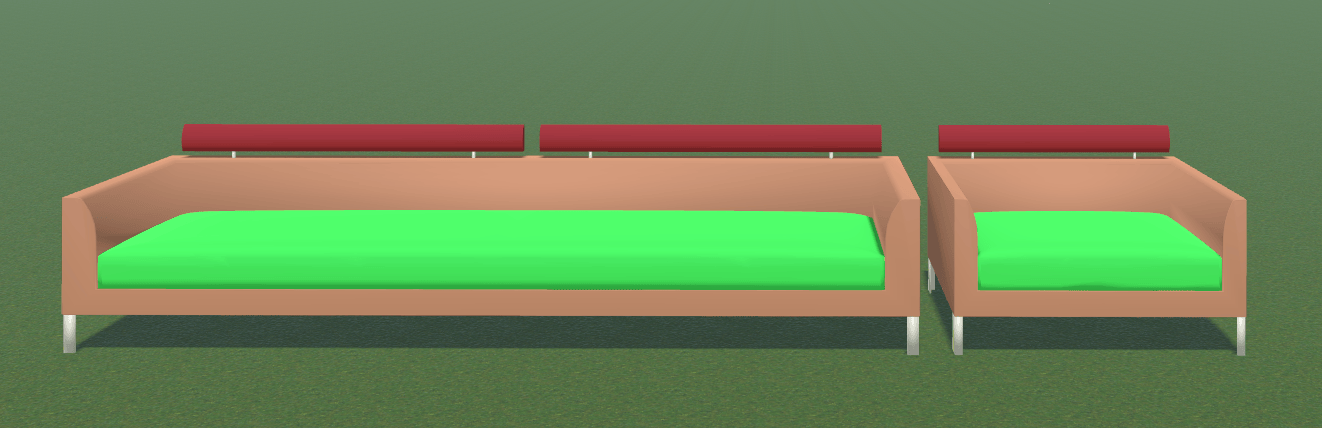
In this example, we have a group of two objects: a sofa and an armchair.
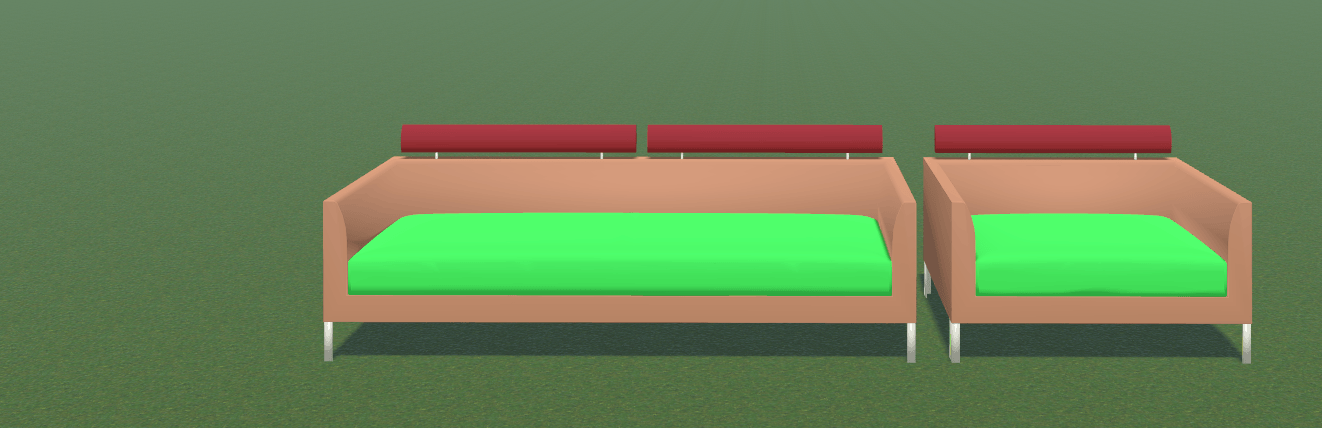
We are going to define the following behavior. The sofa should be able to become longer when the group is stretched. But the sofa’s depth and height must remain the same. The armchair must not change. The gap between the sofa and the armchair must be preserved as well.
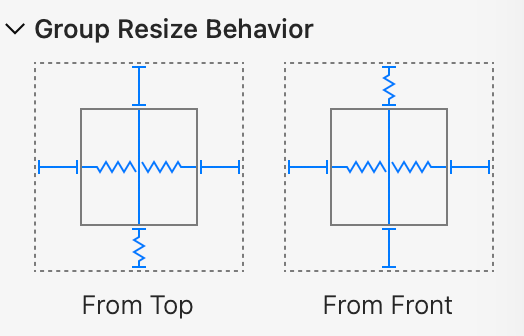
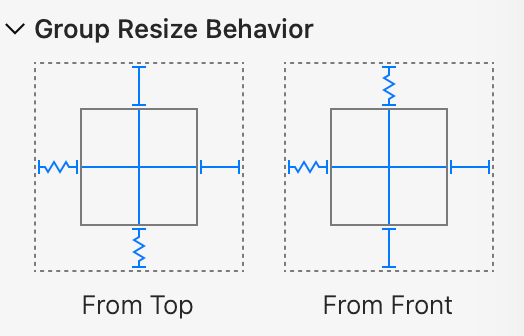
As a result, the sofa has become longer and nothing else has been changed.