Grilled Panels and Dropped (Suspended) Ceilings
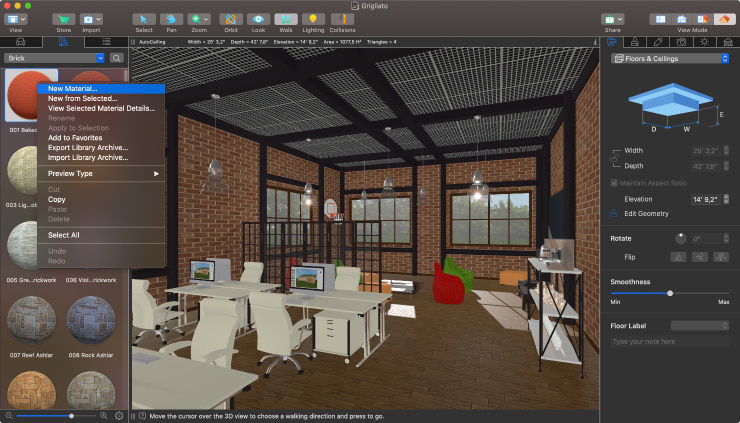
Armstrong and grigliato ceilings are popular choices for offices and public spaces. If you choose these types of ceilings for your Live Home 3D project, you don’t need any technical construction—simply use the Materials feature of Live Home 3D. To create a material, open the Context menu and choose New Material. Users with unlocked Pro Features can access the Advanced Material Editor.
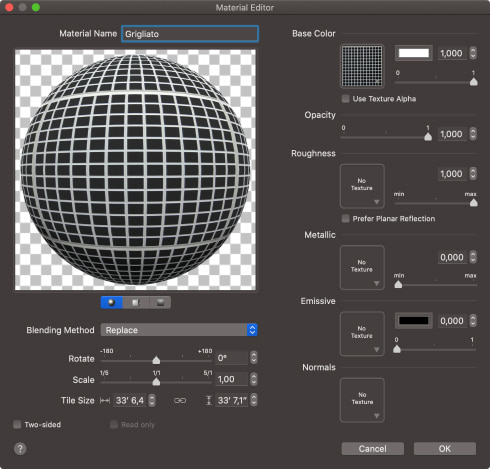
Upload the texture for the new material. You can add Roughness & Normal maps for a more realistic look.
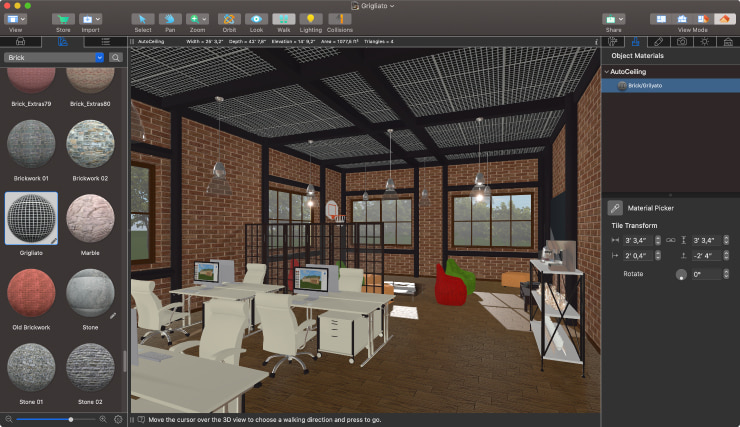
Now apply the created material to the room’s ceiling. Note that the ceiling is a parametric object, and you can change the parameters of the material application to the ceiling in order to get the right size and scale on the designated surface. To do this, choose the necessary values for dimensions and the shift on the surface for the applied material in the Object Materials tab of the Inspector.
To add more details to your project, combine this method with the others—besides Materials, you can use the Building Block tool or Shapes.
Using the Material Editor, you can create almost any type of finishing that is made on one ceiling level: decorative painting, colored painting, decorative plaster, wallpapers, stained glass, etc. You can also make the coating glossy, matte or even satin, depending on your preferences, by adjusting the parameters in the Material Editor.
Beamed Ceilings
Decorative beams are common attributes of the loft and high-tech styles, but they are also typical for other styles like country, Victorian, classic and modern. Beams will perfectly match both big crystal chandeliers and the exposed electrical wiring and pipes. Adding such beams to the ceiling in Live Home 3D is super easy. There are two ways of doing so.
Let’s start with adding beams using objects from the Shapes category of the Object library. Open the Shapes section of the library and choose any suitable shape; then drag and drop it into the project. Change the dimensions and orientation of the chosen shape by dragging the control points, or do it in the Object Properties tab of the Inspector.
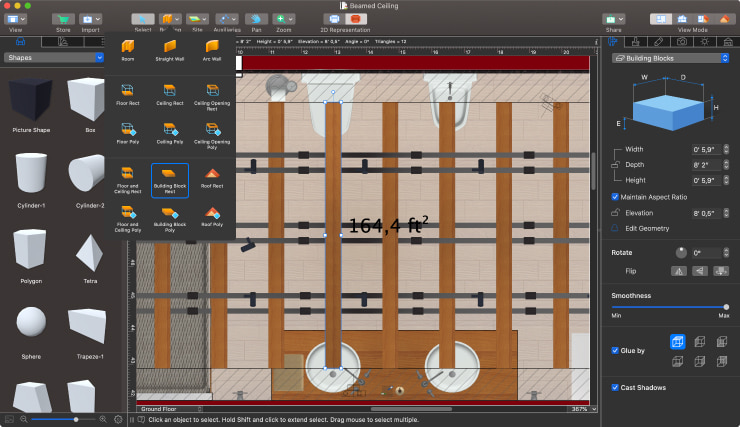
For convenience, untick the Glue by Top Side option in the Object Properties tab of the Inspector. If you don’t do this, the shape will be “glued” to the ceiling automatically. If the beams in your project are supposed to be at a certain height from the floor, you need to enter the necessary value in the Elevation box of the Inspector. Finally, apply the material to the beams.
Let’s move on to the second way of making decorative beams. This method is available only for users with unlocked Pro Features. The main difference between this method and the previous one is that you can draw the contours of the object manually as you see fit.
Click on the Building button on the instrument panel and choose the Building Block Rect tool. As the name suggests, this particular tool allows you to draw rectangular objects, while Building Block Poly is designed for drawing complex polygonal figures accordingly. Note that you can change the shape of the drawn block anytime. For that, open the Context menu and choose Edit Contour.
If you need to create sloping beams, for example, decorative rafters, there are several ways of making them.
One way is using the object that has already been made with the Shapes or the Building Block. In case the object is parametric, like the Building Block or some objects from the Shapes category, the first thing you need to do is open the Context menu and choose Merge. Next, click the Type & Representation option, also in the Context menu.
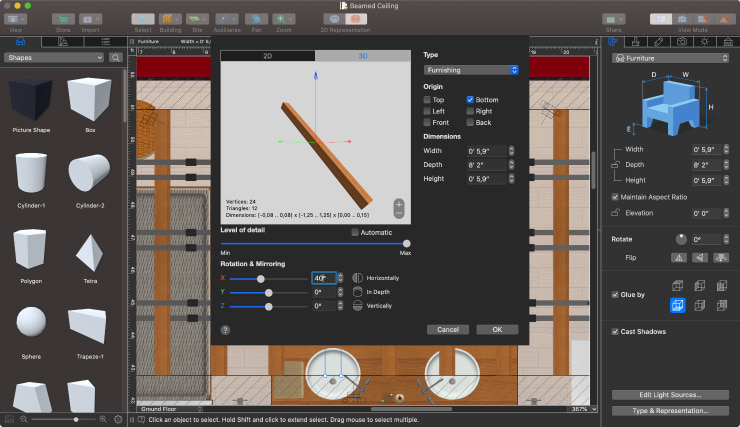
In the 3D tab of the window that popped up, you can quickly change the tilt angle of the object in relation to its axis using sliders.
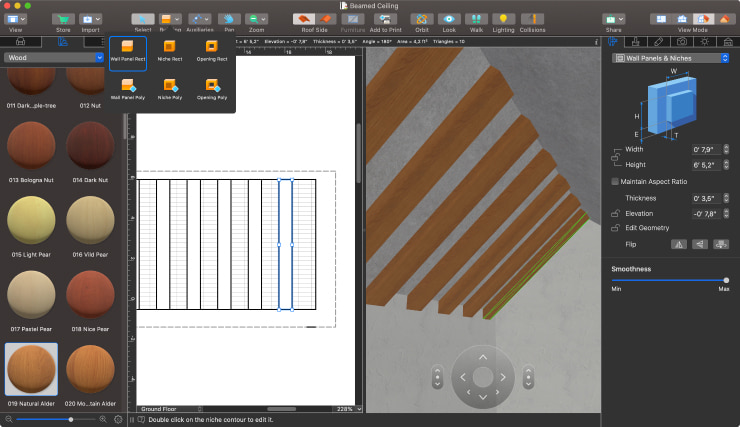
Another way of creating sloping beams is using the Wall Panel tool. Note that you can only work with this method if you have already added the roof to your project.
Choose one of the roof’s slopes and switch to the 2D Elevation/3D view of Split Mode. Make sure that you are working with the right side of the roof. You can switch the side using the Roof Side button on the instrument panel. Next, draw the beams with the help of Wall Panel Rect or Wall Panel Poly, and set a necessary Thickness value for them in the Object Properties of the Inspector. Finally, apply materials to the beams.
The principle of working with the Wall Panel tool is similar to that of the Building Block, the only differences being that the panels are always fixed on one of the surfaces, and the position of the blocks in the space can be arbitrary.
Combine blocks, panels and library objects to make beams more detailed and to achieve the best result.
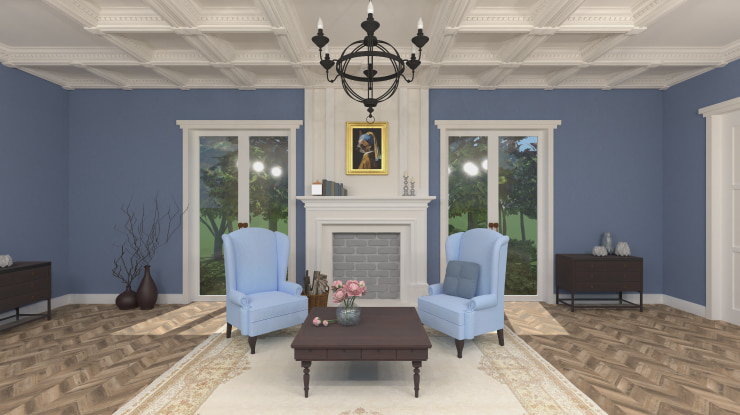
Coffered Ceilings
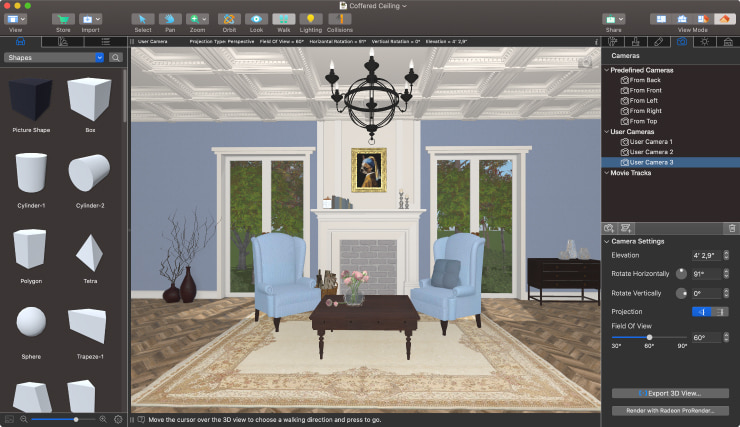
A coffered ceiling is a deepening of a square, rectangular or other shape on the surface of a vault, dome, plafond (flat ceiling) or on the inner surface of an arch called intrados. Coffered ceilings are quite old-fashioned, but still a popular method of the ceiling finishings in classical and neoclassical interiors.
Simple coffered ceilings can be created with the help of panels and blocks, but, since you are now familiar with this method, let’s try making them using other Live Home 3D features and tools.
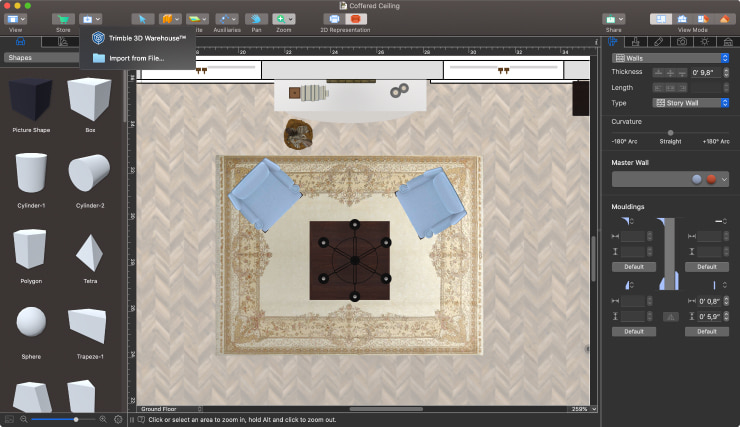
On the instrument panel, click Import and choose Trimble 3D Warehouse™ as an importing source. Trimble 3D Warehouse™ is a free online storage of millions of 3D models.
Note that there are plenty of different formants in which you can import 3D models to Live Home 3D: Autodesk 3D Studio (created in the Autodesk® 3ds Max® software), Autodesk FBX, COLLADA, Wavefront OBJ, Sweet Home 3D, Google Earth KMZ and a 3D Image. The Mac version also offers import from Trimble SketchUp™, Collada Zipped and Ogre XML formats.
When choosing the model to be imported, make sure that the dimensions in the Type & Representation window are adjusted accurately. For meticulous presentation of plans and drawings, switch to the 2D view to adjust dimensions, the origin of coordinates and the representation type of the model. In the 3D view, you can change the dimensions of the model and its orientation along the axes.
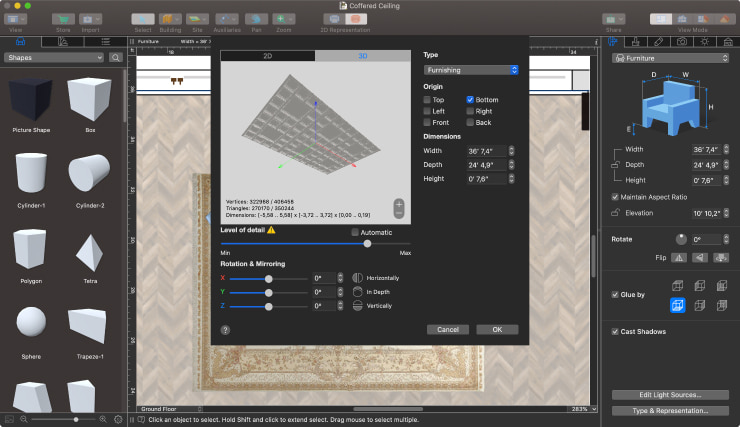
You can work with an imported object the same way as with the one from the library: change its dimensions, rotate the object and glue it by sides. If you are importing a ready-made model of a coffered ceiling, we recommend ticking the Glue by Top Side option. It will automatically place the model right under the room’s ceiling.
Cornices and Fillets
Cornices and fillets are other attributes of the classical style that have now firmly established themselves in modern eclectic design. Live Home 3D already has the basic set of baseboards and fillets, and you can adjust them for both the facade and the inner side of the wall.
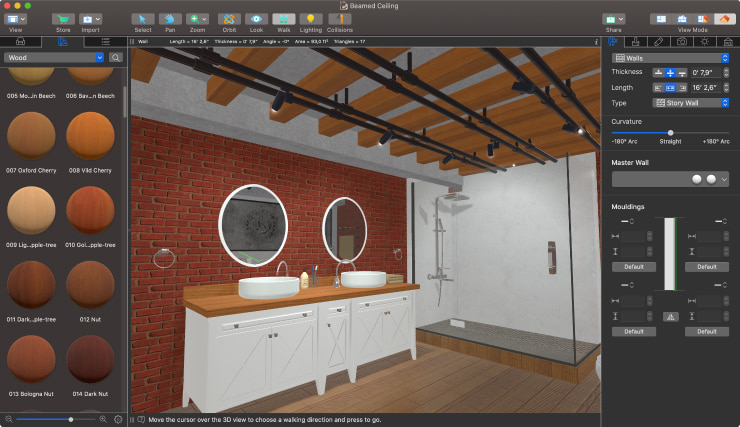
Select the necessary wall in the project (or the entire building) and choose any type of moldings in the Object Properties tab of the Inspector. You can leave the predefined dimensions for moldings or adjust them as you see fit.
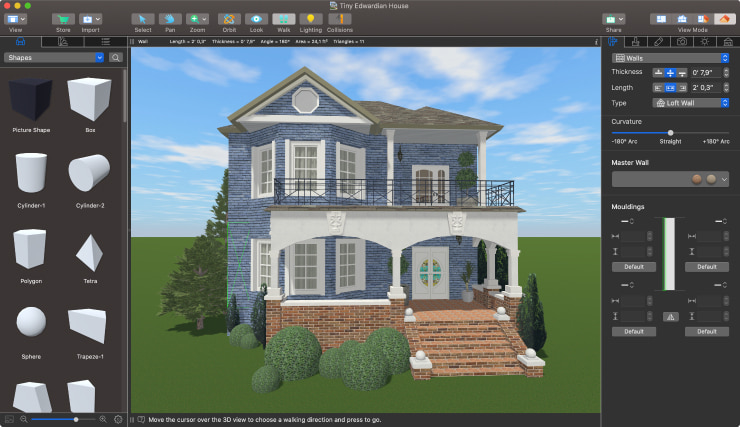
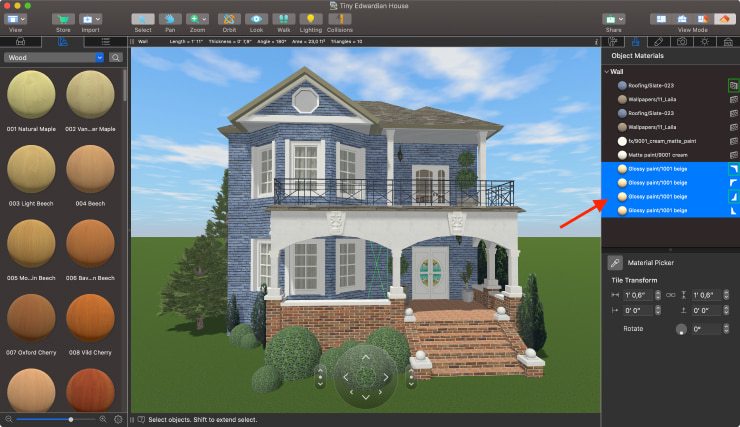
In the Object Materials tab of the Inspector, you can choose a new material for moldings—to match the color of the ceiling or the flooring or make it contrasting—any option to your liking. For convenience, when you are working with a wall, moldings are always marked by a special sign in the Object Materials tab of the Inspector.
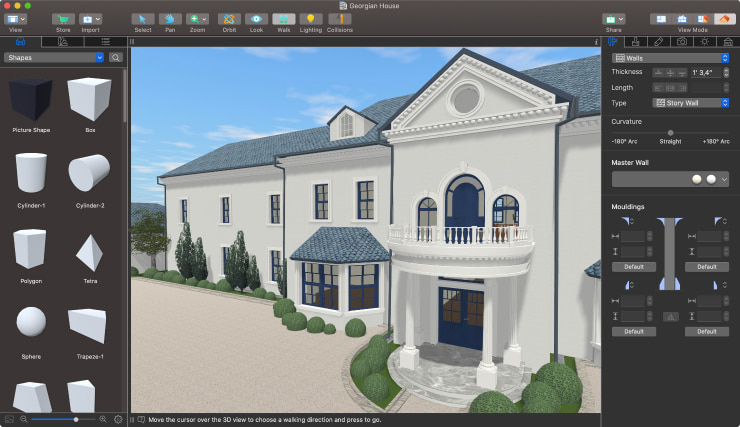
Furthermore, you can import a 3D model of a complex cornice, which we have already described. Those who aren’t looking for the easy way out can put together such construction using just the Building Blocks and various Shapes. Such a method is used in the Georgian House project available in the 50 Houses Pack. Besides, the drainage constructions under the roof and the grids of the drainage system on the ground are both made using Shapes. The platbands on doors and windows are made with the Wall Panel tool; you can find it among the Building tools on the instrument panel in the 2D Elevation View.
False Multi-Level Ceilings
Normally, such a construction is made of drywall and is combined with stretch ceilings. This type of ceiling is the most popular: it allows you to hide pipes and wiring and doesn’t require you to prepare the surface for further work with the ceiling. Furthermore, the ease of treatment allows mounting a construction of any shape.
This kind of ceiling is easy to make in Live Home 3D—using Shapes & Building Blocks is all you need. Make sure to Glue the object by Top or set the Elevation value manually. To build multiple levels, layer objects one under another, setting different Elevation values for each object.
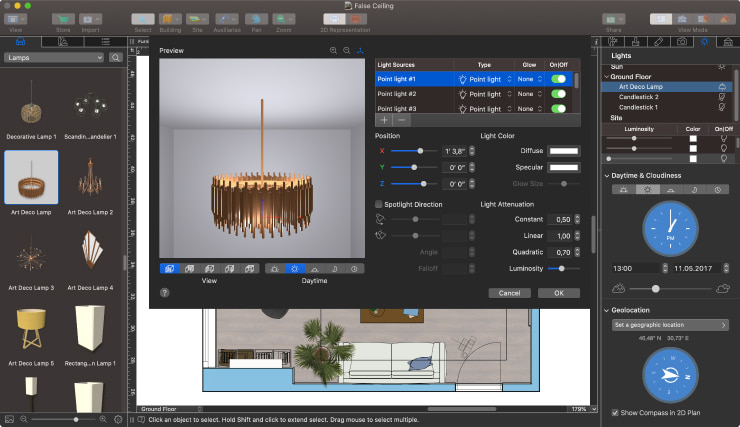
Any object in Live Home 3D can be assigned a light source. To do this, select the object, open the Context menu and choose Edit Light Source. Add light sources with the + and − buttons, and place them relative to the objects using X, Y and Z sliders. Brightness, size and the type of halo can also be adjusted in this window.
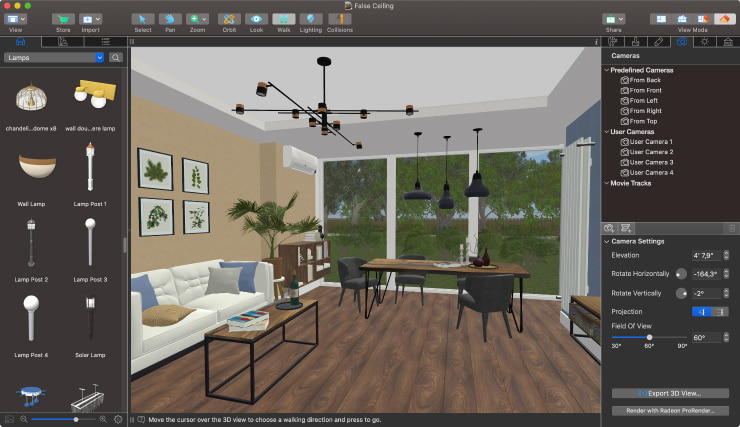
You can adjust the brightness level and turn on/off the lamps at any time in the Light Properties tab of the Inspector.
We’ve discussed the most popular types of decorative ceilings and some convenient ways of creating them in Live Home 3D. Now you can experiment with different types of ceilings yourself to elevate your designs to a whole new level.