Live Home 3D Workspace
The Main Window
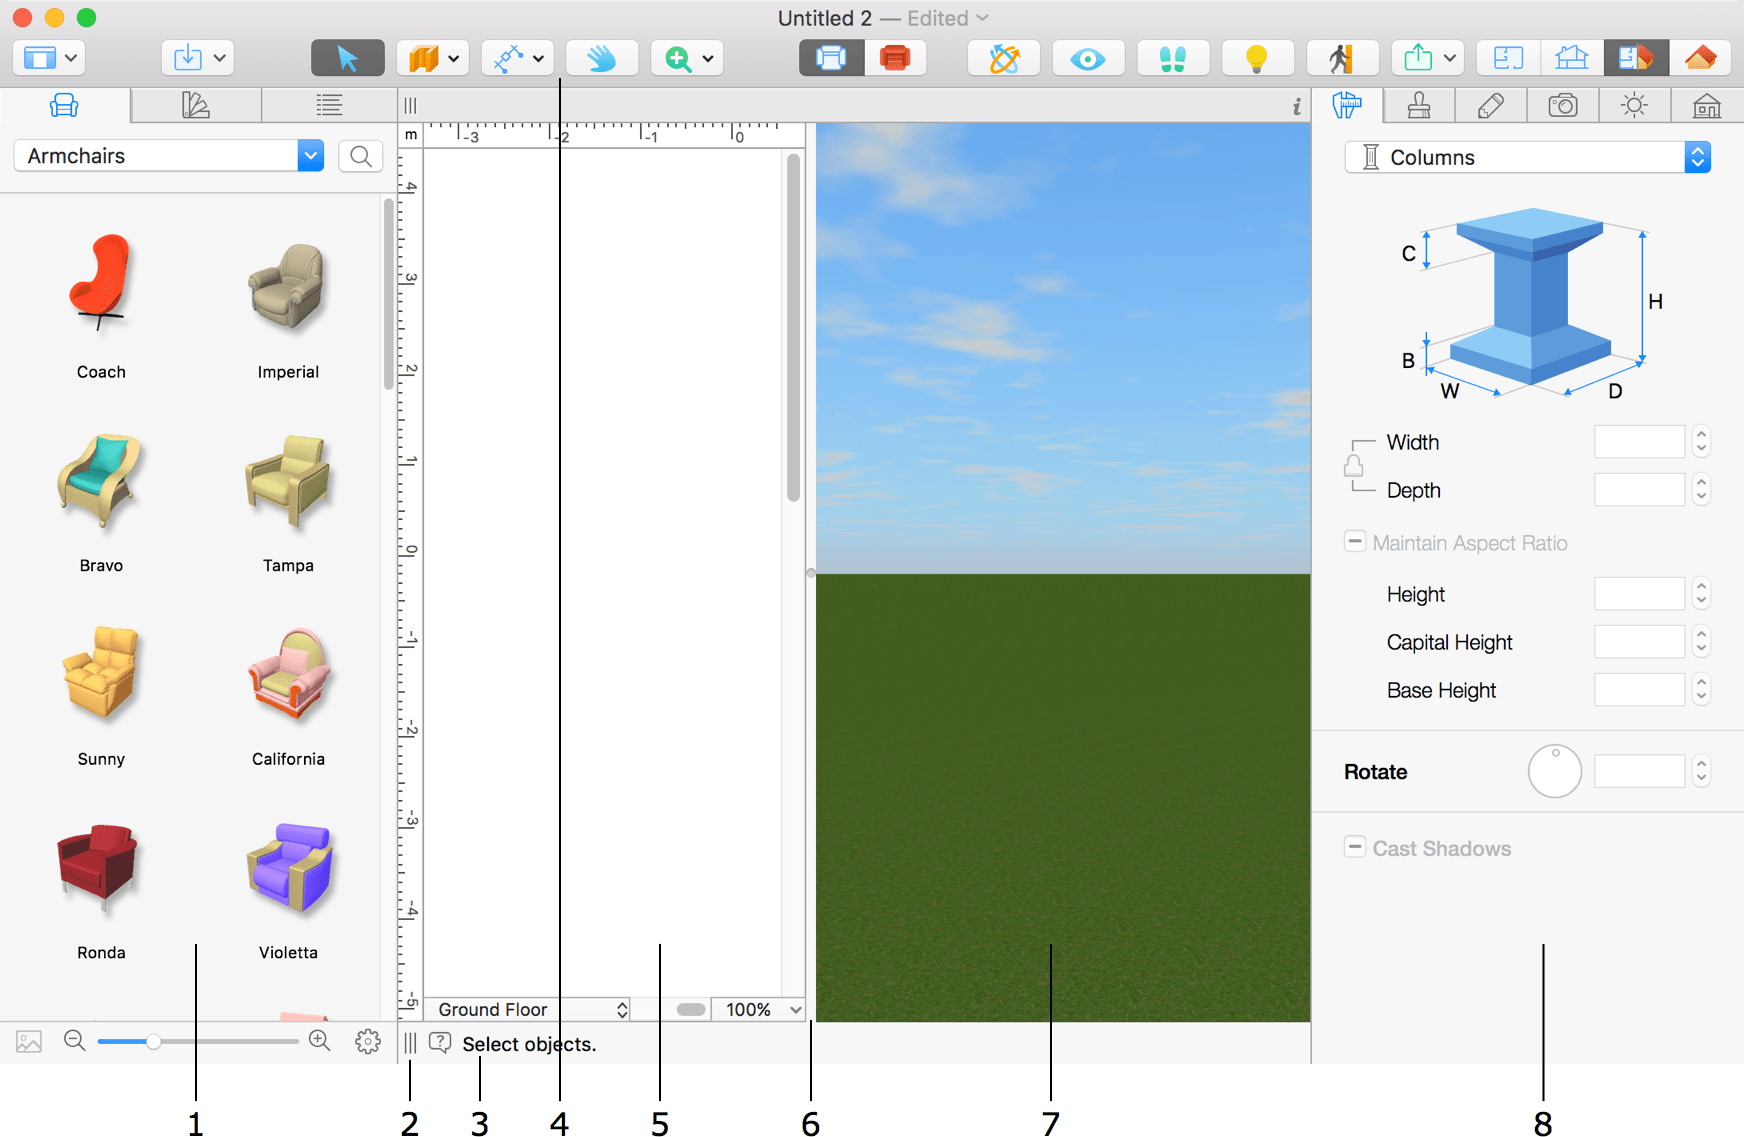
1 – The Library panel can display the 3D object or material library or the Project Tree.
2 – A handle to change the width of the Library panel.
3 – The hint bar. Depending on the context, it tells you which action can be performed currently. The question mark icon brings up the Help Instructor window with a brief instruction.
4 – The toolbar with 2D Plan, 3D view or 2D Elevation view tools. The available set of tools depends on which view is activated.
5 – The 2D view area for editing the floor plan or elevations. For details, see The 2D Plan View section.
6 – A splitter bar between the 2D and 3D views. Move it to distribute space between the views.
7 – The 3D view area. For details, see The 3D View section.
8 – The Inspector.
Controlling Views and Panels
There are buttons in the toolbar that let you set up the appearance of the main window.
 – The View button far to the left, opens a drop-down menu which lets you choose a display mode of the Library panel and Inspector.
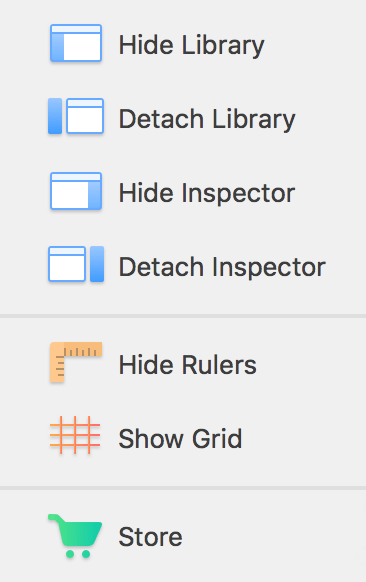
Using the drop-down menu, you can show or hide the Library panel and Inspector. You can also separate these panels from the main window.
Commands in the following section let you show or hide the rulers and grid in the 2D Plan view.
Finally, the Store option opens the In-App Store where you can buy additional content or upgrade the license.
 – Display the 2D Plan view.
 – Display the 2D Elevation view. (Pro edition only)
 – Display the 2D and 3D views together in the Split Mode.
 – Display the 3D view.